RON HAZELTON:
Every year in our country, over 4000 people die in fires and tens of thousands of others are injured. Many are scarred and disabled for life. Fire takes an especially gruesome toll among the very young and the elderly. Now I've experienced home fires and I know firsthand, how quickly they can fill a home with searing heat and choking smoke. I've seen the destruction they can wreak and I know that the worst fires often strike in the middle of the night when we're least prepared to defend against them.
So when my wife Lynn and I bought this 35 year old house, we decided to retro fit it with fire sprinklers. Now this is what's known as a center hall colonial. And one of my concerns is, should there be a fire in the basement of the first floor, this stairwell can fill up with smoke very quickly.
Now our master bedroom is in here while my daughter's bedroom is down this hallway on this end of the house. Should there be a fire, my fear is, I wouldn't be able to reach her. Now we do have smoke alarms and that's very important. But all they can really do is alert me to the presence of a fire. Fire sprinklers on the other hand actually contain a fire and in many cases, put it out even before the fire department arrives. David Wellin-Sevitch is a certified sprinkler installer and he'll be doing this job for me. I've just finished painting the inside of the house so I asked him how much demolition he's going to have to do.
DAVID:
Well it won't be too bad. We'll have to open a few wall sections up and we can utilize some of the closets to conceal the piping.
RON HAZELTON:
So I give David a tour of the house and tell him my concerns about the center stairwell. Then he goes off on his own, checking closets and making measurements everywhere from the basement to the attic. A couple of weeks later, he's back with plans. So these plans have the location of every rubber pipe and every sprinkler for the entire house, right?
DAVID:
Yeah, the whole house.
RON HAZELTON:
Normally the sprinkler system would tie right into our city water supply. The question is, do we have enough pressure? So what would you like to see here?
DAVID:
I'd love to see 100 PSI. And I know we'd be safe.
RON HAZELTON:
The solution to our woefully low water pressure is a 300 gallon water storage tank. The water pressure comes from a pump that's installed nearby. The pipe specified for home fire sprinkler systems is plastic. CPVC or chlorinated polyvinyl chloride.
It's similar to PVC water pipe but more heat resistant and less likely to melt. It's joined using a pipe cement. Because the ceilings are low here in the basement, we're installing cages to protect the sprinkler heads from being accidentally bumped. With the basement complete, the work moves up to the first floor.
Here of course the pipes must be concealed behind the walls and that means removing sections of wallboard to expose the bays between the studs. Holding a vacuum nozzle close to the rotary cutting tool, cuts down on the dust.
Next, a hole is drilled through the bottom of the wall and into the basement below. A section of pipe is cut to length, cemented to a right angle fitting - then the entire assembly is passed through the hole, where it will be connected to the basement sprinkler line.
Here on the first floor, the pipe is extended section by section, up the wall and horizontally through the wall studs where necessary. To avoid opening up the ceilings, I've chosen what are called sidewall sprinkler heads here. While not invisible, they're high enough not to be that noticeable. We've gone from the basement to the first floor. When we come back, we'll go upstairs where things will get nearly invisible.
David can avoid opening any walls on the second floor by running the pipe inside a closet. When exposed like this though, the pipe must be metal instead of plastic.
This power crimping tool squeezes the joints together, making a permanent water tight seal. The final section of metal pipe is passed through the ceiling and into the attic. Here the pipe is run horizontally above the bedroom ceilings.
[MUSIC}
Holes are bored down through the ceiling drywall, the pipe is passed through, then secured in place. Thread sealant is applied to the sprinkler heads and they're screwed in.
[MUSIC}
Finally a cap is installed to conceal the recessed sprinkler from view.
[MUSIC}
Now this portion of the attic is unheated. To keep the pipes from freezing in the winter, insulation is laid on top, trapping the heat that will leak through the ceiling. Then the flooring is replaced. In places where the pipe passes above the joist, the exposed insulation is covered with wire mesh that's then stapled down.
Downstairs, some of the pipe is concealed behind crown molding.
[MUSIC}
Once the system is leak tested, it's pressurized and ready to go. If there is a fire, the nearest sprinkler will activate. In most cases, only one sprinkler will go off.
[MUSIC}
Now I have one or more sprinklers standing guard in every room of my home.
[MUSIC}
The concealed heads like this one will remain out of sight unless there's a fire. In that case, when the heat of the ceiling reaches about 150 degrees, the cover would drop away and the sprinkler would activate.
Typically, within a minute or so, the fire would be out. Sprinklers like mine would discharge about 25 gallons of water per minute if they were activated. Fire fighters' hoses on the other hand put out about 250 gallons per minute - ten times as much.
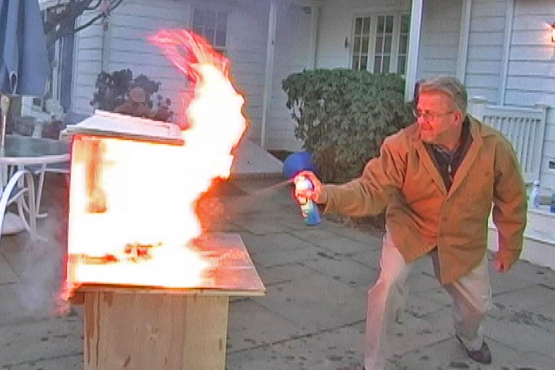
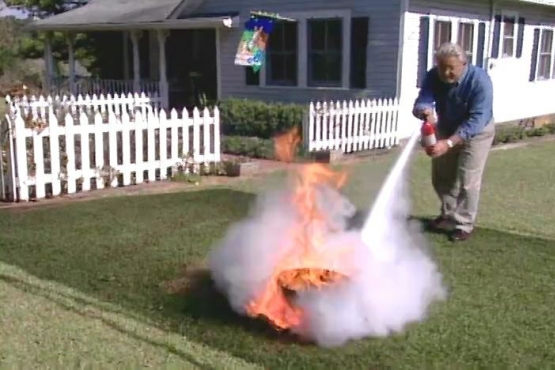
This is the kind of destruction a fire can cause in just minutes. And this is a typical example of how little damage can occur with sprinklers. You know I don't think it's an exaggeration to say that having a home fire sprinkler system is like having a fire fighter in every room of your house 24 hours a day, 7 days a week.
I know that's what I want when it comes to protecting what I value most…you guys.