Ron:
Buckingham Fountain is one of the largest and most famous fountains in the world. Its pitch perfect blend of art and engineering melds ornate statuary with an elaborate pumping system that features 133 jets circulating up to 14,000 gallons of water a minute.
RON-VO:
TODAY, I’VE BEEN ASKED TO MAKE A HOUSECALL IN THE NEARBY VILLAGE OF OAK PARK TO HELP BUILD A SLIGHTLY MORE INTIMATE FOUNTAIN.
THIS BEAUTIFUL OLD VICTORIAN HAS BEEN HOME FOR THE PAST FIVE YEARS TO DAVID AND SUZANNE HOLMES AND THEIR CHILDREN, KATIE AND ROBBIE.
THE VIEW FROM THEIR SECOND STORY BALCONY IS DOMINATED BY THE SIDE WALL OF THEIR GARAGE – A PERFECT LOCATION FOR BUCKINGHAM JUNIOR.
Suzanne:
Thanks for coming.
Ron:
Oh hi Suzanne. You’re very welcome, thank you for having me.
David:
Welcome, welcome.
Ron:
David.
RON-VO:
WITH INTRODUCTIONS AND A SNAPSHOT FOR SUZANNE’S SCRAPBOOK OUT OF THE WAY, WE MOVE TO THE BACKYARD.
Suzanne:
Holy cow. Look at that trailer.
David:
Whoa.
Ron:
You like that huh? Think we have enough tools to do this job?
RON-VO:
MY CARPENTER, DAVID SCHULTE HAS ARRIVED WITH OUR TRAVELING WORKSHOP AND HAS LAID OUT ALL THE MATERIALS FOR THIS PROJECT INCLUDING SOME EXTRAS.
Ron:
This is gonna form the basis of our fountain right here.
Suzanne:
Okay.
Ron:
These are pre-cast, plastic pond, pond liners some people call them.
Ron:
You guys said you were interested in the sound of cascading water. This is designed for that purpose. The water comes in here and then it flows off into the pool here. There are some other smaller versions, yeah. So we can sort of stack these. But we will really emphasize the, the waterfall effect of this.
Suzanne:
Okay.
David:
Yeah that’d be great.
RON-VO:
OUR FIRST STEP IS TO REMOVE THE RASPBERRY BUSHES GROWING IN FRONT OF THE GARAGE WALL. NOW, THE GOOD NEWS HERE IS THAT WE’RE DIGGING THEM OUT AT THE ROOTS AND SINCE THEY’RE VERY STURDY, WE CAN RE-PLANT THEM IN ANOTHER PART OF THE YARD.
Ron:
I think what we’ll do is bring in that big lower pond first.
Suzanne:
Just to see the size?
Ron:
Just to see how it fits.
Suzanne:
Great
MUSIC
Ron:
OK.
Suzanne:
You know I was thinking it should go against the garage but I’m thinking outside the box.
Ron:
This up against the wall like that?
Dave:
Try that.
Suzanne:
How’s that?
Ron:
We don’t have to lock ourselves into these right now but I wanna just make sure that the bottom one is in a good position for us.
David:
What do you think of that?
Suzanne:
That looks good.
David:
I think it was too far out before.
Ron:
What do you think about something also maybe three-tiered? We start up here.
Suzanne:
That would be great.
Ron:
This position’s gonna work okay for the bottom?
Suzanne:
Yeah.
Ron:
All right, good. That’s what we wanna get to.
RON-VO:
NEXT, SUZANNE OUTLINES THE POND LINER WITH CHALK. WE THEN DIG OUT THE MARKED AREA. SINCE MOST OF THE POND LINER WILL REMAIN ABOVE GROUND, WE ONLY REMOVE ABOUT THREE INCHES OF SOIL. I’VE ALSO ASKED DAVE AND SUZANNE TO DIG AWAY A FEW INCHES ALONG THE GARAGE FOUNDATION AS PART OF A PRECAUTIONARY STEP I’D LIKE TO TAKE.
Ron:
We’ve got a uh, a wood frame building here. We’re gonna be having water out here and other materials. I don’t want them up against the wood.
Suzanne:
Okay.
Ron:
So were gonna build a wall, a concrete block wall between the fountain and the garage here.
Suzanne:
Okay.
RON-VO:
SUZANNE COMPACTS THE SOIL WITH A TAMPER … THEN DAVE FOLLOWS BEHIND WITH A BAG OF LEVELING SAND.
Ron:
That nice thudding sound, that’s a good uh—
Suzanne:
Got it. Little arm muscles.
Ron:
Yeah.
David:
Good workout for you honey.
Suzanne:
Yeah.
Ron:
I’m just spreading this out with my hands right now.
Suzanne:
Now do we tamp on this then?
Ron:
No, now were not gonna tamp this. But just level it out with your hands, so that you’ve got about an inch of it.
Ron:
Okay. I’m gonna keep this just a couple of inches out from the wall.
RON-VO:
WIGGLING THE BLOCKS IN THE SAND HELPS US LEVEL EACH ONE. AND GETTING THIS FIRST COURSE RIGHT IS CRITICAL TO MAKING THE ENTIRE WALL LEVEL AND STABLE… SO WE CONTINUALLY CHECK AND ADJUST EACH BLOCK AS WE MOVE ALONG.
BEFORE LAYING OUR SECOND COURSE, SUZANNE APPLIES A BEAD OF LANDSCAPE BLOCK ADHESIVE. THIS, ALONG WITH THE FACT THAT WE’RE SPANNING THE JOINTS OF THE BOTTOM COURSE WITH EACH NEW COURSE, WILL GIVE THE WALL IS STRUCTURAL INTEGRITY.
MUSIC
Ron:
There you go, Dave.
RON-VO:
WITH THE WALL COMPLETE, ROBBIE AND KATIE GIVE THEIR PARENTS A BREATHER.
Ron:
All right, Katie, Robbie. Just sort of spread that around, we wanna end up with about one inch of sand down here, you know. Now I noticed on the bag when we opened this up it said play sand. That doesn’t seem right to me though. I mean we’re not playing, we’re working.
Robbie:
But you can use the sand to play.
Ron:
Oh it’s multipurpose sand. All right. OK. Spread it as evenly as you can with your hands.
Ron:
Okay I think you’ve done a really, really great job. Let’s just check it with a level. I’d say you’re right on the money there.
MUSIC
Ron:
All right, shall we have mom and dad bring the pond liner in?
RON-VO:
WE WORK THE POND LINER INTO THE SAND… THEN DO A ROUGH CHECK FOR LEVEL. WE’LL KEEP CHECKING FOR LEVEL AS WE ADD WATER. AND THE LINER SETTLES INTO THE SAND.
AFTER A FINAL CHECK, WE PACK SAND INTO THE VOIDS AROUND THE BASE OF THE LINER.
NOW WE’RE GOING TO BUILD A DECORATIVE RETAINING WALL AROUND THE OUTSIDE OF THE POND WITH THESE BLOCKS. WE START BY PLACING A DOZEN OR SO AROUND THE LINER.
Ron:
Okay Suzanne, just give it one wrap there and tuck it underneath. Excellent.
Suzanne:
Great.
Ron:
Now that’s a level line, we’ll get to that in just a second. What I’ve done is taken away those stones that we laid out, replaced them with these little green flags. That’s the outside now of our wall.
Suzanne:
Okay.
Ron:
But we also have to make sure that this wall is level. The ground kind of rises up about two inches here which means we’re gonna have to dig a little bit of dirt away down there.
David:
Okay.
Ron:
And to do that we’re gonna need a special shovel.
Suzanne:
Hmm. Okay.
TIP GRAPHIC TOOLBAG TIP SFX
Ron:
You know not all shovels are created equal. Here are three that you’ll probably use most often in your do-it-yourself gardening and landscape projects. This is called a round point shovel. This is the one you’d wanna choose for digging through tough soil, digging holes, and removing larger plants.
This one is called a square point shovel.
This is great for scooping out loose dirt and shoveling material like sand or mulch.
And finally, there’s the garden spade. A very straight edge. This is the tool to use to cut through sod, and create perfectly straight lines for edging.
So whatever your job is, there’s a shovel that’s perfectly suited for it.
MUSIC
RON-VO:
AND THE PERFECT SHOVEL FOR THIS JOB IS OF COURSE, THE SPADE. WE FIRST CUT THROUGH THE SOD DEFINING THE OUTSIDE EDGE OF OUR WALL.
Ron:
Now, what we want to do is kind of just take and really cut back like this and just take some of that dirt right out, sod and all.
RON-VO:
AFTER DIGGING OUT THE SOD, WE BEGIN SETTING OUR STONES BACK IN PLACE… ADJUSTING THEM SO THAT THE TOPS ARE LEVEL WITH THE STRING.
Ron:
The main thing I want, see how were keeping about six inches here.
Suzanne:
Okay.
Ron:
That’s as long as we have a minimum of that. You’re free to pretty much put these wherever they’re gonna look the best.
RON-VO:
AFTER THE FIRST COURSE IS IN, WE APPLY MORE OF OUR LANDSCAPE BLOCK ADHESIVE TO THE TOP… AND THEN BEGIN SETTING OUR SECOND COURSE IN PLACE. THE LIPS ON THE BOTTOMS OF THE BLOCKS ALLOW THEM TO INTERLOCK WITH EACH OTHER AS THEY’RE STACKED.
David:
Looks good, man, I’m tired.
Suzanne:
Looks really good.
David:
Been a long day.
Ron:
Well I think we made some good progress.
David:
Yeah we did.
Ron:
But I think we are gonna stop for the day. Tomorrow what I want to do is backfill it, is put in a, a material in between the back of these stones and that liner for a couple reasons. We gotta build this up now so could put things on top and also it’ll give us our final support.
David:
Right, great.
Ron:
Uh for the pond in there. All right.
Suzanne:
Great, it’s gonna be great.
Ron:
Could we go have ice tea now?
Suzanne:
Yes.
David:
We can do that.
Suzanne:
Absolutely.
Ron:
All right.
David:
Okay, let’s go.
Suzanne:
Thanks.
ACT 2 TEASE RON-VO:
COMING UP…
Suzanne:
OK. You are the hunter. My caveman breaking some stones.
David:
I’m going out, getting the food, building the hut honey.
RON – VO:
IT’S THE START OF DAY TWO HERE IN OAK PARK, ILLINOIS WHERE I’M HELPING DAVID AND SUZANNE HOLMES BUILD A BACKYARD POND. OUR FIRST JOB TODAY IS BACKFILLING THE AREA BETWEEN THE WALL AND THE POND LINER WITH GRAVEL WHICH WILL HELP DRAINAGE.
Suzanne:
Oh that looks pretty just the way it is. I like that.
Ron:
I like gravel.
Suzanne:
That looks nice.
RON-VO:
NEXT, WE COVER THE GRAVEL WITH A FEW INCHES OF SAND.
Ron:
We could go all the way to the top of the second block.
David:
Okay.
Ron:
That’s right. That’s as far as we’re going to with the sand.
RON-VO:
FINALLY, WE FILL UP THE REMAINING SPACE BETWEEN THE WALL AND LINER WITH BARK MULCH.
MUSIC
Ron:
Now this row of stones right here is gonna probably gonna serve two purposes. It will begin to hide the side of this and it’s gonna give us a, kind of a platform to put our next pool on so I think probably can take one more block from you guys there.
Suzanne:
That looks good.
Ron:
Now let’s fill this area back here up with some more mulch.
Suzanne:
Okay.
Ron:
Good, let’s try that.
Ron:
Well there’s one thing about water, it always flows downhill and always seeks the path of least resistance. Now that’s a good thing. But you can never be absolutely sure how water’s going to flow until you try it out. So that’s exactly what we’re doing here. We put these in place, we have done nothing permanent yet. Just want to get a sense of how the water is going to flow. As a matter of fact were not gonna glue these blocks down here. Why? Well because later on they could change the configuration and the arrangement of these pools. So were gonna leave those loose. And let water takes its course.
RON-VO:
PUTTING THE FINISHING TOUCHES ON OUR UPPER WALLS MEANS THAT WE HAVE TO CUT SOME FULL BLOCKS INTO SMALLER PIECES. DAVID TACKLES THE JOB WITH A BRICK CHISEL.
Suzanne:
OK. You are the hunter. My caveman breaking some stones.
David:
I’m going out, getting the food, building the hut honey.
Suzanne:
Are you going to gather some berries, or is that my job?
David:
That’s your job.
Suzanne:
That’s my job.
David:
I’m building the hut here.
Suzanne:
Nice job.
David:
Ron, I’ve got to get one of these tools.
Ron:
All right, you’re through, you’re through.
David:
Come back from work, I do a little of this, I’m all set.
Suzanne:
I like it.
Ron:
Well you wanna see if we got a fit there buddy?
David:
Yeah, let me see.
MUSIC
Ron:
All right. Well it’s time for the mechanics of our pond here.
Suzanne:
Okay.
Ron:
Pretty simple actually. Consists of a pump right here and a filter right here. And there are two hoses coming out of the filter. You guys have each got one.
Suzanne:
All right.
Ron:
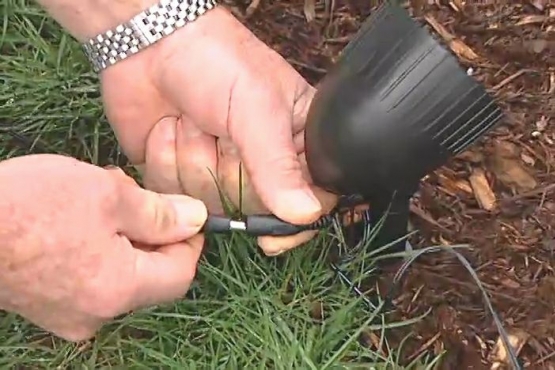
Those hoses have to go to these upper ponds right here. So I’m gonna just submerge this in the water. Now this is designed to run underwater. It’s a uh, the wiring and everything in here is designed as a submersible pump so it’s safe.
Suzanne:
It’s safe. Electricity, and it’s OK.
Ron:
It is. However we are gonna—
Suzanne:
You’re touching it, not me.
Ron:
Well it’s not plugged in yet.
RON-VO:
WHILE I LET THE PUMP FILL WITH WATER, DAVE AND SUZANNE CONCEAL THE HOSES BY SNAKING THEM THROUGH THE ROCKS TO THE UPPER PONDS.
ANOTHER REASON THE PUMP IS SAFE IS RIGHT HERE. WE’RE PLUGGING IT INTO AN OUTLET PROTECTED BY A GROUND FAULT CIRCUIT INTERRUPTER, OR GFCI. THE OUTLET IS ALSO HOUSED IN A WATERPROOF BOX.
WITH WATER FLOWING WE’RE DOWN TO OUR FINAL STEPS.
Ron:
All right guys why don’t you start putting some plants in.
Suzanne:
Here’s a water lily. It might open up and flower in there. Whoo! Goodbye water lily.
Dave:
Right here?
Suzanne:
Yes right, no, no.
Dave:
Right here?
Suzanne:
Right there.
Ron:
Can you hold both of those?
David:
Got ‘em.
Ron:
Let me get one more.
David:
All right, guys, you got the balls in, eh?
Robbie:
Yup.
Katie:
They look pretty.
Suzanne:
There we go.
Ron:
Swim free. Swim free, there’s one out, there’s two out. Yay.
Ron:
What I really like is that we got the sort of height that you wanted by using that trellis, that metal trellis work up there and the hanging baskets. I haven’t looked at this from inside the house.
Suzanne:
It’s beautiful, when you look inside, I mean you’re all the way in the kitchen and you can see it. You can see the pond from the kitchen I was, you know was thinking about the back, but can still see the pond from the kitchen as well. And it’s really nice to hear the water and sitting up on the deck is really relaxing.
David:
It’s hard to remember all the raspberry bushes that we had here which were really kinda plain.
RON-VO:
WELL, THANKS TO VIDEOTAPE, WE CAN REMEMBER. NOT BAD REALLY, BUT OUR CASCADING POND HAS BROUGHT NOT ONLY ADDITIONAL BEAUTY, BUT ALSO THE CALMING SOUND OF A BABBLING BROOK TO THE BACKYARD.
IF SUZANNE AND DAVID EVER GROW TIRED OF IT, THEY CAN EASILY REDESIGN THEIR POND TO SUIT THEIR CHANGING TASTES. AND THAT GIVES OUR POND A LEG UP ON ITS FAMOUS CHICAGO COUSIN.