RON – VO:
IT’S BEEN SAID THAT IF SPRINGTIME HAS A HOME, IT’S RIGHT HERE IN BAY ST. LOUIS MISSISSIPPI …A COASTAL TOWN THAT HASN’T CHANGED A GREAT DEAL IN THE PAST FEW DECADES. ITS STREETS ARE LINED WITH ART GALLERIES AND ANTIQUE SHOPS, AND THE TOWN’S RESTAURANTS PRIDE THEMSELVES ON SERVING THE BEST SEAFOOD THE GULF HAS TO OFFER … AND PLENTY OF IT.
THOMAS FAVRE WAS BORN HERE, AND NOW HAS RETIRED HERE WITH HIS WIFE MARSHA.
THEY LOVE RELAXING ON THEIR FRONT PATIO WITH THEIR DACHSUND, FIDETTE, BUT BY MID-DAY THE SUN CAN DRIVE ALL THREE OF THEM BACK INSIDE.
SO THOMAS AND MARSHA HAVE INVITED ME TO BAY ST. LOUIS IN HOPES OF FINDING A SOLUTION.
Ron:
Well, Good Morning.
Marsha Favre:
Well, hello Ron.
Thomas Favre:
How are you? It’s good to see you.
Marsha:
Great to see you. Welcome to our community!
Thomas:
In the summertime we come out and cook and it’s unbearable, the heat. So we wanted something that we could roll out and cover up and keep the sun off until you know, in the afternoon and then we could roll it back out.
RON-VO:
MY SUGGESTION IS TO INSTALL A SHADE AWNING THAT CAN BE OPENED AND CLOSED MUCH LIKE A WINDOW CURTAIN. THE AWNING WILL GLIDE ALONG THREE WIRE CABLES WHICH WILL RUN BETWEEN THE FENCE AND THE HOUSE.
Ron:
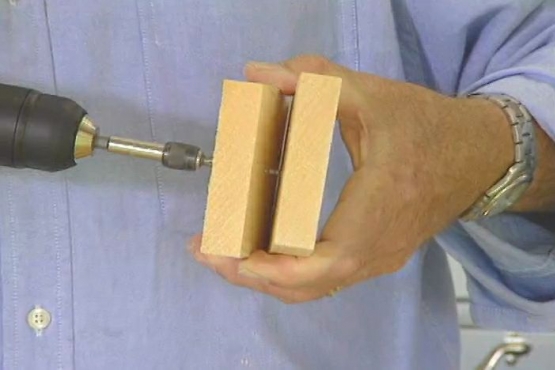
We’ll drill some pilot holes and then we’re going to attach the cable with these. These are called screw eyes. These will get screwed right into the wood. Hopefully we’re going to also grab some framing behind here so we get a good strong attachment. So, we’re ready to go. I’m going to get Thomas and Marsha and we’ll start drilling.
Ron:
All right, shall we begin?
Marsha:
Yep, I’m ready.
Ron:
Okay you go ahead on up there. Marsha, do you feel like you’re dressed for construction?
Marsha:
Well, Ron, I don’t know how familiar you are with Southern women, but a true Southern woman can do this project and probably change the oil in your car in her prom dress. Yes, I’m dressed right.
Ron:
Well I guess you answered that question for me.
RON – VO:
WATCHING MARSHA DRILL PILOT HOLES MAKES ME WANT TO CONSIDER THAT OIL CHANGE.
BUT FOR NOW SHE AND THOMAS INSERT THE SCREW EYES INTO THE HOLES AND TIGHTEN THEM FIRST BY HAND, AND THEN BY USING SCREWDRIVERS FOR LEVERAGE.
Ron:
There’s a certain, dance like quality to your movements.
Marsha:
That’s right. Another trait of a true Southern belle.
Ron:
Now is Thomas a true Southern gentleman?
Marsha:
Well of course, he’s my Rhett Butler.
RON – VO:
WITH THE SCREW EYES ATTACHED TO THE HOUSE, WE NOW HAVE TO LOCATE THE EXACT CORRESPONDING POINTS ON THE FENCE. IN OTHER WORDS, ESTABLISH A DIRECT LINE OF SIGHT FROM THE SCREW EYES TO THE FENCE.
TO ACCOMPLISH THIS, I TIE A LENGTH OF TWINE TO ONE OF THE SCREW EYES.
Ron:
Thomas, if you’ll just take that and go to the other wall over there.
RON – VO:
THOMAS CARRIES THE TWINE ACROSS THE PATIO TO THE FENCE WHILE I HOLD A CARPENTER’S SQUARE PERPENDICULAR TO THE HOUSE.
Ron:
Okay come in this way a little bit.
RON – VO:
I DIRECT HIM TO MOVE THE STRING SIDE TO SIDE UNTIL IT IS PARALLEL TO ONE ARM OF THE SQUARE.
Ron:
Good, right there.
RON-VO:
THOMAS MARKS THE SPOT WHERE THE TWINE MEETS THE FENCE. AND WE REPEAT THE PROCESS FOR THE OTHER TWO SCREW EYES.
NEXT, WE DRILL SHANK OR CLEARANCE HOLES THROUGH EACH MARK ON THE FENCE.
Ron:
Keep going, all the way through. All the way through. There you go.
RON – VO:
THIS TIME, INSTEAD OF SCREW EYES, WE INSTALL EYEBOLTS, WHICH WE SECURE ON THE BACKSIDE OF THE FENCE WITH WASHERS AND NUTS. OUR NEXT STEP IS TO RIG THE CABLES.
Ron:
This is aircraft cable. This is the cable we’re going to stretch across here now and we’re going to drape the shade cloth over that. It’s weather resistant, rust resistant. Really easy stuff to use.
The secret is in this little thing here called a ferrule; it’s got a couple of holes in it. We’re gonna pass the ferrule over the end of the cable like that. And then we’re going to slip this snap over the cable. Make a loop now back and put the end of the cable through the second hole in the ferrule.
RON – VO:
WE SECURE THE CABLE IN PLACE BY CRIMPING THE FERRULE WITH A SWAGING TOOL MADE JUST FOR THE JOB.
Ron:
Hold these handles together, and that’s going to crimp the ferrule. Now look what it did.
Marsha:
I’ll be darned.
Ron:
You see?
RON – VO:
WE FIRST SNAP THE CABLES TO THE SCREW EYES, THEN RUN THEM ACROSS THE PATIO TO THE EYEBOLTS ON THE FENCE. BUT ON THIS SIDE WE USE TURNBUCKLES, WHICH CAN BE TIGHTENED TO STRETCH THE CABLES TAUT … AND TAKE UP ANY SLACK LATER ON.
Thomas:
That’s good.
Ron:
See you get a bad hurricane down here, it’s going to hold the house up.
Thomas:
Hold the fence up.
Ron:
Thank you so much for bringing this over. This is wonderful. I’ll come back anytime.
RON - VO:
NOW THIS IS A POWER LUNCH IF I EVER SAW ONE … A MOUTH WATERING CRAWFISH FEAST BROUGHT OVER BY ROY DEIDO FROM HIS RESTAURANT – BANINGO’S. NOW THERE ARE JUST A COUPLE OF RULES WHEN IT COMES TO DEVOURING THE DELICTABLE CRAWFISH …EAT WITH YOUR FINGERS AND DON’T HESITATE TO SINK YOUR TEETH IN … AH WELL, MAYBE I SHOULD SAY SINK YOUR TOOTH IN.
Marsha:
… and then pinch the tail and it should…
Thomas:
Bite and pull.
Marsha:
…just kind of manipulate it with that one tooth. And as you squeeze it should come out. Yes indeed. Very good!
RON – VO:
NOW EATING LIKE THIS SHOULD BE FOLLOWED WITH A GOOD NAP … BUT, ALAS THERE IS A JOB TO FINISH.
Ron:
Now this is the material that we’re going to use to cover the patio. I call it shade cloth. You’ll find this in the gardening section of a home improvement center. And it will filter about ninety percent of the ultra violet rays. But the nice thing about it is, because it’s kind of an open weave like this, it allows air circulation.
RON – VO:
WE NEED TO SEW HEMS ON THE UNFINISHED EDGES OF THE SHADE CLOTH. NOW MARSHA IS NORMALLY THE SEAMSTRESS IN THE FAMILY, BUT TO MAKE THINGS A LITTLE MORE INTERESTING, WE ELECT THOMAS TO DO THE HONORS.
Marsha:
Very good. It’s just a big running stitch, that’s all it is.
Ron:
Knit one –
Marsha:
No, running stitch.
Ron:
Running stitch.
Marsha:
There’s a difference between knit one and pearl one and running stitch.
Ron:
So this is going to work okay with what we’re doing.
Marsha:
Oh yeah.
Thomas:
It’ll be perfect.
RON – VO:
IN ORDER TO HANG THE SHADE CLOTH ON THE CABLES WE’LL NEED TO MAKE A SERIES OF REINFORCED HOLES ALONG THE EDGES. TO DO IT WE’LL USE A GROMMET KIT. FIRST WE PUNCH A HOLE IN THE MATERIAL WITH THE PUNCH THAT COMES WITH THE KIT. THEN WE INSERT HALF THE GROMMET INTO THE HOLE, PLACE THE MATCHING HALF ON TOP AND DRIVE THE TWO HALVES TOGETHER USING A HAMMER AND A DIE THAT IS ALSO PART OF THE KIT.
Marsha:
Very good.
Ron:
That’s our finished grommet.
RON – VO:
NOW MARSHA WORKS ON THE GROMMETS WHILE THOMAS OFFERS A LITTLE UNSOLICITED COACHING. .
Marsha:
Oh, this is easy.
Thomas:
Move your fingers, move your fingers and just whack it.
RON – VO:
WELL COUPLES WHO LAUGH TOGETHER THROUGH HOME IMPROVEMENT PROJECTS ARE OKAY IN MY BOOK. NOW OUR NEXT STEP IS TO INSERT REGULAR KEY RINGS THROUGH THE GROMMETS WE INSTALLED EARLIER.
Ron
I do believe we’ve bought out every key ring in town here.
RON – VO:
NEXT … WE TEMPORARILY DISCONNECT ONE END OF EACH CABLE AND PASS IT THROUGH THE KEY RINGS. AND WITH MY ALTER EGO PEERING OVER MY SHOULDER, I’M REMINDED THAT THIS AWNING WILL NOT ONLY BLOCK OUT THE SUN, BUT OFFER THE FAVRES A LOT OF PRIVACY AS WELL.
Ron:
Okay, hook it on there. That’s good. Now let’s tighten the turnbuckle up.
Now we’ve added one final detail right here. We put a grommet in the center of the shade cloth. Run a key ring through the grommet, and over this center wire right here. Attached two lines: this one will pull the shade cloth closed, and this one will pull it open. So, Thomas are you ready?
Thomas:
I’m ready.
Ron:
Give it a pull.
Marsha:
Oh, I just love it. That is great. It’s perfect.
Ron:
All right now, when you want a little bit of sun, just pull this back this way. Or you want full shade, just pull it closed again.
Marsha:
Oh it’s just great, it’s just what we needed.
Ron:
You like it?
Marsha:
I love it, thank you Ron.
Thomas:
Perfect.
Marsha:
And I just want to remind you of one thing – that Southern belles can do home improvement projects.
Ron:
I’m convinced!
RON – VO:
I’M ALSO CONVINCED THAT WE’VE PROBABLY DOUBLED THE USEFULNESS OF MARSHA AND THOMAS’ PATIO. WHEN THAT MISSISSIPPI SUN STARTS BLAZING A BIT OF COOL SHADE IS ONLY AN QUICK PULL AWAY. AND THAT’S A FEATURE I’M SURE FIDETTE WILL APPRECIATE , TOO.
 A while ago, I pulled off the highway in the Gulf Coast town of Bay St. Louis, Mississippi. Thomas Favre was born in this coastal community and still lives here with his wife Marsha. The Farves love relaxing on their front patio with their dachshund, Fidette, but by mid-day the sun can drive all three of them back inside. Thomas and Marsha invited me to stop by in hopes of finding a solution. Their idea was to create something that they could roll out to shade the patio and keep the sun off, but could retract when things cooled off.