How to Build a Child’s Toy Chest or Box
Use a Plate Joiner to Assemble a Child's Toy Chest with Glue and Biscuits
Build a child's toy chest and you'll have something that can be a keepsake as well as a functional piece of furniture. Using a plate joiner and a few simple pieces of hardware will give you a sturdy product that will stand up to whatever wear and tear that your kids will give it over the years.
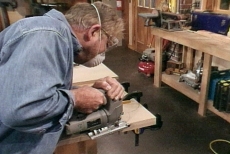
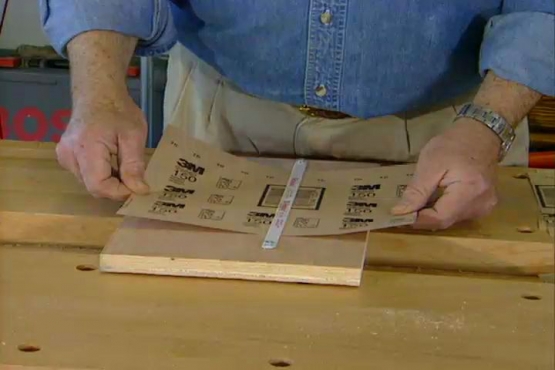
Remove the sharp edges and corners from the side pieces
It is important, with any piece of furniture that a child may be playing around, to remove any sharp edges or corners. Use a jig saw to cut rounded edges and then use sandpaper to soften the edge of the cut. Use your imagination when planning the design. There are a number of scallops or shapes that can be cut into these side pieces that will give the project your own unique flavor. To ensure that the designs match, clamp both side pieces together and cut them at the same time with the jigsaw.
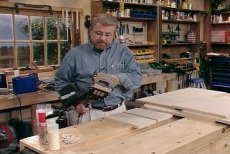
A Plate Joiner is an ideal tool for assembling the toy chest
A plate joiner, also known as a biscuit joiner, is one tool that you can use to assemble furniture without using a lot of nails and screws. It will allow you to construct a durable, but attractive toy chest that will stand the test of time. If you don't own one, they can be rented at most tool rental centers or home improvement centers.
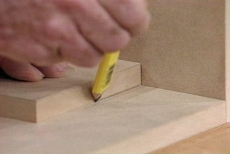
Transfer the marks for the biscuit cuts from one piece to another
It is very important that the slots you cut for the biscuits line up correctly. If not, then the pieces of your toy chest will not line up correctly when assembled. Mark the center of the slot that is already made with a pencil, and then align it with the piece to be cut next. Transfer the pencil mark onto the new piece and then ensure that the mark is at the center of the cut for the biscuit.
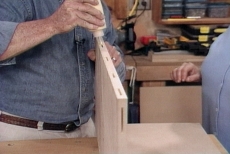
Glue each biscuit into place
A special tip can be added to your glue bottle to make it easier to apply the glue to the slots that receive the biscuits. Once they are in place, the pieces of the toy chest can be pressed together, and then clamped to allow the glue to dry completely. This should take 3 to 4 hours, or the project can be left overnight.
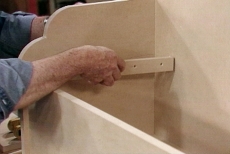
Install the lid
After the four sides and the bottom of the toy chest have been glued together and have dried thoroughly, the clamps can be removed and you are ready to install the top. Cleats must be screwed into each side of the chest to act as stops for the lid and to give it additional support. Once these are in place, the piano hinge (which is available at your local home improvement store) can be screwed into place.
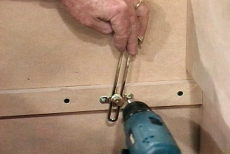
Install a closer for safety
The toy chest is now strong, but the lid slams closed with a lot of force and could be dangerous for little fingers. This problem can be solved by installing one or two lid supports to act as closers. The supports are adjustable, so with a simple turn of a screw, you can adjust the amount of force necessary to close the lid of the chest.
Related Tips


Blog Articles

Maximize Your Yield with DIY Netting for Strawberry Beds
Keep your strawberries safe from pests with our DIY strawberry cage netting solution. Learn how to create sturdy frames and find the best netting for your strawberry plants.

Change It Up: Swapping Out Your Light Switch Plates
Tired of boring light switch covers? Upgrade your home decor with this simple guide on replacing light switch plates and make a statement in every room.

Revamp Your Outdoor Space: How To Stencil A Concrete Patio
Learn how to create a stunning patterned concrete patio with our easy-to-follow instructions for stenciling. Upgrade your outdoor space in no time.


