Ron:
You know home is a place to rest, relax, and recuperate. That’s especially important when your job is demanding and sometimes dangerous.
[Emergency siren]
Leah:
My job can get really stressful. I really don’t have any time for myself. I work a lot of hours. I have two children at home and it seems when I’m not working I’m really busy at the house. I don’t have an area in the house that I can just use for myself. So we have a really great spot that’s all windows that looks out into the water.
Ron:
So Leah gave me a call and I headed up north along the Connecticut coast to the seaside town of Branford. Her home sits at the end of a spit that juts out into the harbor. By the time I arrived, I was as mellow as a seabird.
Leah:
Hey Ron. How are you? Nice to meet you.
Ron:
Hey got to be Leah. Let me come on up.
Leah:
So this is my kitchen area here.
Ron:
I so love this house. You’ve got views on every side here.
Leah:
Yeah it’s really great here. So this is the area that I was speaking to you about. Its one of my favorite spots in the house.
Ron:
So you would like to hang here and just take this all in?
Leah:
I’d like to sit here and relax.
Ron:
I’ve got an idea, really a very good idea. The way I’m seeing this is a great big ah, vinyl lounger chair here. You come in sit down and you just recline back. Cool drink in your hand.
Leah:
Um, that wasn’t what I had in mind.
Ron:
What about storage, you need any?
Leah:
I would love storage. My husband comes in a lot and just dumps his coat or his mittens and hats from the winter and it’s usually like all over the floor.
Ron:
Could you say that again?
Leah:
Mittens?
Ron:
I thought you said mittens. Did you say mittens?
Leah:
Mittens. I did, why don’t you like that word?
Ron:
How do you pronounce that word? How do you pronounce m-i-t-t-e-n-s?
Leah:
Mitten.
Ron:
Now you’re trying.
Leah:
Mitten.
Ron:
[laughs]
Ron:
Based on what Leah is telling me I’m thinking a window seat with built in tables at the ends might be just the ticket. So if you think that’s a good idea?
Leah:
I think it’s an excellent idea.
Ron:
Then I want to invite you over to my shop.
Leah:
Great.
Ron:
And we’ll build it over there, show you how to design it and then we’ll bring it back here and put it in.
Leah:
Excellent, I can’t wait.
[bell rings]
Ron:
Hey good morning.
Leah:
Good morning. How are you today?
Ron:
Sorry to get you out of bed so early today.
Leah:
No problem. It’s not too bad.
Ron:
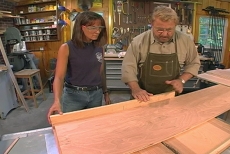
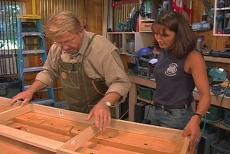
Hey come on over, I’ve just been working on the sketch for the window seat, let me show you what I’ve go.
Leah:
That looks wonderful.
Ron:
I think we ought to do this in three sections: center with a lid that raises up so you can use that for storage, and then you were saying, you know, this is where people come in and sit down like in the winter so maybe to give you some of that storage for shoes and stuff we can leave this one open. This side over here with a lid that raises up, so you’ve got a great view out here and these are higher, see, I was kind of thinking those can sort of like be like end tables.
Leah:
Great, that’s beautiful.
Ron:
I’m going to make this out of plywood, so the first thing I want to do is just like cut a base, cut several pieces out.
[saw]
Ron:
There you go. You’re going to have the top of the table here in just a second. Keep going, keep going, okay good, stop. How was it?
Leah:
Excellent.
Ron:
Still nervous?
Leah:
Not too bad, a little bit.
Ron:
You did great. You really did great.
Leah:
Thank you.
Ron:
So this is the piece that you just ripped down to the right width, okay? Now we’re going to have to cut a couple of these to the proper length. This is something here called a cradle, its just a piece of plywood with some runners on the bottom, it slides across the table top. A simple work stop made from a couple of pieces of one by four is clamped to the rear edge of the cradle. This allows us to cut multiple pieces of wood to precisely the same length without re-measuring each time.
[saw]
Ron:
Go ahead. We’re going to go right up against that stop. And see we’re not measuring now or marking we’re just using this mechanical stop.
[saw]
Ron:
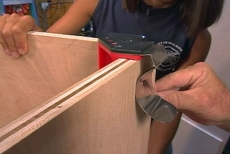
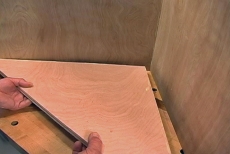
So here are all the parts that we cut out. Very good job. We begin assembling the window seat by attaching the ends to the bottom. Two clamps will hold the bottom on edge as we work on it. On this project, what we’re going to do is glue and nail these together.
Leah:
Why would you do both anyway? Not just the nails or just the glue?
Ron:
That’s a very good question. Well we’re really gluing this together and using the nails to clamp it in position while the glue dries. Now we’re going to put this up here, and now, this is called a joining clamp. It looks like a giant clothespin almost and this will hold these two together while we nail it.
Ron:
Great, perfect.
[nail gun]
Ron:
Leah, why don’t you start at that end down there?
Leah:
All righty.
Ron:
With the ends in place, our next step is to attach the sides. All right, I’m going to set this right up on top. Okay.
[nail gun]
Ron:
Let me just take a peak in here see if you need a little…you’re still batting a thousand. Not a single nail blown through there.
Leah:
All right.
Ron:
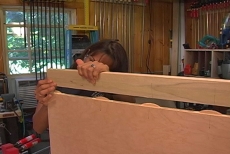
Okay, lets just rotate it up like this. And then one more time, we both know the drill now right? So we’ve got the base built, the box, let’s call it that. The bottom, the ends, the front, and the back. Now we’re going to work on your top. We need to attach a strip of solid wood to the plywood. So we begin by cutting slots into the edges with a machine called a plate joiner. And lets get some glue down in the grooves. Next glue is applied to the edges. So we’ll just drop this in just like that. Then wooden wafers or biscuits are inserted into the slots. Now these are kind of interesting because they’re made of compressed wood. And they’re compressed under quite a bit of pressure. They, um, not only does the glue bond these, but when the glue hits these they swell. Just take it off, and turn it right over and drop it on the biscuits. All set?
[Hammering]
Leah:
Oh, this is just going to hold it all together.
Ron:
It looks pretty good. Everything’s, the lines are lined up, the glue is squeezing out evenly, no gaps, you know what I say? Lets take a lunch break and let this dry.
Leah:
Great idea.
Ron:
Now as I said before, home improvement can be an adventure and it can effect the most unlikely members of the family.
Leah:
Recently we had some home improvements done upstairs in our bedroom. And I came home from work, and I kept hearing the cat in the bedroom and we couldn’t find her. So my husband and I went upstairs and Jay said ‘I think the cat is in the wall.’ And what had happened is the builders actually the cat had jumped into the wall when they took the sheet rock off and the builders actually sheet rocked my cat into the wall. So I cut a hole in the bottom of the wall in-between the two studs to get the cat out. And when the builder came in the next day he was completely mortified. He actually didn’t believe me until he saw the hole in the wall.
Ron:
And that’s how a cat nap, turned into a cat tale. Thankfully it wasn’t a cat-astrophy. Let’s go back to our window seat project.
Ron:
Our window seat will rest on a recessed base that we’ll assemble from one by fours. I’m going to hold this for you.
[nail gun]
Ron:
So here’s our base. I’m going to turn this around. Okay, so this is the front here, now lets go get the box and set that on top. Lets just set this on here.
[saw and nail gun]
Ron:
Next we glue and nail strips of wood to the top edges of the box first along the back and then the sides. The lid is a snug fit so we can move on to the build-in end tables to the right and left of the window seat. These will have a triangular base…a bottom shelf…and three sides. We’ll attach the sides together with glue and nails…the same way we assembled the box
[Nail gun]
Ron:
Oh that one.
Leah:
That one went out. Oh, that was the end of the wood.
Ron:
But that was not your fault. In this case, if it’s exposed, we’ll just grab it like this and we’ll just pull it the rest of the way through. And it’s gone.
Ron:
Okay, now for the fun part, ah?
Leah:
Hey how are you? Hey Ron, this is my husband Jay.
Ron:
Hey Jay, nice to meet ya.
Jay:
Hi Ron. Thanks for coming.
Ron:
Can we get a hand.
Jay:
Sure.
Ron:
Why don’t you grab these loose parts here. Alright Jay, if you just want to take the end of that.
Jay:
Sure thing.
Leah:
Let me get out of your way first.
Ron:
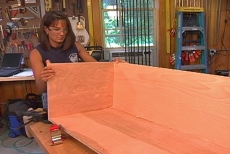
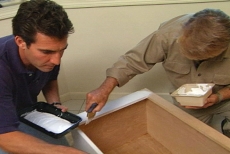
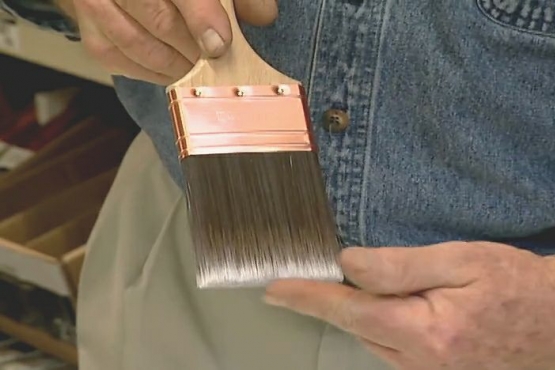
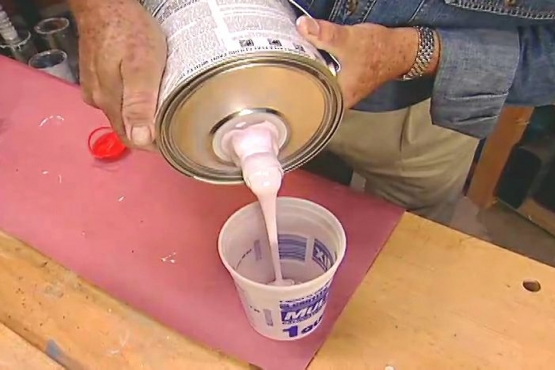
Slide it right out. I’ll grab the end first. Okay, so what I think we should do lets just set this back into the center of the room, okay and we’ll paint it right here and then when its dry we’ll put it back in. The primer we’re using right here has a stain blocker in it. It won’t get bleed through from knots and that kind of thing.
Leah:
Now when you use this primer, do you have to use two coats of color paint or would you just use one?
Ron:
You know, I think one is enough in terms of protecting the wood, if you would.
[Drill]
Ron:
Good, that’s good.
Leah:
We’re actually working together.
Ron:
All three of us.
Jay:
Looking pretty smooth too.
Leah:
We’re not even fighting yet.
Ron:
While Leah is fighting fired, Jay, a pediatrician, is caring for children in his family practice…Now, I’m wondering…just how long does one continue to see one’s childhood doctor? What’s the normal age range a pediatrician treats?
Jay:
Anywhere from birth up to adulthood. Most people would define adulthood as eighteen, but we see some kids up through college and they’re twenty-two, twenty-three.
Leah:
When they try to give him their phone number.
Ron:
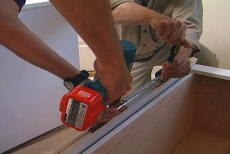
Well the end is near…the piano hinges that were first attached to the lids are now screwed to the base sections. Now it’s finally time to turn that empty alcove into a cozy nook. Before we take a final look, though, let’s turn the clock back just to remind ourselves where we started and just how far we’ve come.
Leah:
It’s great, it’s so relaxing, who needs to go away?