RON HAZELTON:
Well, today's trip takes me to Mountain View, California. I'm visiting Doug and Heidi Mackaway.
[MUSIC]
The couple live on a tree-lined street in the San Francisco suburb of Mountain View. Today, this area is part of Silicon Valley. But when their home was built in 1906, it stood alone as a rural farmhouse. Living here can't help but conjure up thoughts of years past.
And when Doug came upon an antique version of Old Glory that was in use the year his house was built, he just had to have it. Protecting and displaying such a fragile fabric though, can be a challenge, so Doug and Heidi have invited me to help them find an answer.
So tell me the story about the flag and -- and its relevance to -- to the house here.
DOUG Mackaway:
I'd been looking for a 45-star flag because there were 45 states in the Union when this house was built in 1906. So found this flag under a pile of 50-star flags and said, gotta have it.
HEIDI Mackaway:
It's interesting that he has been talking about this for years and then we actually found a flag. It's pretty amazing.
RON HAZELTON:
Right. So where are you guys thinking about putting this? Well?
HEIDI Mackaway:
The living room has a couple of options for us.
RON HAZELTON:
Yeah, okay. Want to show me? So we can see what your options are here.
DOUG Mackaway:
Well, we thought about over the mantle which we think would be certainly a prominent place for it. And we've also thought about over this wall over here. These are essentially the only two walls it could fit on.
RON HAZELTON:
Big enough, really.
DOUG Mackaway:
Really, yeah.
HEIDI Mackaway:
Yeah.
RON HAZELTON:
I think what we ought to do guys, if the flag will tolerate this, is very carefully -- let's bring it in here and just kind of hold it up.
HEIDI Mackaway:
Okay.
RON HAZELTON:
The fabric is very fragile, so we keep handling to a minimum, but it does help to see the flag in both locations before making the decision where it will hang. Our display case will have two parts. First, we'll build a stretcher frame similar to an artist's canvas. This will be covered with three layers of material, onto which we'll attach the flag.
Next, we'll build a shallow display case. Place the stretcher inside it, and finally, install a sheet of clear acrylic plastic for protection. Our first step is to cut strips of poplar for the stretcher frame. The top and bottom must be exactly the same length, so must the two sides and the cross brakes.
The best way to assure they are the same length is to measure the first board, square up the ends, clamp the boards together and then cut them at the same time. [SAWING SOUNDS]
Now perfectly flush here, perfectly flush down there. We know that these two are exactly the same length. All right, we're going to do the same thing now with these shorter pieces. Let you guys do this. [SAWING] All right, guys, we've cut out all the pieces for our stretcher frame.
Now we're going to hook them together using something called a lap joint. And it simply requires that we cut half the thickness away from two pieces of wood, and then they kind of interlock like this. So, to cut that, we're going to use a router and to help us get really accurate with this, I've made up a little holding jib here out of some pieces of this same 1 x 3 poplar.
And we'll start out by putting two pieces of lumber in here like this and I'm just going to put a shim in here to kind of wedge everything tightly in the same place like that. And this is the router that we're going to be using. It's been fitted out with a 3/4" straight bit and I've got it set at the correct depth right now to cut exactly halfway through these pieces of lumber.
The base of the router is placed up against a temporary fence that's part of the holding jig.
See, I made the first cut right here, using this as a fence. That gives us a good straight shoulder right here. Now I'm just going to go back and forth and very carefully to take out the rest of that material, right. [SAWING]
See, we removed just half the thickness right here from these two boards. So let's flip these around now. I want to do the same thing on the other end.
[MUSIC]
Let go. I got to tell you, you two are aces with this tool here.
HEIDI Mackaway:
You're a good teacher.
RON HAZELTON:
Oh, yeah, well, good.
[BOTH SPEAK AT ONCE]
HEIDI Mackaway:
That was fun.
RON HAZELTON:
Yeah, was it fun?
HEIDI Mackaway:
It was fun.
RON HAZELTON:
Was it fun?
DOUG Mackaway:
I'm going to be buying a router this weekend.
[LAUGHTER]
RON HAZELTON:
This sometimes happens. [LAUGHS] Now we're going to put this together and we're going to use some glue.
We brush glue onto both pieces of wood, being sure to cover the shoulders or sides of the joints as well.
HEIDI Mackaway:
So is wood glue always as strong as nails would be? What's the point of wood glue? It's just an extra adhesive?
RON HAZELTON:
You're asking all the tough questions today, you know that.
[HEIDI LAUGHS]
Well, nails are a, a mechanical fastener and they're only going to hold where there is a nail. This is going to bond the entire surface. Once this glue dries, it will be stronger than the wood itself. Now, you ready? Just drop it down in there.
You have to give it a little tap with your hand. Well, it may be more like a bang with your hand.
[HEIDI LAUGHS]
We glue and insert the sides in place, then apply glue to the face of the stretcher frame.
Doug, if you can grab this -- this is quarter inch thick, acid-free foam core.
Acid-free materials help protect the flag from further deterioration. We also use rustproof staples to attach it to the stretcher frame.
For the sake of the flag, we don't want anything here that's got acid in it. We don't want anything that's got the potential of rusting. Okay. This is polyester felt. It's going to provide a little bit of cushion behind the flag.
And also, if you ever decided you wanted to sew this flag on, which is the way conservators often do it, this gives you a little bit more material for the -- the thread to grab.
Again, using rustproof staples, we attach the felt on one side, stretch it tautly against the frame, staple the remaining sides, then cut off the excess. Finally, we add cotton muslin, stapling it to the frame as well. With our stretcher now complete, we've moved it inside to mount the flag. We carefully spread it out and very gently, attempt to smooth out the wrinkles.
The way we're going to attach this is with these little pins. These are ball-headed pins that are stainless steel, so that they won't rust. And in order to make sure that we space these evenly along the edge, I've made up a little gauge here.
It's just a strip of wood with marks every three inches.
Now it's important to point out that there are a number of ways to mount a flag like this. A museum conservator, for example, would most likely sew the flag into place, using a far more painstaking approach than we are.
Our method though will display and protect this flag for many years to come, and allow us to do so within a reasonable amount of time and for an affordable amount of money.
[MUSIC]
Well, guys, now it's time to start the work on the display case that that stretcher frame is going to go inside. And as we mentioned earlier, we're going to make this out of oak. And the first thing we want to do is cut two grooves or dados on the inside.
One of these grooves is going to hold the quarter inch plywood from the back. The other groove is going to hold the acrylic plastic for the front, okay. And I've got the saw set up here. This is a dado blade. In this case, it's just -- actually two blades sandwiched together to give us about a quarter of an inch groove there.
And I'll put the throat back -- cover back in there. I've also clamped on a feather right here. That's to hold the board down in contact with the table, so that this groove remains at consistent depth. Now in order to join the ends or corners of this display case together, we're going to want to cut some miters so that they’ll look like this, and then the two pieces will go together like that, give us a nice, clean finished corner with no end grains showing, all right.
I'd drawn a cut line on each frame section and set the miter saw blade to 45 degrees.
Yeah, so that's the piece we cut off. And this is our first miter.
[MUSIC]
Right. Here are the sides that you guys put the dados in, mitered so nicely on the ends, those are ready to go. This is a piece of 1/4" plywood down here. So what we're going to do is just glue these sides onto the edge of the plywood.
We run a bead of glue into the bottom dado. And the important thing here I'm trying to do is to get this up on the sides of the groove so that it's not just in the bottom.
We slip the frame section over the edge of the plywood back, making sure we're flush at both ends.
Now give me touch to touch, 16th maybe and 32nd. Good.
Next, we apply glue to the miter joints and to the frame sides, then set the sides into place.
All right. We're just going to pin this. This is a -- a pin nailer again. I'll do this first, and then you guys do the rest of 'em.
We glue and nail the bottom and sides of the case. We'll attach the top later on. Next, we move back indoors to address how we're going to hang this large heavy case.
We're going to use two strips of wood -- both of which have a bevel cut on the edge, like this. Now it's going to be kind of hard to see this when we put it up, so I made up a little sample here to show you how this works. Let's say this is the back of our cabinet right here -- we're going to put one of these strips with the bevel pointing down on that.
We'll put this other strip which matches it, on the wall. And then when we put our cabinet up, the top cleat will nest right inside the bottom and that's a very strong way to hang something.
We apply glue to one section of the cleat, press it in contact with the back of the case and attach it with nails that will hold everything in place until the glue dries. Next, we place the other mounting strip on the wall and screw it securely to the wall studs.
This is a big moment, guys. This is when we put the flag in. Drop it down. It should fit. [LAUGHS] Ohh, wow [LAUGHS], nice fit. Okay.
[BOTH SPEAK AT ONCE]
HEIDI Mackaway:
Nice fit.
RON HAZELTON:
Now we're ready to slide our acrylic plastic into place. We leave the protective covering on to make sure we don't scratch the inner surface. We also wear gloves to protect our hands from the cut edges.
And what's kind of important here is that we kind of go in at the same speed.
With the acrylic in place, I attach the top of the frame. Remember, we left that off earlier. Here, instead of glue and nails, I use only screws. This way if Doug and Heidi ever want to remove the flag later on, they can unscrew the top of the frame and simply slide it out. Finally, it's time for the unveiling.
Old Glory and all her glory. All right. What a beauty. There we go.
[BOTH SPEAK AT ONCE]
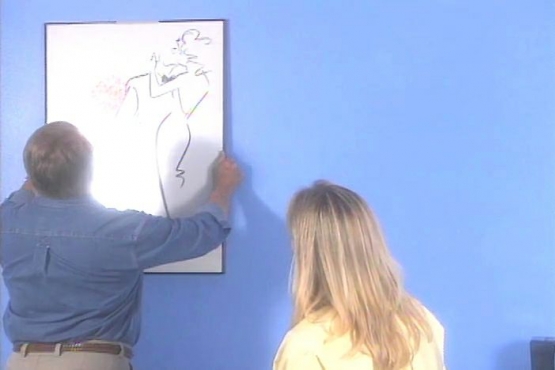
Okay, Heidi, stand back. How are we, left to right?
HEIDI Mackaway:
Really pretty good. Just maybe two inches to Ron's right.
RON HAZELTON:
Just slide it down. That's the beauty of that cleat system.
HEIDI Mackaway:
Oh, it looks pretty good.
RON HAZELTON:
Okay. All right. So what do you think?
HEIDI Mackaway:
It's amazing.
DOUG Mackaway:
Wow.
RON HAZELTON:
Makes a statement, doesn't it?
HEIDI Mackaway:
It certainly does, what a tribute.
[BOTH SPEAK AT ONCE]
RON HAZELTON:
It certainly does. Tell you one thing, it makes me want to stand up and salute.
[HEIDI LAUGHS]
From a stack of old flags in a small town antique store, to the wall of a 1906 farmhouse, I can't help but feel this grand old flag has truly found its home.