RH: From Seattle my Washington adventure takes me South toward Tacoma. Kimberly Bower lives near the Washington coast line at a place called University Place. One of the things she loves about her kitchen is she can stand at the sink and actually watch eagles soaring over the water. What she doesn’t like though is the lighting. It’s a relic from the past. So, I’ve agreed to help her brighten things up with some new fixtures. Here we come Kimberly. Hey Kim!
KB: Good morning Ron! Welcome!
RH: What a nice sign. Thank you so much for that. You know I couldn’t help but notice driving up here the views are spectacular from up here.
KB: Come on in. Let me show you.
RH: You got more? While her husband is at work Kim is going to install the new fixtures herself with a little coaching. Look at this view out here. I’d do dishes standing here looking at that view. So, this is the light fixture up here?
KB: Yes, it is.
RH: Right out of the ‘60s.
KB: Yes.
RH: Well, listen let’s get started on this. I want to begin by turning off the power. Where’s the circuit breaker.
KB: It’s right out this way.
RH: Okay. In the garage?
KB: Yes.
RH: Okay. The power is off. Just take one step up on the ladder here and I want you to unscrew that center nut right there. The round one. Just reach up with your fingers. There you go. It’s loose. Now, see those two red wire nuts. Ease those out. Kim unscrews the wire nuts which secure the wires in the fixture to the household wiring coming out of the ceiling. Now, just pull that fixture right down. There you go. Okay. Out with the old.
KB: Out with the old, in with the new.
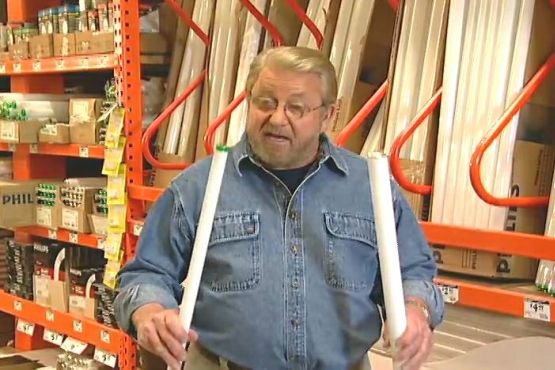
RH: All right. Okay. This is your new light fixture. It’s a T2 fluorescent. The first thing that I want to do is take out this little disk right here. That’s where the wires are going to come through. Let me hand you a pair of pliers.
KB: Okay.
RH: I’m going to start by knocking out a little bit from this end just using a screwdriver. I’m just going to kind of hit this. Now, you take the pliers. Okay, now, give it a twist. Twist it back and forth, back and forth. There you go. Pop it right out. Great. All right, Kim. The disk is out there but here’s a problem. The edge of this is pretty sharp so what I want to do right now is install this rubber grommet. You see it’s got a grove right here along the side.
KB: Okay.
RH: Why don’t you go ahead and do that. The grommet protects the wires insulation from fraying on the sharp edges. One of the most common causes of short circuits and a potential fire hazard. Okay, now again Kim, take one step up and feed those wires right through the grommet. This is just temporary for now but I want to position this. Next Kim and I position the fixture on the ceiling. The edge of the fixture right on that. Now, I’m going to take and awl. There are two holes here to screw this up. Let’s make one mark right here. We use an awl to mark the ceiling through the fixtures mounting holes. This is where we’re supposed to drill holes for toggle bolts but, something isn’t quite right. All right. We got a problem up here. This is an acoustical tile ceiling. I thought it was glued right onto the wall board. It turns out it’s not. There’s a space up here of almost six or seven inches from the acoustical tile to the floorboards in the attic. You can see it right there. So, there’s no way I can use a toggle bolt to attach the fixture here. What I’m going to have to do is find some wood up here. Now, when they put this ceiling up they actually put up firing strips, pieces of one by two, like this on top of the ceiling joists. There’s going to be one in every joint right here. So, what we’re going to do is move over the holes in the fixture, line them up with this joint right here and then we can attach that fixture with wood screws. We need to move that hole down nine inches. We measure over from the original hole to where the joint between the tiles and the wood firing strips would be. I use a spring loaded center punch to create a starter hole. Then I turn the power tools over to Kim to drill new mounting holes in the fixture. Finally, we’re ready to attach the fixture to the firing strips. I’ll drill the first screw in and then give Kim a shot. Now, it’s time to do some wiring. We have to reconnect the fixture wires to the wires coming out of the ceiling. So, Kim the wiring in this is pretty simple. We’ve got a black wire and a white wire. We just want to twist together the wires of a like color. We’ll start with these two white ones right here. Now, if you’ll take one of those wire nuts. There you go. Watching Kim work I just couldn’t help but ask about her nail polish.
KB: That is husky purple.
RH: As in the team?
KB: The University of Washington Husky football team.
RH: Yes.
KB: I was in the Husky marching band for three years.
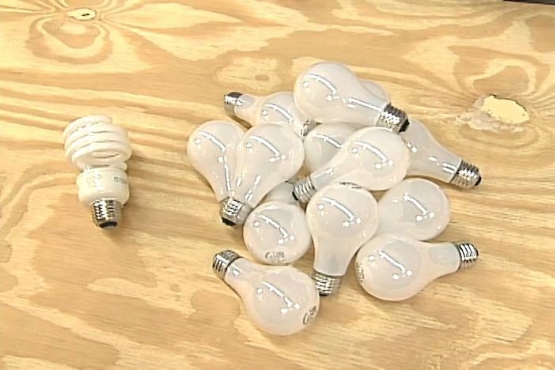
RH: No kidding. Performing in a marching band is a lot tougher than this job. So I knew Kim would be just fine. Now, I want you to kind of push the wires up. Bend them right there. With the wiring out of the way we’re ready to install the frame. This is going to go around the fixture up here. Slip it right over. Okay. Then there are a couple of screws that go right in here. Now we can snap in the cover that conceals the wiring and ballast You notice there are some tabs in the backside here. That’s right. Just engage that one. Good. Then come around to the front side and snap it in. Kim was impressed by the fact that these fluorescent fixtures not only provide more light but consume less electricity and last longer than her old incandescent bulbs. When we install this diffuser it’ll cast a much softer light than typical fluorescents. There we go. One down and one to go.
KB: It looks good.
RH: I think you can do this one yourself.
KB: I think I can too.
RH: Okay, let me watch.
KB: Okay, let’s go for it.
RH: A short time later Kim had removed and replaced the second fixture as well. The before and after shots of her handy work show what a difference good lighting can make. You did a great job over here. I hereby dub thee master apprentice electrician.
KB: Thank you very much for your help Ron.
RH: You’re very welcome. You know I love to always stand back and look at our work and I got to tell you, if I had a choice between our work and the view out there, that’s a tough one.
KB: It is.