RON HAZELTON:
Now, when winter winds start blowing around here, I have to admit my thoughts start turning to warmer climates. So, the idea of visiting Marianne and Larry Jorgensen in Tampa, Florida, definitely appeals to me.
They live in the house Marianne grew up in and had been busy fixing it up. One corner of the kitchen, though, has presented a dilemma. They'd like to use it as a place to sort bills and write checks, a sort of home office. But it's become clutter corner.
MARIANNE JORGENSEN:
Ron, this is our problem area over here.
RON HAZELTON:
Well, you know, it could be a challenge area.
MARIANNE JORGENSEN:
Well, maybe, we'll see.
RON HAZELTON:
Huh? You put it in a positive light. You're using it, though, huh?
MARIANNE JORGENSEN:
Oh, it works perfect, except there's not enough room. There's no cabinets, no drawers. We need a little bit more.
RON HAZELTON:
Some more organization, some more space.
MARIANNE JORGENSEN:
Absolutely.
RON HAZELTON:
I got the sketches here. This looks like your original sketch, maybe?
MARIANNE JORGENSEN:
Yes, it is.
RON HAZELTON:
What you did right here?
RON HAZELTON:
After sketching out her idea for the work space, Marianne and Larry took her drawing to their home improvement center, where the kitchen design staff helped them create this plan.
LARRY JORGENSEN:
They came up with some great ideas, especially staggered cabinets they have here.
RON HAZELTON:
You can move -- kind of move things around.
LARRY JORGENSEN:
Move things around, yeah. They gave us different options and made it great for us to make a decision. So --
RON HAZELTON:
So, we're going to make this whole thing from -- from modular units. Did everything get here by now?
LARRY JORGENSEN:
Yes, it did. Yes, it did. It's in the garage, all boxed and ready to go.
[MUSIC]
RON HAZELTON:
So, this is our last cabinet, guys. This is everything we're going to need here for the job.
LARRY JORGENSEN:
Great.
RON HAZELTON:
Alright? Now, good news is this is all preassembled cabinetry. We don't have to put it together. That's going to save us a lot of time.
LARRY JORGENSEN:
Right.
MARIANNE JORGENSEN:
Right.
RON HAZELTON:
What we will want to do, though, is we'll attach all the bottom cabinets and all the top cabinets together first. And the upper cabinets we'll mount right here on the wall. The lower ones will sit on the floor and we'll just secure them to the wall studs back here, so that they won't move.
[MUSIC]
RON HAZELTON:
We start by opening the shipping boxes and laying our cabinetry out, so that we can see everything. Next, I give the drawers an impromptu durability test.
Now, I don't necessarily recommend you do this yourself.
[BANGING AROUND]
[MUSIC]
RON HAZELTON:
Well, I can say the drawers work really well.
LARRY JORGENSEN:
Yeah.
RON HAZELTON:
Now, these are our upper cabinets right here. There are three of them, and we're going to attach them together into one section. They're going to be a little bit heavy, though. So, in order to cut the weight down, I want to take these doors off.
[DRILL]
RON HAZELTON:
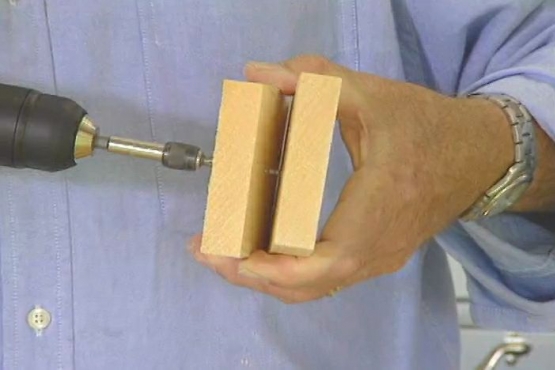
We'll mount these cabinets to the wall studs, which Marianne and Larry locate using an electronic stud-finder. This wood cleat will serve as a temporary ledge or support, holding the upper cabinets in place until we can attach them to the wall.
MARIANNE JORGENSEN:
Good, got it.
LARRY JORGENSEN:
Great job.
RON HAZELTON:
Alright, guys, we're about to start attaching these together. But there's one thing I want to deal with. You notice the face frame right here?
It kind of overhangs the side a little bit. It creates a gap that runs all the way back here. I want to put something in to sort of give us -- to fill that gap here at the back. So, let me lay this down. I'll just take a piece of scrap wood that's the same thickness as that overhang. We'll slide it back here like that.
LARRY JORGENSEN:
Right.
RON HAZELTON:
Marianne tacks the wood strip into place with a portable pin-nailer, one that's equipped with its own onboard compressor.
[NAILER SOUND]
RON HAZELTON:
Got that little compressor going there?
MARIANNE JORGENSEN:
Yeah, yeah.
RON HAZELTON:
Isn't that cool?
MARIANNE JORGENSEN:
Yeah. One more?
RON HAZELTON:
Uh-huh.
[NAILER SOUND]
MARIANNE JORGENSEN:
One more?
RON HAZELTON:
You like that tool?
MARIANNE JORGENSEN:
I like it very much.
RON HAZELTON:
You want to keep going, yeah?
MARIANNE JORGENSEN:
Yeah, I'll take it.
RON HAZELTON:
We'll find some more reasons to use that.
RON HAZELTON:
With shims in place, we're ready to attach the three upper cabinets together. I start by tracing the front edge of the smaller cabinet onto the side of the larger center cabinet. Then I mark and drill four clearance holes.
[DRILL SOUND]
RON HAZELTON:
So, this is the screw that we're going to use to attach these cabinets together. But before you put it in, Larry, I want you to put one of these plastic disks on here, like that. And then when the screw is tightened up, we'll slip this plastic finish cap on top of it.
LARRY JORGENSEN:
Okay.
RON HAZELTON:
So, we don't see the screws in here. It's a nice neat installation. So, there you go.
LARRY JORGENSEN:
Alright.
RON HAZELTON:
Marianne, your job is to hold this in place, now.
LARRY JORGENSEN:
Okay.
RON HAZELTON:
Right along that line that we marked earlier.
LARRY JORGENSEN:
Okay.
RON HAZELTON:
And we've drilled a pilot hole, so it should come right together very nicely.
[MUSIC]
RON HAZELTON:
Okay, Larry, just set it right up on the cleat there. I'm going to slide it down to you. And say, oh, it's already in contact, right?
LARRY JORGENSEN:
Right.
RON HAZELTON:
Okay? Marianne, if you can just push on this end, just hold it against the wall.
MARIANNE JORGENSEN:
Okay.
RON HAZELTON:
You don't have to lift it --
MARIANNE JORGENSEN:
Okay.
RON HAZELTON:
-- because that cleat's doing all the work right now.
RON HAZELTON:
I drive the first of four screws through a predrilled clearance hole and into a stud. Then Marianne takes over and finishes the job.
[DRILL]
RON HAZELTON:
Good, good. Okay, now, we're going to use those same caps right here.
[MUSIC]
MARIANNE JORGENSEN:
Okay, oh, and just plug it in?
RON HAZELTON:
Our next step is to join the two base units together by temporarily clamping the middle drawer section between them. Marianne screws the sections together, using a drill fitted with a flexible shaft, designed just for tight spots like this one.
Alright, Larry, that's in position now. So, we want to secure this to the wall studs.
LARRY JORGENSEN:
Okay.
RON HAZELTON:
What I've done here is I've drilled a large hole right here, because the screw has actually got to go through this piece. There's your stud.
So, go ahead and put this on the end of your extended bit holder there.
LARRY JORGENSEN:
Alright.
RON HAZELTON:
Pass it through the large hole and get the screw into the shank hole behind there. Can you do it?
[DRILL SOUNDS]
RON HAZELTON:
With the bottom cabinets secured to the wall studs, we next tack wood strips across the tops. Adding this extra three quarters of an inch in height will raise the counter top just enough to ensure the front lip will clear the drawers.
[MUSIC]
RON HAZELTON:
You ready to put that counter top on?
MARIANNE JORGENSEN:
That's it. That's it. We want it on.
RON HAZELTON:
We're going to put it on with this. This is construction adhesive. And, Marianne, why don't you put this down? All you do is just kind of make an S pattern here, like this, just kind of a -- about like that.
MARIANNE JORGENSEN:
That's a lovely design.
RON HAZELTON:
Is it? You like that? Okay, Larry, why dohnt you grab that end?
LARRY JORGENSEN:
Alright.
RON HAZELTON:
As part of their planning session at the home improvement center, Marianne and Larry chose a high-pressure plastic laminate counter top. The holes near the rear edge will allow power cords to pass through. For a finished look, we dropped these decorative plastic grommets in place.
Here we go, shelves. Now, for you, Larry, big, manly shelves.
LARRY JORGENSEN:
Alright.
MARIANNE JORGENSEN:
Wait a minute. I want those.
RON HAZELTON:
You do?
MARIANNE JORGENSEN:
Yes.
RON HAZELTON:
I think these are much more fitting for you, delicate, feminine shelves.
MARIANNE JORGENSEN:
Thank you.
LARRY JORGENSEN:
There you are.
RON HAZELTON:
So, guys, why don't you go ahead and put those in there?
LARRY JORGENSEN:
Alright.
RON HAZELTON:
We've got the brackets in place.
[MUSIC]
RON HAZELTON:
There you go. This requires the most skill of anything we've done today. Left side, Larry, there you go.
LARRY JORGENSEN:
There we go.
RON HAZELTON:
There you go. Here's a big Papa Bear drawer there, a couple Mama Bear drawers.
LARRY JORGENSEN:
Alright.
[MUSIC]
RON HAZELTON:
It is coming together.
MARIANNE JORGENSEN:
Oh, beautiful.
LARRY JORGENSEN:
Looks great.
RON HAZELTON:
Huh? Put that one right up here, Bud.
LARRY JORGENSEN:
Alright.
RON HAZELTON:
Finally, we're down to our last step, installing the cabinet doors.
[MUSIC]
MARIANNE JORGENSEN:
Don't you have an electric screwdriver?
LARRY JORGENSEN:
I did. I did.
MARIANNE JORGENSEN:
Where is it.
LARRY JORGENSEN:
I'm going to get it for the other two doors. Why do it the hard way?
[MUSIC]
[SCREWDRIVER]
RON HAZELTON:
There you go, the final touch.
LARRY JORGENSEN:
Looks --
MARIANNE JORGENSEN:
It's beautiful.
LARRY JORGENSEN:
-- wonderful. I tell you what, it finishes the kitchen off just perfectly.
MARIANNE JORGENSEN:
It's gorgeous, absolutely gorgeous.
[BELL RINGS]
RON HAZELTON:
Here, I want you to sit down here.
MARIANNE JORGENSEN:
Oh, boy.
RON HAZELTON:
The seat of power.
MARIANNE JORGENSEN:
Oh, yes, yes, yes, definitely.
RON HAZELTON:
Yes. The throne from which the household is run.
LARRY JORGENSEN:
Yes.
MARIANNE JORGENSEN:
Hear ye, hear ye.
RON HAZELTON:
Isn't it nice to sort of have an office space right in your kitchen? This is a big kitchen. I know you're going to spend a lot of time here.
LARRY JORGENSEN:
Yes.
RON HAZELTON:
But you still have to run the household. And why not do it from here?
LARRY JORGENSEN:
Exactly.
RON HAZELTON:
Everything you need.
LARRY JORGENSEN:
It's perfect.
MARIANNE JORGENSEN:
I absolutely love it.
LARRY JORGENSEN:
It's absolutely perfect.
RON HAZELTON:
So, you're happy?
MARIANNE JORGENSEN:
Very nice.
RON HAZELTON:
Stay here for one second.
MARIANNE JORGENSEN:
Okay.
RON HAZELTON:
And we've gotten one thing out of the way today.
MARIANNE JORGENSEN:
Okay.
RON HAZELTON:
But I want to do one other thing. I thought we might go, kind of, you know, just file your paid bills and sort through your cancelled checks.
MARIANNE JORGENSEN:
Oh, no, no, not those again.
RON HAZELTON:
Come on.
[MUSIC]
RON HAZELTON:
Well, what started off today as a cluttered, catchall corner has now been converted into a very efficient kitchen office nook that blends seamlessly into the rest of the room.
And if you're like me, it's always nice balancing the checkbook or paying the bills, knowing comfort food is just a few feet away.