How to Use Rag-Roll Painting Techniques
Add Subtle Color and Visual Texture to Living Room Walls with Rag-Roll Painting Techniques in Neutral Tints and Satin Sheens
Transform your living room walls with a faux finish applied with a rag-roll painting technique and contrasting neutral color in satin sheen paint and glaze. An old cotton rag and this modern variation of an ancient painting process can add rich painting interest to any smooth wall in your home, creating a new décor that's appropriate for any era.
Prepare the Wall before Beginning the Rag-Roll Painting
Remove all layers of wallpaper and repair plaster or wallboard to ensure the walls are clean and smooth. Choose the coordinating wall and rag-roll painting colors. Apply two coats of satin sheen latex paint in the preferred base wall color.
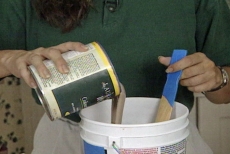
Mix Paint and Glaze for the Rag-Roll Painting Project
Mix equal parts of latex paint and water-based glaze in a container. These products have a satin sheen to match the gloss level of the painted walls and will produce a soft sheer look. The glaze also slows drying time.
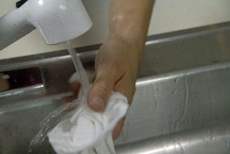
Prepare Tools for the Rag-Roll Painting Technique
Obtain cotton rags about a foot square and dampen them with water in preparation for the rag-roll painting project. Pour a small amount of the paint/glaze mixture into a clean paint tray.
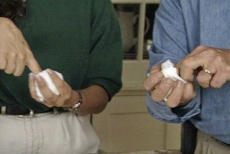
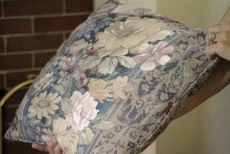
Shape the Rag into a Rosette for the Rag-Roll Painting Project
Lay the cloth out flat, pinch and lift it at the middle, and gather it into your hand. Poke your finger into the center to give the desired shape/texture of a rosette for the rag-roll painting project.
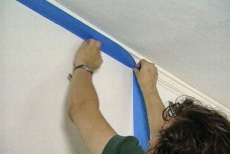
Empty and Prepare the Room for the Rag-Roll Painting Project
Remove all the furniture and other room contents to provide clear access to the walls. Use painter's tape or low-tack masking tape to cover and protect the ceiling and trim immediately beside the wall while you paint.
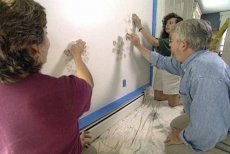
Daub the Rosette in Paint for the Rag-Roll painting Technique
Daub the rosette lightly in the paint and apply several splotches on the wall. Continue daubing in an ever-expanding pattern to leave random white space and thinner areas of the paint behind for in the rag-roll painting technique.
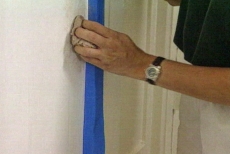
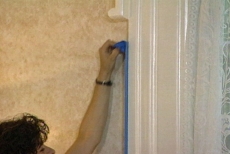
Continue the Rag-Roll Painting Technique in Corners
Press the rag against the wall corners and tape-masked trim to carry the rag-roll painting technique and design into nooks and crevices on the sides and ceiling. Avoid touching wood trim and other areas that are not masked.
Restoring the Room after the Rag-Roll Painting Project
Remove masking tape from the walls and trim when the rag-roll painting project is complete and the paint has dried. Replace the furniture and accessories to get the full effect of the rag-roll painting technique.
Blog Articles

Maximize Your Yield with DIY Netting for Strawberry Beds
Keep your strawberries safe from pests with our DIY strawberry cage netting solution. Learn how to create sturdy frames and find the best netting for your strawberry plants.

Change It Up: Swapping Out Your Light Switch Plates
Tired of boring light switch covers? Upgrade your home decor with this simple guide on replacing light switch plates and make a statement in every room.

Revamp Your Outdoor Space: How To Stencil A Concrete Patio
Learn how to create a stunning patterned concrete patio with our easy-to-follow instructions for stenciling. Upgrade your outdoor space in no time.


