RON HAZELTON: Well, we’re just across the North Carolina border headed for Rock Hill, South Carolina. A lot of Civil War, even Revolutionary War history in these parts. Teresa Curtis requested a HouseCall for a window that seems to have lost it’s view.
RON HAZELTON: Hi Teresa!
TERESA: Good morning Ron.
RON HAZELTON: How ya doin?
TERESA: Fine, how are you?
RON HAZELTON: Good, very good. Kind of cool here for South Carolina?
TERESA: Yes, it is.
RON HAZELTON: Now you have got a problem with your window?
TERESA: Yes I do.
TERESA: You wanna show me what it is?
TERESA: Yeah, sure come on around.
RON HAZELTON: Which room is this?
TERESA: It’s my son’s room.
RON HAZELTON: The problem is clearly, or not so clearly, condensation between the panes of glass.
RON HAZELTON: Yeah, this is typical on these double-glazed windows, and where you have two pieces of glass and an air space in between. And the seals around the edge fail. Ya know what? I think that we should just replace the whole window. So why don’t we make some measurements, pick up a new one and then come back and put it in.
TERESA: OK sounds good.
RON HAZELTON: To get the exact measurement of the window’s rough opening, I’ll need to remove the window trim. A wide putty knife between the wall and the pry bar keeps the wall from being damaged.
RON HAZELTON: O.K. we’ve got all of our window trim off. Now, this is what I am looking for, this edge and this edge, this is our rough frame opening. And that’s what we want to measure to make sure our new window will fit inside here.
TERESA: 34½ inches
RON HAZELTON: 34 and a half. OK, now, let’s measure from the top up here.
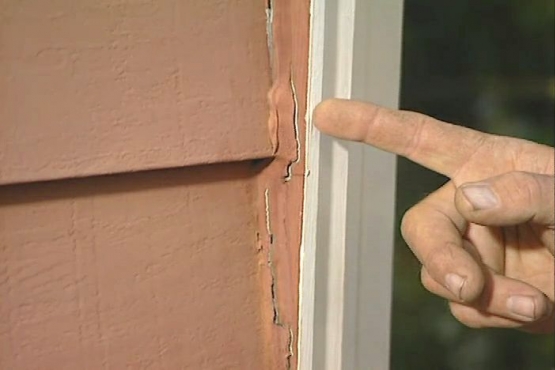
RON HAZELTON: Back outside, we’ll need to dismantle the window’s exterior trim. After removing the aluminum molding, we cut away all of the old caulking. Then it’s time to loosen and then pry out the old frame. The wood won’t come free without some splintering. But, we’re going to be replacing it later on.
RON HAZELTON: Now often times you remove an old window like this by taking it out from the outside, but this one wants to go inside because its separated right here from the brick mold. Teresa, you got a hold of it?
TERESA: Yes I do.
RON HAZELTON: OK, It’s gonna wanna come into you now…there you go.
RON HAZELTON: We prep the old window opening by clearing out all of the old insulation and dried out caulk.
RON HAZELTON: So go ahead and position this, bring the saw blade down
RON HAZELTON: Because the old window’s opening is a bit wider than what we’ll need for the new window, Teresa cuts some 1 by 4 pine that will act as a spacer to make up the difference.
TERESA: Here you go Ron.
RON HAZELTON: O.K. good job. Let’s just drill a couple pilot holes. Just tap that in Teresa if you would.
RON HAZELTON: Alright, here’s our new window. Set it right on the edge, bring it back a little bit, close to the edge. Perfect. Now on the sides, there’s this flange right here, which we want to bend down so it’s perpendicular to the side of the window. Now that the metal flange that we just bent down is going to get nailed to that 2 X 4 framing right here. It’s really important that we get a good seal, wanna keep out the moisture and drafts. So Teresa, if you could just hand me the caulking gun. Gonna put a heavy bead of caulking right on the inside of that flange starting right here and going all the way down to the other end.
RON HAZELTON: After Teresa finished caulking her side, all that’s left to do is to slip the window into the frame.
RON HAZELTON: O.K. Teresa we’re gonna set it right in now. Lift the bottom a little bit here…
RON HAZELTON: Now that’s what I call a perfect fit. Now we head back inside to make sure the window is seated properly. We level the window by inserting wooden shims between the edge and the frame opening. A little nudge, and we’re there. Back outside, we’re ready to secure the window, first by nailing that flange into the frame. In a brick veneer house like this one, there will be a space between the brick and the wood framing. To fill that gap, I’ll first caulk around the window flange, and then install a piece of 2 X 4, which I’ve cut to fit. (POUNDING NOISE) Then we fill the remaining gap with aerosol urethane foam insulation. Now it’s back to the power miter box to cut the exterior trim pieces. Teresa cuts a 45 degree angle while I do the installation. Once again, plenty of caulk for a good seal, and up it goes. Teresa and I then take turns on the nail gun. A final bead of caulk will seal any spaces between the wood and brick. .
RON HAZELTON: Well we’re back inside and these are the shims or spacers that go between the window and the framing.
RON HAZELTON: I secure these shims with a nail gun. Then Teresa uses a utility knife to score, then break away the excess.
RON HAZELTON: For the shims that are too thick for the knife, I use one of my smaller Japanese hand saws.
TERESA: Neat little tool there
RON HAZELTON: Teresa replaces the insulation to keep those drafts out. (SAWING SOUND) We’ll surround the window with casing which will conceal the space between the window and the wall.
RON HAZELTON: Well we are going to recycle one thing – this is the old windowsill, and we’re gonna slip it right here. I just had to trim a little bit off.
RON HAZELTON: Then we add decorative molding on top of the casing.
RON HAZELTON: O.K. Teresa, on the line and flush at the top. So how was it for you, working with the tools?
TERESA: Oh, it was great.
RON HAZELTON: At the end of the day the final step is to rehang the curtains.
RON HAZELTON: Take a look the haze is all gone, come tomorrow morning you can see forever. Good job.
TERESA: Thank you, you too.