RON HAZELTON:
One day out of every month, I get a piece of mail that I really don't look forward to receiving. Ouch. [LAUGHS] Well, one thing that's predictable about my utility costs and that is that they keep going up every month.
And I can't help but think that part of those heating and cooling dollars are going right out my windows. Thirty five years ago, when this house was built, these windows were standard fare. In those days, energy was cheap and the fact that a single pane of glass was a poor insulator was well, not that big a deal.
Then, heating and cooling costs began to climb. The storm windows that were put on about 20 years ago were supposed to make the house more energy efficient, but honestly, I'm not sure how effective they really are. But more importantly, I just don't like the way they look. I also don't like what it takes to clean them.
[MUSIC] [SOUND CUT]
So for all of those reasons, I'm gonna replace my old windows and I'm gonna replace them with this. A state of the art, double hung window from Pella. Now it's got the look that I want, it's very energy efficient and you won't believe how easy this is to clean. The installation, ah, surprisingly simple.
Step one is to remove the storm windows and screens from the inside, then start on the frame outside. Now this storm window frame is held in place with several screws around the outside. I want to take it off and normally what I do, is just use a screwdriver and back those screws out.
But if you take a look here, you'll see that I've got a problem. These screw heads are covered with several coats of paint. There's no way I'm gonna get a screwdriver to engage that. So I'm gonna use this little tool right here.
It's called a grab-it. On one end is a reamer, right here. That will bore kind of a small hole in the head of the screw and on this end is the retractor. Let me load this up on the drill and show you how it works.
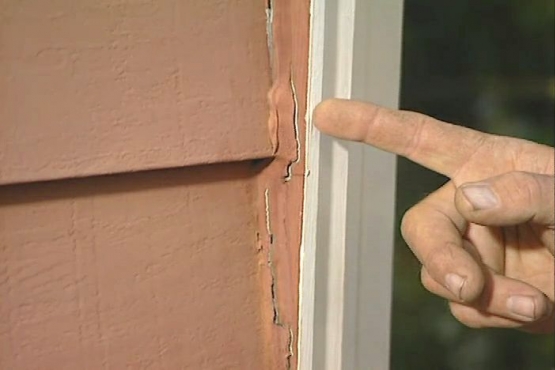
First, I use the reamer to create a cone shaped depression. Then turn the bit end for end and use the retractor to back the screw out. Back inside, I use a utility knife to cut through the paint and caulk between this narrow strip of molding called a sash stop and the window casing.
Then I insert a putty knife and work the sash strips loose enough to allow room for a pry bar. I'm going very carefully here because I want to reuse these when I install the new window. With the strips gone, I remove the upper sash, lower sash and window track, all at the same time.
This piece of wood called a parting strip, comes out easily by gripping it with a pair of multi groove pliers. Now with the exception of the storm window, I've been able to do all of my work from the inside. There's been very little demolition required. Just the removal of these three strips of molding.
The outside trim and the casing right here, still intact. With the window opening clean, it's time for a test fit. Everything looks just fine.
First, I check the sill to make sure it's level. Then apply silicone sealant to the bottom corners. From my van, I get a couple of rolls of aluminum weatherproofing tape. I peel off the protective backing, then starting on the sides, press the tape onto the surface and smooth it out with my hands.
The tape has a butyl adhesive backing that will prevent any water from penetrating the sill. Next, I apply silicone sealant to the outside stop against which the new windowframe will sit and to the edge of the window ledge or stoop as it's called. Now I can set the window in place, putting the bottom in first, then tipping the frame upright and pushing it against the stops.
I check to make sure the frame is square, then begin installing shims. First at the top, then the bottom and finally, in the middle. For the window to operate smoothly, it's important that the gap between the sash and frame be uniform from top to bottom.
With the frame square and locked in position, I run screws into predrilled holes in the sides, through the shims and into the jamb. Then using a utility knife, I score the shims and break off the excess. There's a small gap or space between the edge of the frame and the window opening that I fill with low expansion foam made just for this purpose.
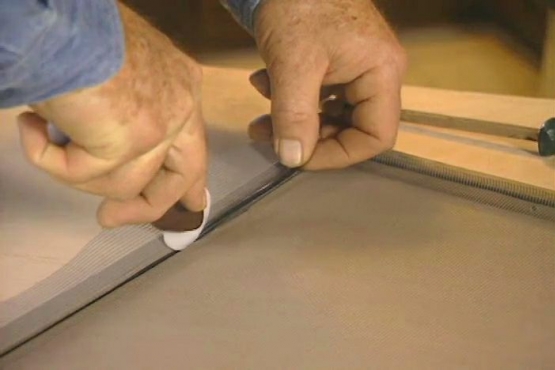
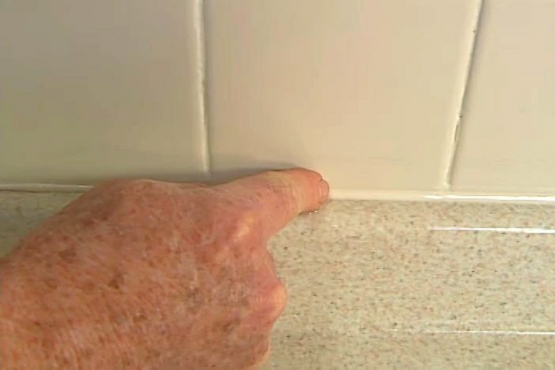
about the last thing I have left to do here on the inside is replace the sash stops I took off earlier. Outside, I begin making a watertight seal between the replacement window frame and the original opening by pressing foam backer rod into the gap between the two.
Then I fill the remaining space with silicone caulk. Spray the surface with a lubricant and release liquid called Caulk Mate and tool the joint smooth with my finger. This is a standard window screen but I'm going to be putting in high transparency window screens, Pella calls them Vivid View.
Fifty percent more light, three times as much air flow and great curb appeal. As a matter of fact, it's like having no screen at all. Even though these windows are state of the art, they still look very conventional. The millwork detailing, classical hardware and authentic proportions make them seem as if they've always been part of the house. In fact, they look even better than the original windows because I no longer have to use the storm windows. And the reason I don't have to use the storm windows is because of the way the new windows are constructed.
Actually, they're made up of two pieces of glass with a space in between filled with argon gas. Now here's how that works. A single pane of glass offers little insulation value. In the winter, warm air passes right through to the outside, wasting energy.
In the summer, heat penetrates the windows, driving up air conditioning costs. On the other hand, double insulated glass with a gas bill barrier reflects warm air back into the house in the winter and keeps heat outside during the summer, lowering both heating and air conditioning costs.
Now these windows also have a coating on the glass. It's called a low E coating that filters out damaging ultraviolet rays and helps prevent fading on upholstery, drapes, and carpeting. But you know, what I think I like best about these windows is the way they've been designed for easy cleaning.
You lift up, push the tabs on the inside, tilt this down, clean the outside of the window, the upper sash works the same way, when you finish, put it back and that's it. Good looking, energy efficient and easy to clean. I mean what more could you ask for in a window?