Ron Hazelton:
Today I am off to the lone star state, well San Antonio to be exact to visit Paul and Kimberly Greeting, they have some kitchen updating plans in mind and they have asked for some help.
RON HAZELTON:
Tell me what you guys had in mind here?
KIMBERLY:
Well first things, we had bought a new stove.
RON HAZELTON:
You've already got that. What color is that?
KIMBERLY:
It's white.
RON HAZELTON:
Okay, good. So we're going to replace this stove with a new one. All right.
PAUL:
Yeah. We would also like to replace this range hood here.
RON HAZELTON:
Okay, you got that.
PAUL:
Now we have a white range hood to go here.
RON HAZELTON:
So these two match. Now I know when you contacted me, you said you wanted to do something in the wall back here. What were you thinking of?
KIMBERLY:
We were thinking of tile.
PAUL:
Tile.
RON HAZELTON:
Uh huh, right. Just plain white?
PAUL:
No.
RON HAZELTON:
something a little more interesting --
KIMBERLY:
No.
PAUL:
And maybe a pattern.
[BOTH SPEAK AT ONCE]
RON HAZELTON:
Yeah, something to create kind of a focal point here?
KIMBERLY:
Yeah, sure.
RON HAZELTON:
How would you describe your taste, by the way? Are you kind of modern, traditional? What would you say?
KIMBERLY:
Eclectic.
RON HAZELTON:
Eclectic. Well let's -- we'll do an eclectic kitchen.
[LAUGHTER]
Hey, that's perfect for me. Listen, before we do anything, we're going to have to take the old stove out of here. So Paul, if you don't mind, just grab the corner right there.
PAUL:
Oh, okay.
RON HAZELTON:
And let's just --
While Paul and I remove the old stove, Kimberly turns off the power to the range hood at the main breaker. So Kimberly, the next thing I'd like you to do is to take the wires off. And if you'll take this screw out right here --
KIMBERLY:
Okay.
RON HAZELTON:
-- go ahead. Now a little cover plate will come off and then we'll disconnect the wires.
Kimberly first removes the plastic wire nuts and then disconnects the wires that power the exhaust fan and range light.
And as soon as Kimberly's finished that, Paul, take this cordless driver right here. And there are four screws holding this to bottom of this cabinet. Go ahead and pull those out. I'll get out of your way.
PAUL:
Okay.
RON HAZELTON:
Okay, that's the last one. I'll take the drill from you there. Okay, guys, it should come right down now. Just pull it down and pull it away from the wall so the wires will pull out there. There you go. Get in down this way. we carried[?] it right to the garage.
PAUL:
Right.
RON HAZELTON:
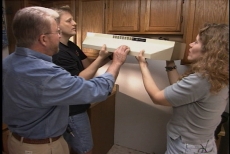
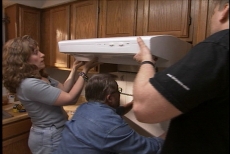
Well, this is our new exhaust hood. Guys, just slip it right in there, the same way the other one came out.
Paul and Kimberly hold the hood in place and I draw a line across the bottom to mark the upper edges of the tile we're about to install. Since we're working on a vertical surface, I'm going to install a wood cleat below the first row of tiles.
This ledge will keep the tiles from sliding downward while the mortar sets up. Next, we apply masking tape to keep the mortar from getting onto the surrounding wall. After we mix up the thin set mortar, Kimberly applies it with a wide putty knife. I follow with a notched trowel which creates uniform ridges of mortar, all of which are the same height.
This guarantees even mortar distribution on the backside of each tile.
Okay, guys, are you ready to put some tile up?
KIMBERLY:
Yeah.
PAUL:
Sure.
RON HAZELTON:
I'm going to give you each a stack right here. Okay. Now here's, here's all you have to do. We're going to start down here at the bottom and if you're trying this at home, this is very important, you want to push the tile into the -- into the thin set, and kind of give it a little wiggle like this back and forth, okay. And why don't you go ahead, Paul and drop one of yours on.
PAUL:
Okay.
RON HAZELTON:
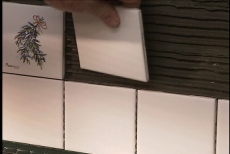
As Paul and Kimberly lay the first row, they insert temporary vinyl spacers between the tiles. These spacers create an even gap or grout joint. We'll remove the spacers once the mortar sets. Not to dress this backsplash up a bit, we're also installing rope trim and some decorative tiles to satisfy Kimberly's eclectic tastes.
All of this herb motif here, rosemary and sage and parsley.
We alternate the decorative tiles with plain ones.
KIMBERLY:
Yeah, Ron, that looks great.
RON HAZELTON:
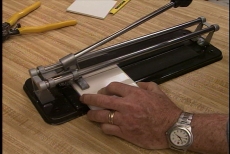
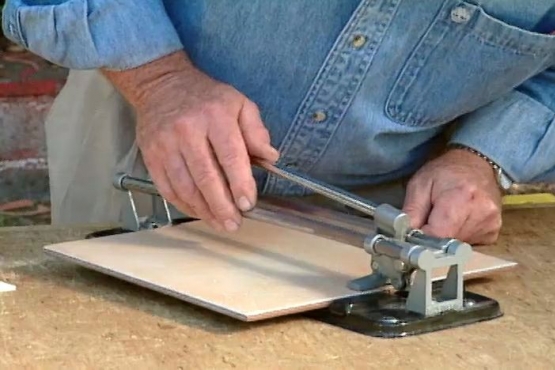
Now this top row of tile we're going to have to cut a bit so it will fit up underneath the exhaust fan. And to do that, we're going to use this tool. This is called a scoring cutter. Very simple to use. We just align this small wheel right here with the mark that we've made on the tile.
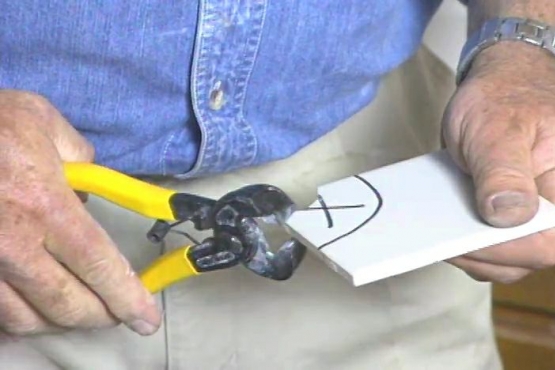
Then bring this all the way back to this side, push down the handle, score it forward, that's scoring the surface of the tile. Then hold the handle like this, and there we have our cut. Now occasionally there may be a little bit of a ragged edge here.
This, we can clean off with some tile nippers, just like this.
[MUSIC]
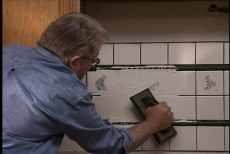
Well I think the tile looks great. You know, we're down now pretty close to the last tiling step and that is to, to grout those joints in between.
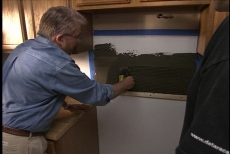
After the mortar has set up, we mix some grout. I use a foam rubber float to force the grout into the gaps between the tiles. Then holding the float at about a 45 degree angle, I rake it diagonally to squeegee off the excess.
When you see it kind of bulge out like that, that's good. That means that it's gone all the way to the bottom of the joint and it's kind of squishing out a little bit. It can be a little messy here. We're going to clean this off a little bit later. Just push it in just like that.
KIMBERLY:
The pretty tile.
RON HAZELTON:
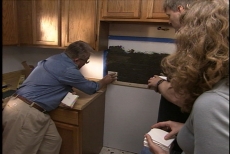
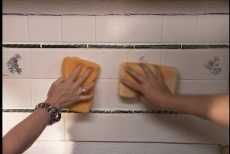
Now it's going to -- it will stay pretty. You can see it's beginning to dry right here on the face. Now it's time to wash off the rest of this excess,
We use damp sponges to clean the haze off the tiles, taking care not to pull the grout of to the joints. Just wash it off the surface of the tile, leave it in the joint.
Once the grout is dry, we're ready to install the new range hood.
Okay, let me get the wires fed through the back here. Okay, hold it right there.
We've come to the final step of the process: putting the new range into place.
Okay, here we go, all the way up. Right, see how this looks. And there you go.
PAUL:
Wow.
RON HAZELTON:
I've got to say, this is a great start on your new kitchen, your new look hun?
KIMBERLY:
It is.
RON HAZELTON:
And I think that that's what you wanted too. It gives this wall a focal point right here.
KIMBERLY:
Yes, it does.
RON HAZELTON:
Anyway, thanks for having me over. I had a great time.
KIMBERLY:
Thank you, we did too.
RON HAZELTON:
You were wonderful.
Well, I'm pretty sure this backsplash made a splash with Paul and Kimberly. I always say, nothing fuels the flames of love like a do it yourself project.