How to Install an Attic Ladder or Stairway
Open That Hidden Storage Space above Your Garage Ceiling and Install a Pre-assembled Attic Stairway for Easy Access
Install a disappearing pre-assembled attic staircase to access above-ceiling storage in your garage. It doesn't require magic--just a little DIY know-how! Perform much of the work with hand tools--even cutting the opening in the ceiling. Add supports, drop the stairway into place, secure it and adjust the legs. Presto-chango and you're pretty much finished!
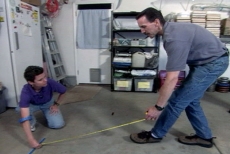
Position the Opening in the Ceiling to Allow Stairway Operation
Determine the optimum ceiling location for the pre-assembled stairway to unfold in a convenient spot while clearing obstacles. Use a tape measure and masking tape to mark results on the garage floor.
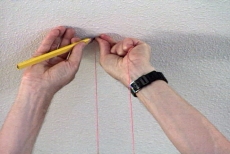
Transfer Coordinates for the Location to the Ceiling
Use a plumb bob to transfer the coordinates from the garage floor to the ceiling, marking a four-cornered rectangle for the pre-assembled stairway. Insert a wooden dowel at each corner through the attic floor to mark the position above.
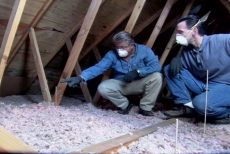
Adjust Location to Avoid Electric Cables and Obstacles
Clear insulation from the attic side to determine if the opening marked by dowels conflicts with electric cables or other obstacles. Consider pre-assembled stairway convenience for people carrying boxes or other unwieldy items. Relocate the hole if necessary.
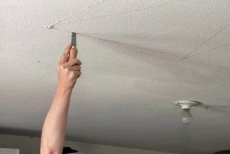
Cut the Ceiling Opening with a Wallboard Saw
Use a hand saw such as a wallboard saw to open the ceiling along the marked cut-lines. For this pre-assembled stairway, the opening should fit exactly between ceiling joists that will support the unit.

Attach a Header at Each End of the Opening
Nail a two-by-four header between the joists at each end of the opening. Nail through the joists into the ends of the headers. Use a carpenter's square to ensure the opening is square and will fit the pre-assembled stairway.
Attach Temporary Ledgers to the Headers Just Installed
Clamp temporary ledgers into position on the ceiling side of the pre-assembled stairway opening. Attach the ledgers by driving screws through the ledger and ceiling and into the headers installed earlier.
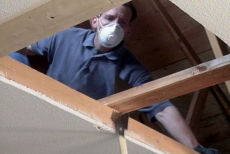
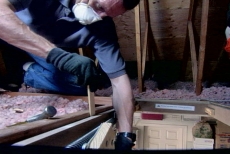
Cut away the Wooden Brace That Spans the Opening
Use a Japanese handsaw to cut away the wooden brace that spans the opening for the pre-assembled stairway. The headers installed earlier will provide support in its place. Your project may not require removal of a brace.
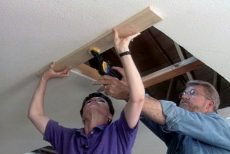
Set the Pre-assembled Stairway into Position from the Attic
Position the pre-assembled stairway in the hole, working from the attic side of the ceiling. The temporary ledgers installed earlier will support the heavy unit while to find the optimum position.
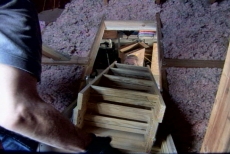
Shim the Pre-assembled Stairway and Secure It with Nails
Insert wooden shims between the pre-assembled stairway frame and the joists to hold it in position. Secure the unit by driving nails through the stairway unit shims into the joists. Trim off the excess shim length.
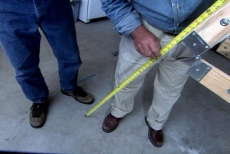
Trim Pre-assembled Stairway Rails to the Correct Length
Extend all but the last ladder section on the pre-assembled stairway and measure the distance to the garage floor. Trim the last section to length, cutting the rail ends at an angle to rest squarely on the floor. Add molding.
Related Tips


Blog Articles

Maximize Your Yield with DIY Netting for Strawberry Beds
Keep your strawberries safe from pests with our DIY strawberry cage netting solution. Learn how to create sturdy frames and find the best netting for your strawberry plants.

Change It Up: Swapping Out Your Light Switch Plates
Tired of boring light switch covers? Upgrade your home decor with this simple guide on replacing light switch plates and make a statement in every room.

Revamp Your Outdoor Space: How To Stencil A Concrete Patio
Learn how to create a stunning patterned concrete patio with our easy-to-follow instructions for stenciling. Upgrade your outdoor space in no time.


