How to Install a Wood Stair Railing from a Kit
Improve the Appearance and Safety of your Stair Railing
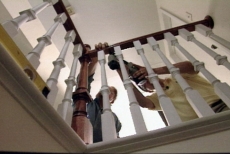
Installing a new wood stair railing kit can be an important step when preparing a home for the arrival of a new baby. If the exsiting railing system has too much space between the balusters, children can slide or climb through them and cause injury to themselves. A new wood stair railing kit allows you to close those gaps and rest easy, knowing that you can install a gate at the entrance to the stairwell and that the kids will be perfectly safe playing around the balusters and handrail.
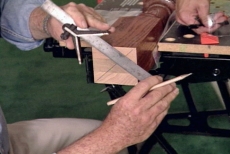
Prepare a Stable Workspace
After you have removed the old railing and completed any necessary painting and staining, you will need to have a stable surface on which to work. In this case, Ron is using a portable workbench that doubles as a vice. Make sure you use something, in this case plastic bags, to protect your newly finished newel post. Use a center finder attachment for your square to mark the dead center point on the bottom of the newel post. Next, drill a pilot hole through the dead center mark. This will be the hole that receives the screw that holds the mounting bracket.
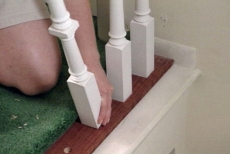
Determining the Placement of the Newel Post and Rosette
Begin by making sure that the post is square. Once you are confident that it is, drill pilot holes through the bracket to mark the exact location of where the post is to be installed. Ron is using a bit with a flexible shaft to drill these holes and to drive the screws. This prevents the chuck of the drill from damaging the finish on the newel post. If you don't have a flexible shaft, then mark the location of the pilot holes through the bracket with a pencil and then drill the holes. Use a level to transfer the center point of the handrail terminus on the newel post, to the opposite wall. The rosette will be centered here, and the handrail will terminate at the rosette.
Install the Rosette
Use a toggle bolt to install the rosette. After you've determined the center point in step 7, push the bolt from the toggle bolt through the rosette and give it a tap to mark the spot in the wall. Remove the rosette and bore a hole big enough to except the toggle bolt and install it. Take care to tighten the toggle bolt slowly so that you don't damage the wall or the rosette.
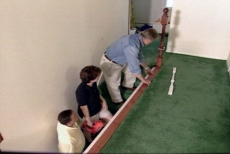
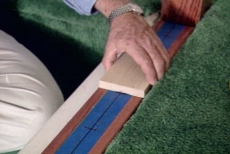
Cut the Railings to Length and Install the Toe Rail
Measure the distance between the newel posts and the rosette. Using a miter saw, cut the handrail and the toe rail to the correct length for each span. Set the toe rail into place and install it using finish nails. A nail gun is ideal for this task.
Determine the Baluster Locations
Since pencil can be difficult to see, apply a piece of painters tape over the toe rail and use a magic marker to lay out the baluster locations. Once you've determined how far apart they should be, cut a length of wood to use as a gauge for spacing. Keep in mind that the maximum width between the widest points should be no more than 4 inches.
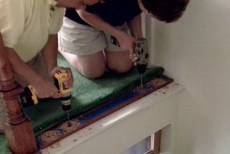
Prepare the Holes for the Baluster Pins
Drill Holes in the toe rail to receive the pins on the bottom of the balusters. Use a spade or paddle bit that corresponds to the size of the pin on the bottom of your baluster. Go back and remove the tape after the holes have been drilled. Next, mark the location of the handrail terminus onto the newel post. Using a jig or a portable drill press attachment, make sure that you drill a perfectly straight hole into the newel post. This hole will receive the hanger bolt.
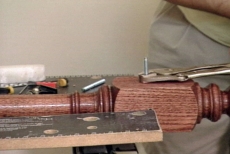
Install the hanger bolts
Use Vise Grips to install the hanger bolt into the newel post, taking care not to damage the surface of the post. Drill another perfectly straight hole through the end of the handrail, and then a sub sequent 1" hole though the bottom. This last hole is where the nuts and washer will engage the hanger bolt.
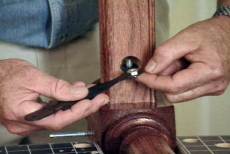
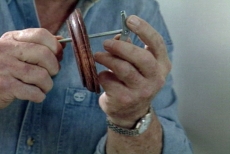
Connect the Handrail and the Newel Post
Slide the rail onto the hanger bolt and then install the convex washer and nut that came with your kit. You will find that the best way to tighten the nut is to use the special wrench that came with your wood stair railing kit.
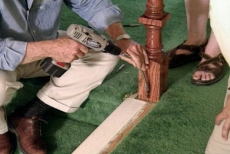
Set the Newel and Handrail Assembly
Now you are ready to set the assembly into place. Set the base of the newel over the pre-drilled holes. Carefully slide the handrail over the hanger bolt that is installed in the rosette, and then install the washer and nut to secure the handrail to the wall. You may find it helpful to tip a few balusters into place to help you stabilize the assembly while you tighten this nut. Once you've got the rosette secured, you can tip the remaining balusters into their homes.
Fasten the Newel Post and Balusters
Drive the screws into the pre-drilled holes and through the bracket on the bottom of the newel post, this time installing the newel for good. After you've got the baluster set up straight, begin installing small spacers, called filets, in between each one. These are installed in the groove underneath the top rail. Use a finish nailer to set them in place. These filets, along with a toe nailed finish nail into the baluster itself, will complete the process of securing your new wood stair rail kit.
Related Tips


Blog Articles

Maximize Your Yield with DIY Netting for Strawberry Beds
Keep your strawberries safe from pests with our DIY strawberry cage netting solution. Learn how to create sturdy frames and find the best netting for your strawberry plants.

Change It Up: Swapping Out Your Light Switch Plates
Tired of boring light switch covers? Upgrade your home decor with this simple guide on replacing light switch plates and make a statement in every room.

Revamp Your Outdoor Space: How To Stencil A Concrete Patio
Learn how to create a stunning patterned concrete patio with our easy-to-follow instructions for stenciling. Upgrade your outdoor space in no time.


