How To Install A Sliding Patio Door
Upgrade Your Old Patio Door with Great New Privacy Features
Sliding patio doors are a common, but a number of new features and benefits are available. Privacy features including upgraded lock hardware, tinted glass, and between the glass shades and blinds are just the beginning. No matter what features you are looking for for your home, Ron shows the basic steps required to remove your old door from the opening, and then securely install the new unit so that it is weather tight, looks great, and lasts for years.

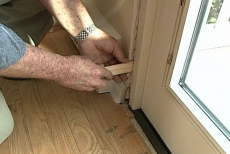
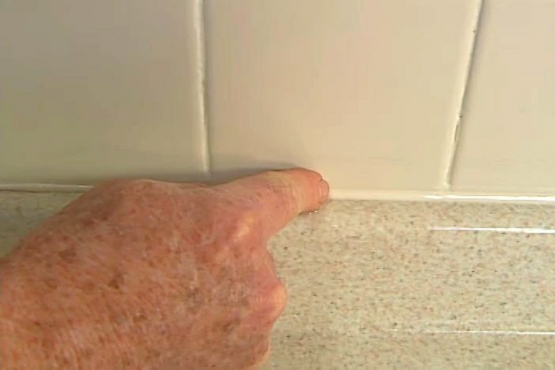
Remove the Existing Interior Trim
Before the existing patio door unit can be removed, the trim that surrounds it must be removed. Use a utility knife to cut through the caulk and paint. If you just pull the trim away without cutting it first, it may cause the wall board to tear. The trim can be worked loose with a stiff putty knife, and then pull away with a pry bar.

Begin to disassemble the door
The door unit is very heavy, so you will want to remove as much of it as is possible before hand. Take off any stops or pieces of trim that may hold the sliding panel into place so that it can be removed. Once this is done, you can go outside and begin to remove the exterior trim, just as you did inside. Take care to cut through the paint and caulk here just like you did on the interior pieces to prevent damage to the rest of the house.

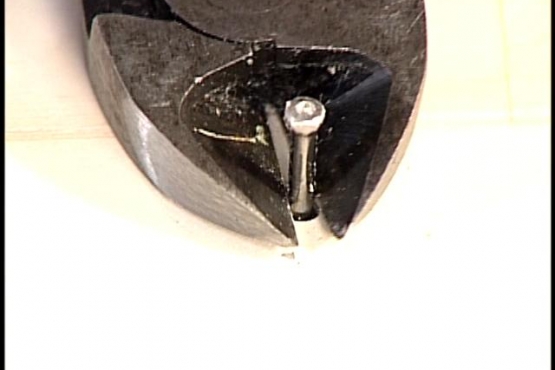
Potential Exterior Difficulties
When removing the exterior trim, it can often be difficult to get a pry bar behind the wood in order to pull it away from the house. If this is the case, use a magnet to locate the nail heads that are hiding under the filler and paint, and then use a tool called a tiger's paw to remove them.
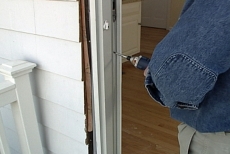
Remove the Remaining Fasteners in the Old Patio Door
Remove the screws and nails that hold the old door unit in place. These are often driven through the jamb, and can be tricky to find. You may have to look under door track or behind strike plates. Once you are sure all of the screws and nails have been removed, use a hammer to tap the old unit out of the opening. Be sure to push in towards the outside of the house.
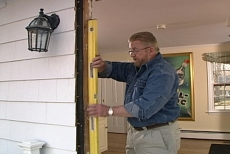
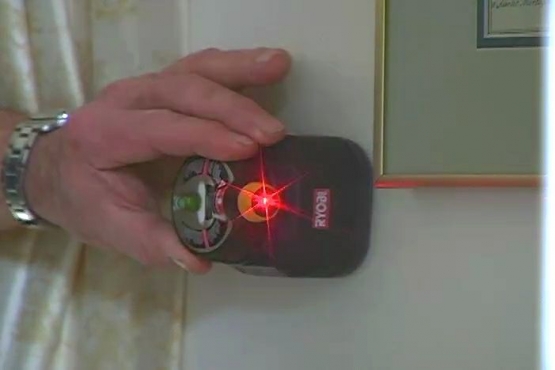
Prepare the Rough Opening to Receive the New Patio Door
Once the old door has been removed, you will need to make sure that the opening is properly prepared to receive the new one. Use a level to check that the sill is level, and that the sides of the opening are plumb. If you find that the opening is to big, use strips of plywood to reduce the opening's size.
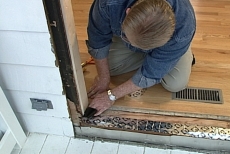
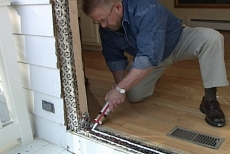
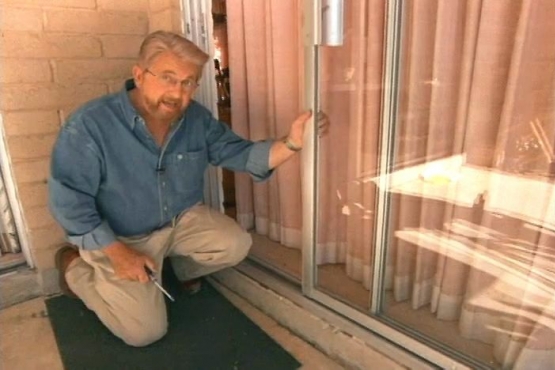
Ensure that the Opening is Water Tight
Before you install the new sliding patio door, you will need to make sure that the rough opening is protected from moisture. Use foil backed tape along the sill, running the tape about 6 inches up the side jamb as well. Carefully cut the corners and wrap the tape back, as if you were wrapping a present. Use a second strip of tape on the threshold, and then seal the entire opening, sides and header included. Once the foil tape has been sealed down, reapply the sill molding that you removed to get the old unit out.
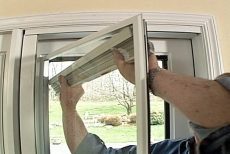
Set the New Door into Place
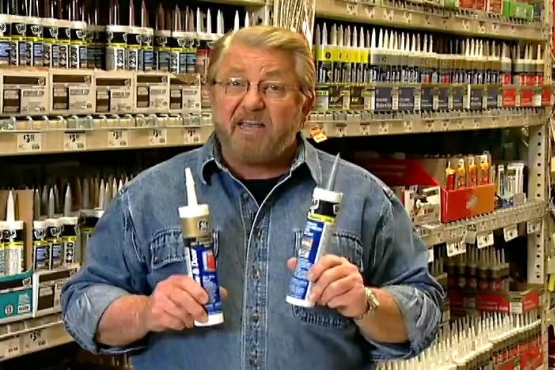
Before you install the new patio door unit, run three beads of silicone sealant along the sill. Set the door unit into place, bottom first, so that you do not smear the caulk. Once the bottom is firmly seated, tip the unit up into position. Most units come with an aluminum nailing flange that will need to be folded into an open position.
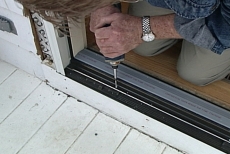
Secure the New Door
Use roofing nails to nail through the aluminum fin and into the frame studs that make up the rough opening. Just drive one or two nails partially in to begin with, as you may need to make adjustments. Once these have been driven in, check the unit for plumb and level. After you are confident with those measurements, install shims to hold the proper spacing between the studs and the door frame and begin to screw the door into place. Drive screws through the side jambs, beginning on the latch side. Once that is secure, move back outside and finish nailing roofing nails through all of the holes in the nailing flange.
Finish Screwing the Door into the Opening
Now that the door has been secured through the latch side jamb and the nailing flange, you can finish the rest of the installation. Put a dab of silicone in any hole that goes through the sill before you drive a screw in it. This will help keep the unit water tight. Lastly, screw in the top, and then set the active door panel into the frame.
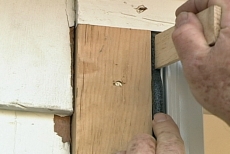
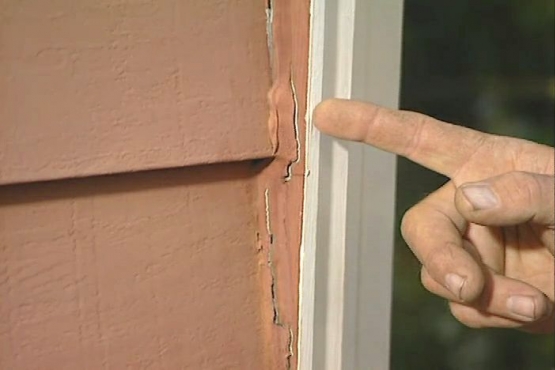
Install the Exterior Trim
When you attach the exterior trim, you will need to leave a small gap to allow the wood to shrink and expand seasonally. In order to seal the small gap, use foam backer rod, as this will allow the wood to shrink and expand naturally. Stuff the backer rod into the gap, and then cover it with a bead of silicone sealant.
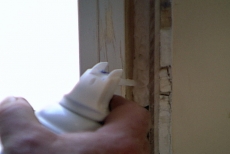
Install the Interior Trim
Begin by trimming any excess off of the shims that were applied in Step 8. Fill the gaps around the outside of the frame with a low expansion spray insulating foam. Be sure to use low expansion foam, as the high expansion version can cause the door jambs to bow and make the doors difficult to open and latch correctly. Once the gaps are filled, install the interior door casings.
Install the Finishing Touches
Now that the door is structurally complete, you can install the locking mechanism per the manufacturer’s instructions, as well as any shades, blinds or grills that may have come with the door.
Related Tips
Blog Articles

Maximize Your Yield with DIY Netting for Strawberry Beds
Keep your strawberries safe from pests with our DIY strawberry cage netting solution. Learn how to create sturdy frames and find the best netting for your strawberry plants.

Change It Up: Swapping Out Your Light Switch Plates
Tired of boring light switch covers? Upgrade your home decor with this simple guide on replacing light switch plates and make a statement in every room.

Revamp Your Outdoor Space: How To Stencil A Concrete Patio
Learn how to create a stunning patterned concrete patio with our easy-to-follow instructions for stenciling. Upgrade your outdoor space in no time.


