How to Put in a Garden or Greenhouse Window
Improve Your View by Installing a Greenhouse or Garden Window in Your Kitchen
Put up a quality box-shaped garden window, also known as a greenhouse window, to bring in more natural light, make the room feel larger, and bring part of your garden within arm's reach in the kitchen. This model boasts dual-paned glass to maintain your heating and cooling comfort and dollars and makes the ideal setting for indoor herbs and plants.
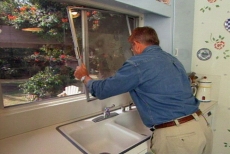
Remove the Sliding Glass Panel in the Old Window
Remove the sliding glass panel in the old window, grasping it with both hands, lifting it up and pulling the bottom outward off the old window track. Remove the screens the same way.
Lift out the Center Brace and Fixed Window Panel
Remove the center brace and remaining fixed panel as part of the greenhouse window project. Use a hammer and small pry bar to loosen the center brace. Lift the fixed panel off its track as you did for the sliding portion.

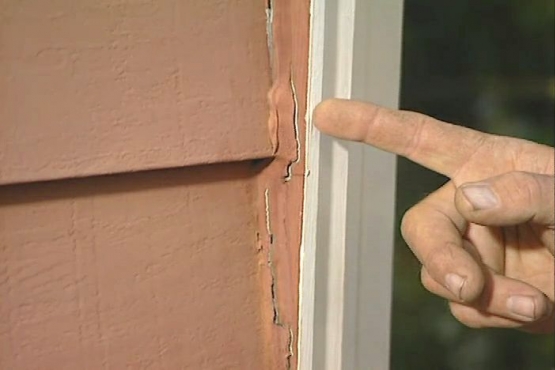
Remove the Exterior Trim around the Opening for the Greenhouse Window
Loosen the exterior trim around the garden window opening, first scoring the heavy paint sealing the trim before levering the trim with the pry bar. The trim on the top, bottom, and both sides must be removed.

Score the Caulking and Remove the Old Aluminum Window Frame
Pre-cut the caulk that seals the aluminum window frame. Tap with a wood block and hammer from the inside to break the seal and loosen the window frame for removal. It will not be used in the greenhouse window installation.

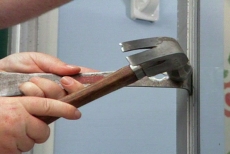
Use a Nail Remover to Free the Wooden Window Frames
Drive the small prongs of a nail remover under the nails holding the old wooden window frames. Lever the heads until the nails can be extracted with the larger prongs. Remove the frames which are not required for the greenhouse.

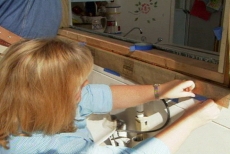
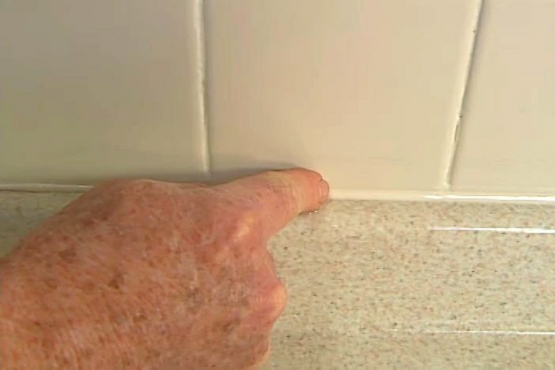
Dress the Edge of the Opening for the Greenhouse Window
Build up and finish the interior edge of the window opening that will be visible through the new greenhouse window. Nail up spacers/shims to level and then add a two-by-four to the bottom and trim along the top and sides.
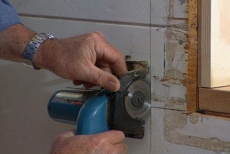
Expose the Front Edge of Perimeter Two-by-fours
Cut away the wooden siding to expose the front edge of two-by-fours at the window's perimeter. The nailing flange of the new greenhouse window will be secured to the front edge of the two-by-fours.
Waterproof the Window Opening with Flashing Paper and Caulk
Waterproof the greenhouse window opening with flashing paper and caulk, inserting the flashing paper behind the sheathing, folding the edge back over the siding and taping it temporarily. Caulk generously along the wooden edge of the opening.

Position and Secure the Greenhouse Window in Place
Insert the garden window into the opening and secure it with rust-proof screws driven through the nailing flange into the two-by-four framing beneath. Caulk the edges. Remove the tape and fold the flashing paper over the nailing flange.

Dress the Edges of the Greenhouse Window
Finish the edges of the greenhouse window, nailing filler strips over the nailing strip to provide a nailing surface for the new trim. Caulk the backs of the trim and secure them in place. Paint to match.
Related Tips


Blog Articles

Maximize Your Yield with DIY Netting for Strawberry Beds
Keep your strawberries safe from pests with our DIY strawberry cage netting solution. Learn how to create sturdy frames and find the best netting for your strawberry plants.

Change It Up: Swapping Out Your Light Switch Plates
Tired of boring light switch covers? Upgrade your home decor with this simple guide on replacing light switch plates and make a statement in every room.

Revamp Your Outdoor Space: How To Stencil A Concrete Patio
Learn how to create a stunning patterned concrete patio with our easy-to-follow instructions for stenciling. Upgrade your outdoor space in no time.


