How to Install a Front Door That’s Energy Efficient
Remove and Replace Your Existing Front Door In a Few Simple Steps
A front door that sticks, does not seal, or that just does not operate properly can be frustrating. Install a new door, frame, and sidelights that will maintain the original look of your home, but that provides the highest level of energy efficiency. Not only will your new front door look great, but it can help reduce your energy costs as well.

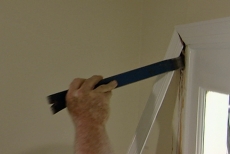
Remove Exterior Trim
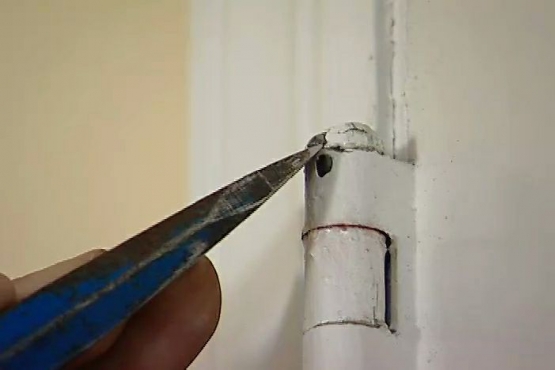
Begin the process by removing the exterior trim that surrounds the door frame. This can be done with a pry bar and a hammer. Take care to not damage the surrounding material, as you may end up having to do some additional repairs. Removing this trim will expose the entire frame of the existing door so that you can cut through the nails as described in step three.
Remove the Interior Trim
After the exterior trim pieces have been carefully pulled away, repeat the process on the inside. If you hope to reuse these pieces be extra careful when removing them so that they don't split. If the new unit is a slightly different size than the old one, you'll need to purchase and cut new trim pieces anyway. Use a flat bladed putty knife to get them started without damaging the pieces.
Remove the Existing Door Unit
Cut through any frame nails using a reciprocating saw. After those nails have been cut, the entire unit should come out in one piece. There is no need to demolish the frame and remove it piece by piece, as this may damage the rough opening and require more work before the new unit can be installed.
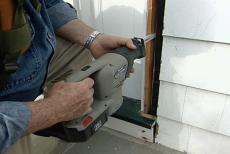
Prepare the Opening
It is important the bottom of the opening is flat and level. You'll also need to verify that the opening is the correct size. In this case, the opening is slightly to large, so Ron uses strips of plywood to reduce the opening to accommodate the new door unit. The final step in prep is to install foil tape around the opening to ensure that it is water tight.
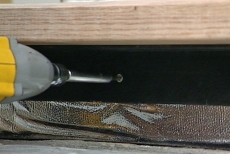
Install the Sill Support
Made from a piece of oak and angle iron, the sill support will ensure that your door sill has a solid foundation to rest upon and that the sill won't rock loose over time. This support piece should be secured directly to the frame work of the house with screws. Seal the area under the door sill and the sill support by laying three beads of silicone caulk on the support as the final step before setting the door into place.
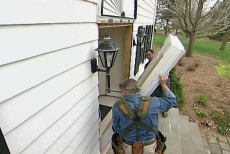
Install the Door
Get a friend to help you set the new door unit into place. It will be especially heavy if the unit has sidelights or a transom. Set the bottom firmly into place first, taking care not to drag it across the beads of sealant. Next, tip the door up into position. Secure the door with one or two nails, through the flange, just to hold it in place while you complete step seven. Don't drive all the nails yet, as you may have to make some adjustments.
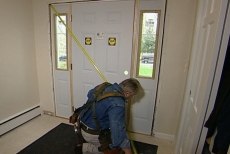
Making Adjustments
Check to see that the door is square and level. A 4 to 6 ft. level can be used to check for level. Measure diagonally across the door to see if it is square. The two diagonal measurements should match. You will also want to check the margin, or the space between the door and the jamb.
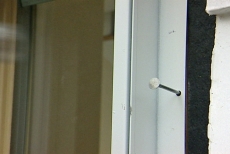
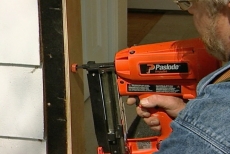
Secure the Door in the Rough Opening
The best fastener to use for this project is a simple galvanized roofing nail, driven right through the nailing flange into the framework of the house. Once the unit has been nailed in all the way around, fold the flap of foil tape over the flange so that the unit is completely water tight.
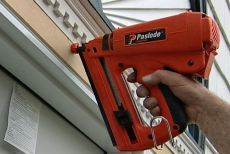
Install the Trim
Cut three pieces of trim to cover the nailing flange on the exterior of the house. You will want to miter the corners for the installation of the interior trim. Before nailing the interior pieces into place, fill any gaps with loose fiberglass insulation.
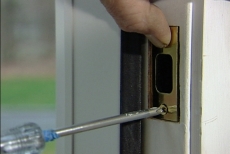
Install the Hardware
Take care to follow the manufacturer's instructions when installing the hardware. You may find it easier to use hand held screwdrivers instead of a cordless driver as well. While it is a little slower, you will be able to be more careful and avoid scratching the finish on your new hardware.
Related Tips


Blog Articles

Maximize Your Yield with DIY Netting for Strawberry Beds
Keep your strawberries safe from pests with our DIY strawberry cage netting solution. Learn how to create sturdy frames and find the best netting for your strawberry plants.

Change It Up: Swapping Out Your Light Switch Plates
Tired of boring light switch covers? Upgrade your home decor with this simple guide on replacing light switch plates and make a statement in every room.

Revamp Your Outdoor Space: How To Stencil A Concrete Patio
Learn how to create a stunning patterned concrete patio with our easy-to-follow instructions for stenciling. Upgrade your outdoor space in no time.


