RON HAZELTON:
Well, this is gonna be a bit of a long trip, but I think it's gonna be worth it. I'm headed to Lafayette, California for a visit with Joan Lee. She wants some help with a patio and I think I can lend her a hand.
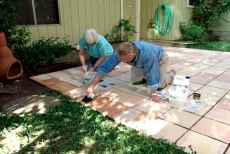
Joan and her late husband purchased this beautiful fountain on a trip to Mexico. She'd like to create the perfect setting for it, by covering the patio with Mexican style Saltillo tile. Now Joan is determined to do this job herself, so I'm going to teach her how, on a small patio in another part of the yard.
Perfect, perfect. If I've ever seen a patio that was ready for Saltillo tile, this is it.
JOAN LEE:
Great. I'm ready for a Saltillo tile.
RON HAZELTON:
Were you gonna do this job yourself?
JOAN LEE:
Yes.
RON HAZELTON:
Really?
JOAN LEE:
Yes. I took a class.
RON HAZELTON:
You took a class?
JOAN LEE:
Yes.
RON HAZELTON:
Where?
JOAN LEE:
At a home improvement center.
RON HAZELTON:
But you don't need it.
JOAN LEE:
Oh [LAUGHS] --
RON HAZELTON:
Maybe I'll learn something from you. Seriously, there's always more than one way to do a job.
JOAN LEE:
Right, right.
RON HAZELTON:
Did they talk to you about cleaning the patio?
JOAN LEE:
No, they didn't.
RON HAZELTON:
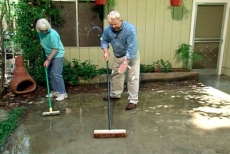
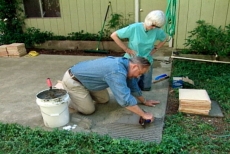
Okay, we're gonna start with that. This is not bad. There's a little bit of dirt on here though. Just to make sure we get a good bond between the mortar and this existing concrete slab, I want to start out by cleaning this. So let's get some stuff and do that first, all right?
JOAN LEE:
Oh, okay.
RON HAZELTON:
Ah, nice buh?
JOAN LEE:
Oh, yeah.
RON HAZELTON:
Is this the right color for you?
JOAN LEE:
Yes.
RON HAZELTON:
It's a natural color. These are individually made. Here's the concrete wash, right here. We're gonna attach this to your garden hose.
JOAN LEE:
Okay.
RON HAZELTON:
And it will do this job very quickly so --
JOAN LEE:
Okay, good, great.
RON HAZELTON:
Let's go grab a hose. Keep it going side to side.
This concrete wash will dissolve any longstanding dirt or algae on the patio. We let it sit for about 10 minutes, then give it a good scrubbing.
If there is algae on here, this will kind of break it up.
JOAN LEE:
I can see it loosening.
RON HAZELTON:
Yeah.
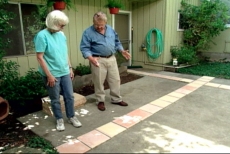
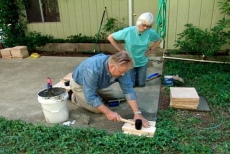
Finally we rinse off the patio with water and begin moving our tiles over to the worksite. Now you've done a lot of research, you went to the clinic and everything, what's next?
JOAN LEE:
To figure out how many tiles will go across and what the space will be.
RON HAZELTON:
Okay, and why do we need to do that?
JOAN LEE:
Because you don't want to end up with a little piece or too much cutting.
RON HAZELTON:
I told you, you don't need me. Yeah, right, exactly right. We want to make sure that when we put these down for real that we don't end up with some little narrow strips on the side.
JOAN LEE:
Right.
RON HAZELTON:
Right. So let's just grab a few of these. And you know what, over here; we have an expansion joint right here. What I'd like to do is to make one of the tile joints fall right on this expansion joint.
[BOTH SPEAK AT ONCE]
So let's just see how this would lay out if we started with a full tile right there and then we went across this way. We're gonna have to leave a half an inch for our joint. Okay. Okay, last one, I don't believe this. I do not believe this.
JOAN LEE:
Perfect.
RON HAZELTON:
This never happens. This is a very good omen. It's coming out perfectly.
Next, we lay a row of tile across the width of the patio, leaving approximately a half inch between each one.
Okay, last one in this direction.
JOAN LEE:
Oh, it doesn't quite fit. It's just about an inch-
[BOTH SPEAK AT ONCE]
RON HAZELTON:
A little long?
JOAN LEE:
Yeah.
RON HAZELTON:
All right. Well, I don't want to tighten up these joints in here, because I want them to be consistent half inch. So here's what we can do. It's about an inch and a half over down there. We could cut an inch and a half off this end tile, or we could split the difference.
We could cut half of it, three quarters of an inch off here and three quarters of an inch down here. It's really; it's really your call.
JOAN LEE:
Okay, since people and or are usually from that side down, I'd rather that looks the full tile down there and have --
RON HAZELTON:
Keep the full tile here.
JOAN LEE:
And cut it on this side.
RON HAZELTON:
And cut it on this end, I agree. You know, I'll -- you're never gonna really even notice that.
JOAN LEE:
No.
RON HAZELTON:
Remember these, high school geometry class? Only I bet you never had one as large as this one.
JOAN LEE:
Absolutely not.
RON HAZELTON:
Giant right triangle. So Joan, put it right along the edge of the patio there and I'll do the same here.
JOAN LEE:
Okay.
RON HAZELTON:
Good. Now what we've just established here is that this is a perfect 90 degree angle right here and that we have a perfect rectangle. Your patio is a perfect rectangle. Congratulations, by the way. [LAUGHS] That's important because it means we can start here in this corner and sort of work that way.
If it wasn't a perfect rectangle, we'd probably want to start in the middle, because our grout lines could get really nutty after a while. They just would look very strange.
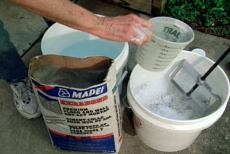
Our next step is to mix some exterior grade thin set mortar. We could mix this up with water, but to get a stronger and a more pliable bond, we're going to use this. This is an acrylic fortifier, in place of the water. Pour this in.
To two gallons of acrylic, we add one bag of mortar which Joan pours in gradually. I use a mixer attached to a drill to stir the mortar. Once it's mixed, it will need to slake for about 10 minutes before we use it.
Now you know how we're gonna put this on?
JOAN LEE:
No.
RON HAZELTON:
With our hands.
JOAN LEE:
Oh.
RON HAZELTON:
I'm just kidding ya. We're gonna put it on with trowels. You know, there's a whole world of trowels out there.
JOAN LEE:
Oh, you're kidding.
RON HAZELTON:
Ah, you won't believe it.
JOAN LEE:
I don't.
[NUSIC]
RON HAZELTON:
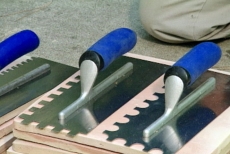
Well, what do you say we talk trowels? Now you know, not all trowels are created equal. This one, for example, is used to distribute and smooth stucco and concrete and plaster. While these, with notches in them, are used to apply mortar under tile.
Now you notice the notches are all different sizes. That's because you have to match the trowel to the tiling job you're doing. The general rule here is the smaller the tile, the smaller the notches. The larger, and the more irregular the tile, the larger the notches. So when you're about to do a tiling job, be sure you pick the right trowel. That's trowel talk.
JOAN LEE:
Ron, there's a whole world of trowels. I just learned this from you.
RON HAZELTON:
Isn't that great?
JOAN LEE:
Yes, and it is. And I don't know what we're gonna do with all these trowels.
RON HAZELTON:
Right on, sister. I think we'll put some tile down.
JOAN LEE:
Oh, all right.
RON HAZELTON:
Ready?
JOAN LEE:
Yes.
RON HAZELTON:
Ready to talk tile now?
[BOTH SPEAK AT ONCE]
JOAN LEE:
Yes. I'm ready, I'm ready to talk tile.
RON HAZELTON:
Okay.
We use the straight side of the trowel to distribute the mortar in one small area, taking it right up to the edge.
There we go, around here. Now, now we take the trowel, and we use the notched side. I'm gonna turn this up so it's almost perfectly vertical like this, got a few pine needles in here and I'm going to sort of rake this across the mortar we just put down.
Now you see what we're getting here? We're getting some ridges and some furrows. Now see those nice high ridges, like right here?
JOAN LEE:
Right.
RON HAZELTON:
That's why we want to make sure we hold this up perpendicular. Otherwise it would just sort of smash those out.
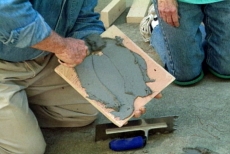
Since Satillos have an irregular surface, we take an extra step called buttering which is spreading a thin layer of mortar across the back of each tile. Now you want to be careful not to get mortar on the face of these because they're still unsealed.
All right, now we're just gonna drop this on here. In this case, we're gonna just align it with the edge of the patio, like that. This is kind of an important tile because it kind of sets the tone for everything else. Now, we'll take a piece of two by four and a rubber mallet. We'll just give this a little tap. That's to sort of set it into the mortar. And as we do that, it kind of squishes those high ridges down and makes uniform contact with the back of the tile.
What you don't want is to have some mortar here, none here, you step on that part without the mortar underneath, the tile's not supported, it will crack.
JOAN LEE:
Crack, yeah.
RON HAZELTON:
Okay.
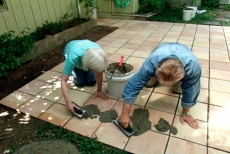
With the fundamentals of troweling and buttering under her belt, Joan lays her first tile in place. To keep the grout lines at a consistent half inch width, I insert a couple of plastic spacers between the tiles.
So now, you've got your two by four?
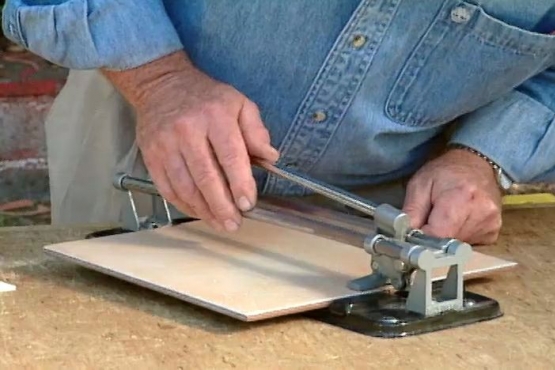
The whole tiles go down very quickly. But we'll need to cut tiles to fit along the edges. First, we measure the space.
That's about three and a half inches. Now, we need to subtract from that, the width of two grout lines. Our grout lines are half an inch apiece, that's one inch. So we're going to mark this tile here at not three and a half inches, but instead, two and a half inches to allow for that grout line.
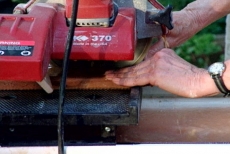
This is a tile saw.
JOAN LEE:
Oh.
RON HAZELTON:
Awesome, isn't it?
JOAN LEE:
Awesome.
RON HAZELTON:
To think that that saw can cut through here. It's actually got a diamond blade on it and a little pump that circulates water over the blade to keep it cool. So shall we cut some tile?
JOAN LEE:
Let's cut some tile.
RON HAZELTON:
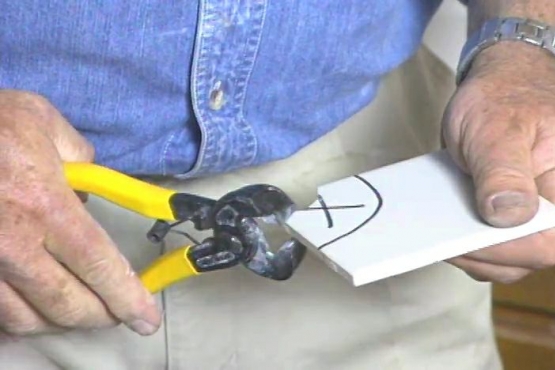
There's the cut line that we drew right there. So all we do is lay it on this moving table.
After lining up the blade to the cut line, Joan pushes the tray toward the blade to make her cut.
Good, now pull it back this way. [SOUND OF SAW] And that's the piece that we want.
JOAN LEE:
Oh, oh, that's beautiful.
RON HAZELTON:
By golly, you did a good, a good cutting job there. Straight as an arrow.
JOAN LEE:
[LAUGHS] Okay. All right.
RON HAZELTON:
All right, let's put this in.
Now, once all our tiles are laid, we have to let the mortar set overnight prior to taking our next step.
Here's what's gonna happen next. We are gonna mix up some grout and fill those joints, but before we do that, you gotta put on what's called a pre-grout sealer. Actually, this is a sealer that can be put on before and after the grout.
But the problem is, these are very, very porous on the top. If this grout gets smeared on the top of the tile, and it will, when we put it on, we'd never get it off if we didn't put the sealer on first. So we're gonna start by doing that.
Why don't we take our shoes off because this is still, till we get the sealer on here, very susceptible to picking up dirt. Okay, look at that. Kind of wore the toe off of my shoe yesterday just --
[BOTH SPEAK AT ONCE]
JOAN LEE:
You sure did.
RON HAZELTON:
-- being down there, putting those down.
We use paintbrushes to apply sealer to the face of each tile. We want to avoid getting it on the edges or between the tiles because that could prevent the grout from adhering later on.
This is so important on Saltillo tiles because they are so absorbent. If they're not properly sealed, then boy, the first time you spill something on them, a cup of coffee, a glass of wine, you know, that stain is in there permanently.
There we go. Huh? You know what time it is now?
JOAN LEE:
Looks good. Time to wait for it to dry.
RON HAZELTON:
Wait for it to dry. I think I see another coffee break coming on.
JOAN LEE:
Oh, good deal.
RON HAZELTON:
We give the sealer time to dry, then I show Joan just how effectively it works.
So you see how that's beading up on the surface there?
JOAN LEE:
Oh, yes.
RON HAZELTON:
It's just water. That lets us know the sealer is doing its job now, so we can go ahead and start our grouting. So well mix the grout up. This looks familiar, huh?
JOAN LEE:
Yes.
RON HAZELTON:
Remember all the fun we had with this.
JOAN LEE:
Yes, that thing --
RON HAZELTON:
Round two.
[JOAN LAUGHS]
We mix a bag of exterior grade grout with a gallon of water. This grout is also ready for large joints as opposed to the small joints of say, a kitchen countertop. [SOUND OF SAW]
JOAN LEE:
Ooh, boy
RON HAZELTON:
[LAUGHS] Go ahead.
JOAN LEE:
It's really thick. I'm sorry but -- oh --
[LAUGHTER]
I give up.
RON HAZELTON:
Oh, okay, a little more water in here.
JOAN LEE:
I think that will help.
RON HAZELTON:
Okay, you ready? There you go, you got it now.
With a little more water and a bit of practice, Joan mixes the first batch of grout. And now, we're ready to put it to use. And the right tool for this, is this one right, this right here. This is called a grout float. You know, sponge rubber.
This one's got a smooth rubber on the bottom. So you've got one right there?
JOAN LEE:
Okay.
RON HAZELTON:
So the first thing you want to do is take your, your float and kind of force this grout, kind of hold it flat, force it down into that joint between the tiles. You want to push it all the way down to the bottom, so you completely fill the joint up. Make sense?
JOAN LEE:
I see, yes.
RON HAZELTON:
As you're taking off the excess grout from your tile, keep your float up about 45 degrees or so and go from corner to corner. That will keep from raking out. See, if you come across a joint like this --
JOAN LEE:
Oh, I see.
RON HAZELTON:
You can kind of rake it out, what, I rake out what you just put in there.
JOAN LEE:
Right.
RON HAZELTON:
After grouting a section of the patio, we clean off the tiles with a damp sponge, being careful not to wash the grout out of the joints.
You can kind of smooth it out, blend it in and if you come across a little spot like this, where there's a little hole, you can just take a little more grout, put it in here.
We work our way across the patio, grouting all the joints except for one.
Now I put this piece of foam, this is called backer rod, in this joint because I didn't want the grout to go in here. This joint we're going to have to handle a little bit differently than the rest. If you remember, there was an expansion joint in the concrete right underneath here.
We set the tile up so that this joint would fall right on top of that. That means the concrete could move on either side of that joint so we're gonna put a flexible material in here instead of the regular caulk. This is it.
It's called concrete crack sealer. It's gonna be the same color. And it's self leveling. So we're just gonna put it in up to the top of the joint and it will eventually flatten itself out and we won't have to touch it. Well?
JOAN LEE:
I love it.
RON HAZELTON:
Yeah.
JOAN LEE:
I love it. Absolutely, it looks wonderful.
RON HAZELTON:
You can live with this, huh?
JOAN LEE:
Oh, absolutely.
RON HAZELTON:
You remember before it was just like a dark slab of concrete?
JOAN LEE:
Mm-hmm [AFFIRMATIVE]. Looked dirty, drab. It looked --
RON HAZELTON:
Who'd want to sit out here, you know, the way it used to look?
JOAN LEE:
No.
RON HAZELTON:
Now, I agree with you, it's light, it's bright, it's cheery and it makes me want to sip a Margarita.
JOAN LEE:
[LAUGHS] Okay.
RON HAZELTON:
Thank you very much.
Now remember, this patio was just a practice run because Joan wanted to tile the patio near her Mexican fountain by herself and that's exactly what she did. I was thrilled when she sent me these photos of here handiwork. Congratulations, Joan, you've made me proud.