How to Install a Dog or Pet Door
Install a Pet Door to Allow Your Dog or Cat Free Access Inside and Outside Your Home
Spend an afternoon on a pet door installation and make life easier for you and your pet long term. Customize pet door size for your cat or dog. Use the security panel to control access at night or in your absence. Pet door installation requires one person, but company is welcome and makes the work go faster.
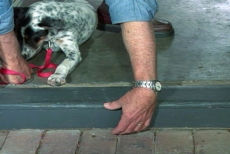
Measure and Mark Elevation of Pet's Chest from Floor/Ground
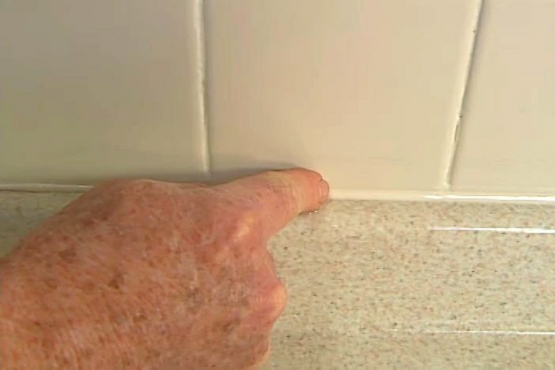
Measure the height of your pet's chest to determine the correct pet door height from the floor/ground. If the ground outside is a different elevation from the floor inside, average the heights and mark the elevation with tape.
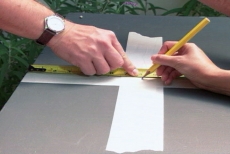
Mark the Door's Center and Remark the Pet Door's Elevation
Run masking tape upward from the door's center bottom edge. Draw a perpendicular line up the exact center of the door to intersect the exact measurement for the pet door's bottom edge as measured and marked earlier with tape.
Trace Cut Lines for the Pet Door Opening
Mark the center of the pet door security cover/panel and align it with center of the exterior door marked earlier. Trace around the security panel with a heavy pencil, using it as a rectangular template for the pet door opening.

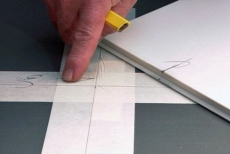
Drill Starter Holes at the Corners of the Rectangular Tracing
Drill small pilot holes through the corners of the pet door tracing. Keep the drill vertical. Re-drill halfway through the door with a larger bit. Finish the hole from the opposite side to avoid splintering the wood.

Cut an Opening along the Trace Lines with a Jigsaw
Insert the blade of a jigsaw into one of the corner holes and saw along the cut lines traced earlier for the pet door. Be particularly careful about cutting the corners neatly and completely at right angles. Remove the tape.
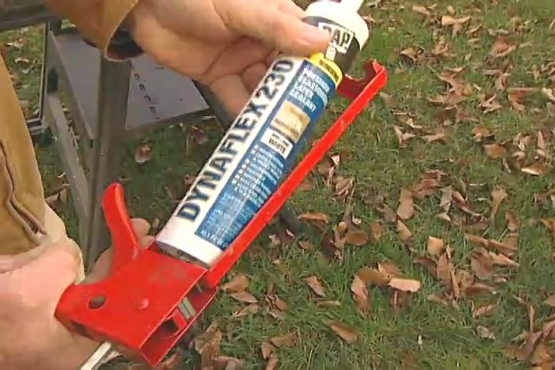
Run a Bead of Exterior Caulking around the Opening
Run exterior caulking around the opening to make a water-tight seal for the pet door frame and prevent wood rot. Press the frame in place, remove excess caulking with your fingers, and secure it temporarily with painter's tape.
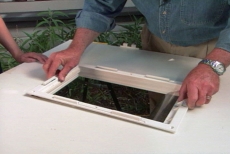
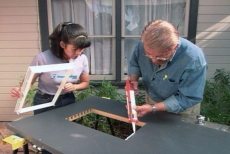
Position and Secure the Interior Frame of the Pet Door
Position the interior frame of the pet door in the opening with the hinge side upward. Secure this inner panel to the outer panel with screws, effectively sandwiching the people door between.

Use the Pet Door Security Panel to Control Access
Slip the security panel onto the pet door from the interior side to prevent your house pet from exiting or entering at night or when you are away from home. It5 also prevents other domestic or wild animals from entering.
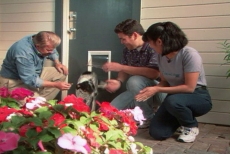
Introduce Your House Pet to the New Pet Door
Teach your dog or cat to use the pet door to exit and enter your home. If necessary, coax your reluctant pet from the opposite site with treats and praise it when it passes through the opening
Related Tips

Blog Articles

Maximize Your Yield with DIY Netting for Strawberry Beds
Keep your strawberries safe from pests with our DIY strawberry cage netting solution. Learn how to create sturdy frames and find the best netting for your strawberry plants.

Change It Up: Swapping Out Your Light Switch Plates
Tired of boring light switch covers? Upgrade your home decor with this simple guide on replacing light switch plates and make a statement in every room.

Revamp Your Outdoor Space: How To Stencil A Concrete Patio
Learn how to create a stunning patterned concrete patio with our easy-to-follow instructions for stenciling. Upgrade your outdoor space in no time.


