RON HAZELTON:
You know, I really love older homes and we’re heading to a city that has plenty of them, Augusta, Georgia.
For the last year, this great old Victorian has been home to Bob and Maryann Zura and their son, Connor. The couple fell in love with the enormous kitchen, but there's one problem: Bob, who does most of the cooking, practically has to shout when he's at the stove and the family's at the table.
Well, today we're going to close the communication gap by building a kitchen island in front of the stove that will provide seating, work space and plenty of storage.
Boy, what a grand old lady this is. Look at the --
[BOTH SPEAK AT ONCE]
MARYANN:
Yeah. Either 1887 or 1889, that's as close as we get to a date.
RON HAZELTON:
And you've been here how long?
MARYANN:
Almost a year.
RON HAZELTON:
Yeah. So this is a kitchen project. Little island.
BOB:
We need a lot of help on it.
RON HAZELTON:
Okay, let's take a look.
[BOTH SPEAK AT ONCE]
Now the nice thing about this project is, we're not going to custom make this, we're going to assemble it from modular cabinet, base cabinets that we got at the home improvement center. And so it's really an assemblage of cabinets with a countertop placed on the, on top of everything.
MARYANN:
Nice and easy.
RON HAZELTON:
Yeah. So the thought was to put the seating on this side over here and run along here and then there will be room for one chair over here at the end.
MARYANN:
Okay, great.
RON HAZELTON:
And then on this side which will face your cabinets over there, we'll have all the doors and drawers.
BOB:
Okay.
RON HAZELTON:
So we need to move this out of the way. This an heirloom?
MARYANN:
Yeah.
BOB:
Sort of. It's my medical school and college desk, so happy to see it go.
RON HAZELTON:
Oh yeah, it's not going to go far away --
[BOTH SPEAK AT ONCE]
BOB:
It will probably become Connor's desk soon as he --
[BOTH SPEAK AT ONCE]
RON HAZELTON:
All right, Connor, you want to go for a ride?
CONNOR:
Oh, that would be good.
[BOTH SPEAK AT ONCE]
RON HAZELTON:
Okay, here we go -- whooo.
MARYANN:
Bye, guys.
RON HAZELTON:
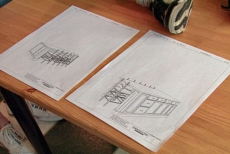
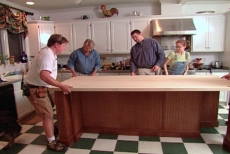
Choosing the exact placement of our island is important. So I make a cardboard template and get ready for some experimenting.
Now, there we go. So this is the dimension of your new countertop. Three and a half feet wide, eight feet long. What do you think?
MARYANN:
I think it looks perfect.
RON HAZELTON:
Not too big?
BOB:
We thought it was going to be too big, but it, I think the room fits it perfectly.
[BOTH SPEAK AT ONCE]
MARYANN:
Yeah, it doesn't look too big now.
BOB:
Looks great.
RON HAZELTON:
Okay. What I want to do now, guys, tape measure is, since we've agreed that this size is okay, we're really talking about placement. How far away from your other cabinets. Now ideally, the minimum we would want on this would be three feet. So let me set it in here three feet. Carry that -- come down this way a little bit. Push it out to the three foot mark there. All right. Now some of the things you'll want to consider: dishwasher here. Is this going to clear all right?
And do you want to be able to walk around this?
MARYANN:
Right.
RON HAZELTON:
Now assuming we've got a cabinet door over here on this cabinet, are they going to bang each other?
MARYANN:
Maybe.
BOB:
I think definitely we'll need a little more room by the dishwasher.
[BOTH SPEAK AT ONCE]
MARYANN:
Definitely want to move it --
RON HAZELTON:
Okay, and then we'll come out to 42. Now remember over here -- see, now you could actually walk through here.
BOB:
Maybe you could, buddy.
[LAUGHTER]
RON HAZELTON:
You could sidle through here. Cricket, could you please tape this last corner --
[LAUGHTER]
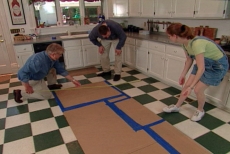
With Cricket's approval, I mark the corners of the island with masking tape.
If you could just pick up the cardboard here, okay.
[LAUGHTER]
Okay, Crick. Come on up, girl. We'll give this --
[BOTH SPEAK AT ONCE]
-- you can have this, right. This can be yours. All right, so let's now bring in some of the base cabinets.
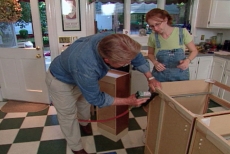
All of our cabinetry has been unpacked in the dining room. And with a little help from my carpenter, David Shulte[?], we arrange them in position, placing the corners just inside the tape marks.
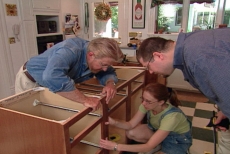
Now it's time to start joining these up. Maryann, kind of use your fingers to feel down there if there's, if they're flush. And when they are, just let Bob know. Bob, you put a clamp, the first clamp on, right below this first --
[BOTH SPEAK AT ONCE]
-- first rail there.
We'll attach the cabinets together by driving screws through the face frames. Our first step is to drill a clearance hole through the first face frame. I've wrapped a piece of tape around the big as a depth marker, to make sure we don't penetrate into the adjoining frame.
Now I'm going to take a smaller bit. You see this is longer, this is going to go into the second piece of wood here. Call this a pilot hole. Now this is small enough so that the screw will actually bite into that one. This is a counter sink, the bit right here. It's a kind of a cone shaped bit.
It's going to create a cone shaped recess. That's so that the head of the screw right here, will drop into that and it won't get in the way of the drawer out here.
MARYANN:
Oh, okay.
RON HAZELTON:
Finally, we drive in a two and a half inch screw. We'll use three for each base frame.
Put the next one in right down here and guess who's going to do that?
[LAUGHTER]
MARYANN:
I can do it, but I need more drills.
RON HAZELTON:
Yeah, you've got to have --
[LAUGHTER]
A normal person would just change the bits out, but not you.
[BOTH SPEAK AT ONCE]
MARYANN:
I need, I need at least six drills to do --
[BOTH SPEAK AT ONCE]
RON HAZELTON:
When you get to the edge of the tape, then you want to stop ---
MARYANN:
What do you think?
RON HAZELTON:
Couldn't be done better.
Using nearly every drill in my collection, Maryann drives in the rest of the screws.
MARYANN:
Ta da.
[SOT]
RON HAZELTON:
Up next, Maryann graduates from screw gun to nail gun and we top things off with one mammoth size butcher block.
[MUSIC]
ANNOUNCER:
Ron Hazelton's HouseCalls is being brought to you by the Home Depot.
[SOUND CUT]
RON HAZELTON:
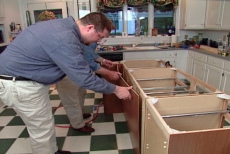
Today's HouseCall has brought me to Augusta, Georgia to help Bob and Maryann Zura construct a large kitchen island out of off the shelf modular cabinets. We've already screwed the cabinets together along the front face and now we're going to attach the backs together.
Now if these cabinets were going up against the wall, we'd screw the backs into the wall studs and we wouldn't worry about this back here. But since these are freestanding, we're going to attach these at the back as well as the front and so I'm going to slip this in here.
This is just a spacer -- like that. And it's the same thickness as this gap right here.
The spacer will allow us to fasten the cabinet sides firmly together with screws. Once it's secured, we'll trim off the top of the spacer with a Japanese hand saw.
These are actually very old tools. They originally were made by Japanese sword makers. They're the ones who probably made some of the first saws. This is a production model here, but it's great for something like this because I can get it right down on the surface here and it cuts, as I pull the sword to me and that makes a nice flush cut for trimming off a piece like, like that.
With the first two cabinets attached together, we repeat the process, and add a third. Everything we're using on this island is a standard or a stock cabinet. But I needed two 12 inch wide cabinets for the bottom and I couldn't find anything in a base cabinet that narrow, so we're having to use wall cabinets.
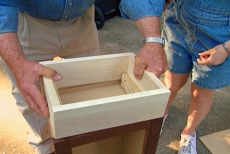
They're the correct width but they're a little bit short. They're only 30 inches high. So to bring them up to the proper height, we're going to put a little base on the bottom.
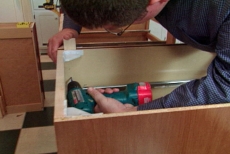
I've constructed the base out of four pieces of one by four. Then added two wooden cleats to the inside. These cleats will drop down into the bottom of our cabinet and be attached with screws. And then this, it's called a right angle drill. It's just for getting in tight spots like this and it will --
[BOTH SPEAK AT ONCE]
MARYANN:
-- tight spot.
RON HAZELTON:
-- fit right down in here. Okay, that's all there is to it. Just drive those in like that.
MARYANN:
Okay.
RON HAZELTON:
There you go.
MARYANN:
Believe it or not, I was pushing. [LAUGHS] There it goes.
RON HAZELTON:
Push, good. Before attaching these new cabinets, we add another spacer. Now we're going to just tack this on here. Here, why don't you put a couple of those.
[LAUGHTER]
I could tell you really wanted to do that. Okay. It's a little brad gun, a nail gun and just hold it fairly straight. Push it in so it won't go any further and pull the trigger.
MARYANN:
And it's okay for me to hold onto this thing.
RON HAZELTON:
[Affirmative].
MARYANN:
Whoa.
RON HAZELTON:
And make it a quick pull.
MARYANN:
Okay.
RON HAZELTON:
With the spacers in place, Maryann gets another chance to master her drilling skills as we attach the cabinets together.
MARYANN:
It's easier when you go faster.
RON HAZELTON:
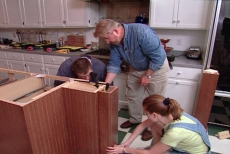
So Bob, this is the -- the backs of these cabinets we're seeing right now that we've attached together normally would be up against the wall, but in this case, we're going to see the backs so to cover them up, we're going to use some of this [ ? ]board or plywood paneling.
BOB:
Okay.
RON HAZELTON:
Bob and I put glue on the back of the paneling and along the edge of the cabinet.
All right? So this is going to come down here. You want to hold that in place, Bob?
BOB:
Sure.
RON HAZELTON:
And let's make it flush with this edge out here.
Bob fires in nails about every six inches, being careful to stay near the edge so the nails will grab the cabinets' sides.
This is a lot of fun. This is why you do this.
We repeat the process with the back panel.
Now we're going to -- it reminds me of? Lombard Street, San Francisco.
BOB:
Maryann and I are both UVA graduates so it's the serpentine walls of Jefferson in Charlottesville that we really go --
RON HAZELTON:
Well this is, I always figure when you're gluing, it's sort of a carpenter's Rorschach test in a way, you know, All right, ready to put this up?
BOB:
Sure. Keep going along here?
RON HAZELTON:
Yeah. Now here's -- let's just see if this --this is how we're going to deal with these --these holes. See, this is just a wax pencil. this is a pre-finished paneling. The paneling's already on here so this is the -- this is the stuff you use to fill up the holes rather than a putty. Doesn't have to be sanded.
Well, it's Connor's bedtime. So Bob and Maryann leave me on my own. While they're gone, I attach base molding and trim along each corner. Our kit for this project also comes with two prefinished decorative columns which we'll attach next.
Hey, guys. So Connor's down for his nap?
BOB:
He's sleeping.
RON HAZELTON:
Okay.
MARYANN:
Can't make any noise.
RON HAZELTON:
[WHISPERS] All right, be very quiet. No nailing right now, I promise. So Maryann, can you just hold this in place down here? You see that line right there? Just take your --just knock it over a little bit so it's right on the line.
Bob, here's the screwdriver, okay, and some screws. Just from the inside now -- I drilled three clearance holes there. Screw through and into the back of this column.
The plastic disk is a base for a snap on cap that conceals the screw head. Finally, we're ready to install our butcher block countertop. A special order item from the home improvement center. Now this is a great example of why carpenters Scott Haines and David Shulte accompany me on all my HouseCalls.
All right. That is --
[BOTH SPEAK AT ONCE]
-- big butcher block.
MAN:
That is beautiful. Wow.
RON HAZELTON:
And in the off season, it can be a ping pong table.
MARYANN:
Yeah.
RON HAZELTON:
However we use it, we need to put the proper finish on it.
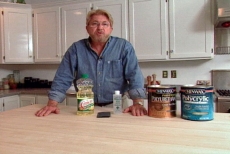
When it comes to finishing a brand new butcher block countertop like this one, you've got a couple of options, depending on how you're going to use it. If you're going to prepare food directly on the wood, especially if you're going to carve on it, then you'll want to use some kind of an oil finish.
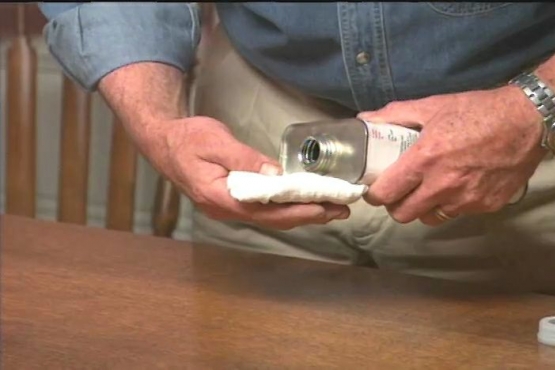
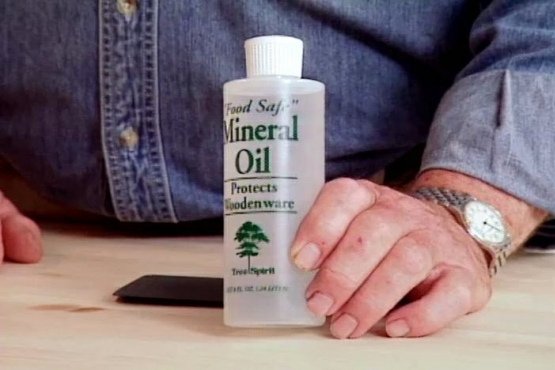
Don't though, use a vegetable oil like this because it could turn rancid over time. Instead, you'll want to use a mineral oil. And one of the best ways to put this on is to spread the oil on the surface and then work it into the wood, using some wet or dry sandpaper.
When you do this, make sure that you're always going back and forth with the grain of the wood. Now if you're not going to be carving directly on the surface, I'd recommend a clear coating like a polyurethane varnish. This is a water base, this is an oil base.
The advantage to these is that they seal the wood up very, very well, resist almost entirely, any kind of staining from liquids and are relatively easy to put on. Now you'll probably want to put on, two or even three coats.
A foam brush like this is a good applicator. Use long straight strokes, always going with the grain. In between each coat, give it a sanding with wet or dry paper dipped in water. The water acts as a lubricant. And once again, make sure you always sand with the grain.
You got your island.
MARYANN:
Oh, it's beautiful.
RON HAZELTON:
Yeah?
BOB:
Fantastic.
[BOTH SPEAK AT ONCE]
RON HAZELTON:
Can you envision it in use?
BOB:
I couldn't envision it, but now I can --
RON HAZELTON:
But can you envision the cabinets here as a reality.
[SEVERAL SPEAK AT ONCE]
MARYANN:
Oh absolutely.
BOB:
It's going to be perfect.
MARYANN:
We'll be living at this island.
RON HAZELTON:
Yeah?
MARYANN:
Yeah, I'm sure of it.
RON HAZELTON:
What are we going to call it?
[LAUGHTER]
[SEVERAL SPEAK AT ONCE]
RON HAZELTON:
Maryann island.
MARYANN:
Connor's island.
RON HAZELTON:
Yeah, Connor's island.
[LAUGHTER]
Well, Connor's island has brought additional countertop space, lots of new storage and a family gathering center to this spacious kitchen. And remember, it was made by simply assembling stock modular cabinets. Now I'd say that makes it a perfect weekend project for just about any of us do it yourselfers.