How to Build and Assemble a Wooden Foot Bridge
Learn how to laminate beams and assemble decking and rails for a woodland footbridge.
Homeowners want a footbridge to help them cross a deep ravine on their property. When the area is dry, crossing the gulley at the bottom requires a hop, but rains and runoff can add slippery banks and rushing water as additional obstacles. Consequently, the bridge will be high enough to avoid the steep banks and any flowing water. Built of laminated four-by-six support beams, pre-cut posts, decking and side rails, the 12-foot length of bridge will span the gulley resting on heavy block piers.
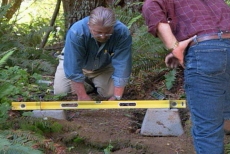
Level the Ground and the First Two Concrete Support Piers
Use shovels and hand tools to level areas at the four corners of the bridge for supporting concrete blocks/piers. Position and level the first two piers at one end of the bridge using a bullet level and a bar level.
Use 12-Foot Planks to Position Piers on the Opposite Bank
Clamp 12-foot planks to the first two piers, ensure they are parallel and mark the other ends as locations for a second pair of piers. Level the ground, position and level the piers, and temporarily clamp them to the planks.
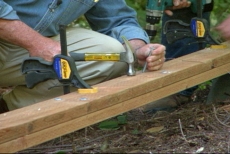
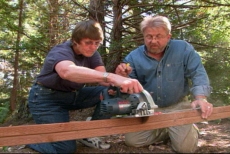
Laminate Two-by-sixes into a Pair of 12-Foot Support Beams
Apply construction adhesive to a 12-foot two-by-six plank and clamp another on top. Pre-drill for carriage bolts every 24 inches, inject silicon into the holes, drive in bolts, and secure them with washers and nuts on the opposite side. Repeat.
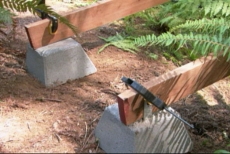
Bore Holes in Beams for Attaching Metal Straps on Piers
Position footbridge beams on piers and drill holes into the wood through the metal strap on each pier. Add silicon to each hole, drive in a carriage bolt, and secure it with washers and nuts tightened with a socket wrench.
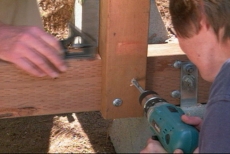
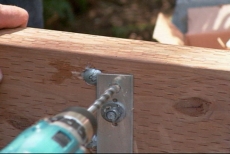
Position and Secure Pre-cut Railing Posts with Carriage Bolts
Temporarily clamp pre-purchased railing posts in position along the footbridge. Pre-drill holes, add silicon waterproofing, hammer in the bolts, and secure with washers and nuts.
Measure and Cut Treads for the Bridge Deck from Two-by-sixes
Measure the distance between the outer edges of the two beams for tread length and add two inches for overhang. Center the first tread across the end of the beams, pre-drill holes, and drive in rust-resistant deck screws.
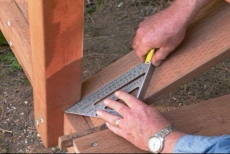
Notch Treads as Necessary to Fit Around Railing Posts
Use a speed-square to mark cut lines on planks that butt into railing posts and notch them with a jigsaw. Space all planks 1/2 inch apart, pre-drilling and securing each while working across the bridge span.

Coat the Cut Ends of the Treads with Wood Preservative
Use a paint brush to liberally coat the cut ends of the deck treads with wood preservative to prevent moisture from promoting wood rot. Walk on the bridge to test its sturdiness and balance.
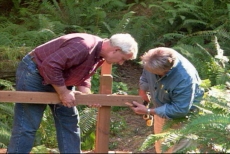
Position the Garden Bridge Handrail and Secure with Rust-resistant Screws
Position and clamp a handrail to the railing posts and secure it with rust-resistant screws. Repeat this process for the other side of the trail bridge to complete the project.
Related Tips


Blog Articles

Maximize Your Yield with DIY Netting for Strawberry Beds
Keep your strawberries safe from pests with our DIY strawberry cage netting solution. Learn how to create sturdy frames and find the best netting for your strawberry plants.

Change It Up: Swapping Out Your Light Switch Plates
Tired of boring light switch covers? Upgrade your home decor with this simple guide on replacing light switch plates and make a statement in every room.

Revamp Your Outdoor Space: How To Stencil A Concrete Patio
Learn how to create a stunning patterned concrete patio with our easy-to-follow instructions for stenciling. Upgrade your outdoor space in no time.


