RON HAZELTON:
Well, I’m headed off to the great Southwest. Santa Fe, New Mexico. Cindy Carabahold has asked me for a little help.
Her family spends most of their time in the living room, often around this antique piano Cindy has owned since childhood. She's asked me to help dress up this room a bit. And the lure of Santa Fe combined with a chance to play that piano was more than I could resist.
You know from the outside, this is a pretty typical southwestern home. In here, there's a few touches of traditional.
You want to sort of expand on that?
CINDY:
Yes, I do. That's what I like.
RON HAZELTON:
And you were thinking about - about some, some detailing up on the - on top of the walls here?
[BOTH SPEAK AT ONCE]
CINDY:
Yes. Yes, I was thinking that it would look really nice with some crown molding.
RON HAZELTON:
Yeah. We might pick up on this and add some crown moldings around the ceiling up here. And maybe even something on top of the fan here. Maybe a rosette, something like that. Just to bring out a few more traditional details.
Now this is a pretty typical piece of crown molding and it could go right up in the corner just like this. But the ceilings in this room are pretty high and I want something a little bit more substantial.
So we're going to attach flat baseboard to both the wall and the ceiling, then install the crown molding in between the two. This mockup I've made shows how much more substantial the molding will be. We'll want to attach the molding to studs and ceiling joists wherever we can.
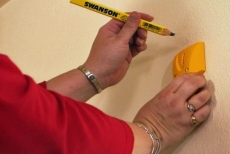
So Cindy and I use electronic stud finders to locate and mark each stud and joist. With that done, we move off to the garage to give Cindy her first experience using a sliding compound miter saw. Our first cuts are for the baseboards that will be applied to the ceiling.
The ends of these boards are cut at 45 degree angles in order to meet cleanly in the corners of the room. With the blade rotated to 45 degrees, Cindy makes the miter cuts for each corner. Now every place that we located a wall stud, we have put a piece of masking tape.
And every place we've located a ceiling joist, we've also put a piece of tape. You can see them all the way down along the ceiling here. Now the first piece of molding that we're going to put up though, we're going to put on this ceiling over here.
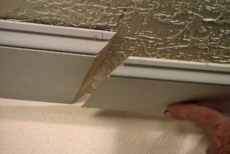
And because the joists run in this direction, all we've got is the edge of one joist right here to nail to. So we're going to have to rely on some construction adhesive to hold this first piece up.
All the way up. Press it into the wall. Push it into the wall and then up onto the ceiling like this. Good. Next, I use an air nailer to driv nails into the edge of the joist. Okay, now out here where we've only got the construction adhesive, I'm going put in 2 nails at opposing angles.
One like this and one like this. That's going to give me a mechanical hold. Not really strong but strong enough until the glue dries. With the baseboard attached to the ceiling, Cindy lines up the miter cut on the second piece and I secure it by driving 2 nails into each joist.
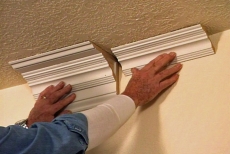
While miter cuts are used for each corner, we need a different type of joint where 2 sections of baseboard meet in the middle of the ceiling or wall. Rather than joining them end to end to form a butt joint, we're going to put 45 degree bevels on each end, forming what is known as a scarf joint. That will effectively hide the seam.
Unlike the miter cut where the saw blade was rotated to a 45 degree angle, the scarf joint requires the blade to be tilted to 45 degrees. After they're cut, the two beveled ends simply slip into place.
Nails can be driven through both boards locking them together. Cindy and I work our way around the living room attaching the baseboards to the ceiling and walls. Our next step is to do some prep work with the crown molding.
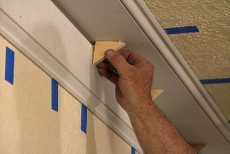
Now Cindy, these are glue blocks. This is going to give us a surface to which we can attach our - our crown molding. I'm putting some construction adhesive on here, all right. Now if you set that right up in the corner, right on the, where the stud is and push it in.
We attach each glue block with a dollop of construction adhesive followed by a couple of nails. This glue block will not only support the crown molding but also give us an additional nailing surface. Then it's back out to the garage for more cutting.
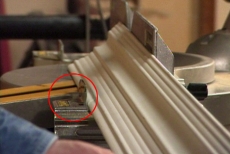
Because the crown molding is installed on an angle, we have to make what is known as a compound miter cut for it to fit into the corners. For this, I have installed a bracket on the saw called a crown stop. It holds the crown molding at one angle while the saw cuts it at another angle.
So this is our compound miter here. We've got one angle going this way and then a second angle going over this way.
CINDY:
I see that.
RON HAZELTON:
And this is what's going to allow this to fit into the corners. Okay, this is the crowning glory as I like to put it.
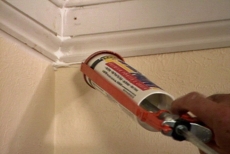
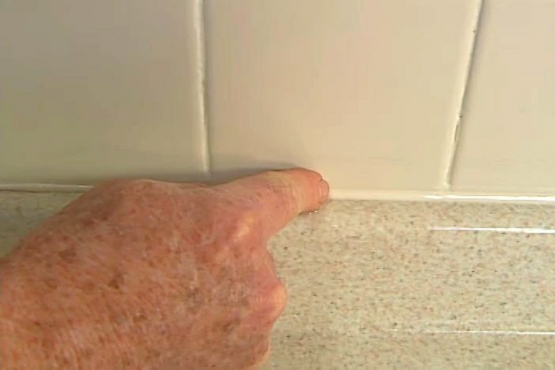
We attach the crown molding by driving nails into each glue block and along the top and bottom edge where it meets the baseboards. After it's all up, we run a bead of caulk over the joints. And cover the nail holes with spackle.
Then Cindy gets to work painting. Now while Cindy's finishing up the painting, I want to take this opportunity to bring some of that detail we put up here in the corner over to the center of the room by installing a ceiling medallion right above this fan.
And while I'm at it, I'm going to change this fan to something that's a little bit more in keeping with the new look in this room. Now we've turned off the power to the circuit breaker. So my first step is going to be to come up here and take down this trim ring. Removing the fan takes a matter of minutes. And then it's time for Cindy to make a decision. Now these are some of the ceiling medallions I picked up. Generally speaking, the higher the ceiling, the larger the room, the larger the object you're going to hang underneath - the larger the medallion.
But truthfully, any of these would probably work in this room. So do you have a preference here?
CINDY:
Well I think I like this big one in the middle.
RON HAZELTON:
Okay, then that's the one we'll use.
CINDY:
Great.
RON HAZELTON:
While Cindy returns to painting, I drill 4 pilot holes through the medallion which is made of lightweight molded plastic. Then apply construction adhesive to the back, press the medallion to the ceiling and secure it with screws. Installing a new fan is no more difficult than removing the old one.
So, what do you think?
CINDY:
It's gorgeous.
RON HAZELTON:
You got a whole new look here. Or maybe it's a whole old look.
CINDY:
Oh, it's perfect. And the ceiling fan and medallion - it's like the jewel of the room.
RON HAZELTON:
That's a good way to put it. Yeah.
CINDY:
It's beautiful.
RON HAZELTON:
Now before I move the rest of the furniture back in here, there's been - there's something I've been dying to do since I walked into this room.
CINDY:
Okay, anything.
RON HAZELTON:
Can I play that 142 year old piano?
CINDY:
Be my guest.
RON HAZELTON:
Well like the song I'm playing, I like to think I throw my heart and soul into my work. I suppose though it's probably best that I keep my day job. And after seeing how happy Cindy is here at the end of this day, it's a job worth keeping.