How to Level a Floor Before Putting Down Hardwood Flooring
Easy to use products make leveling a cracked, sagging, or warped floor possible
If you are ready to upgrade the floor coverings in your home, or even if you are installing them for the first time, it is vitally important that the sub-floor be level, smooth and free from blemishes. Self leveling floor compounds, which you can mix and apply yourself, are an ideal solution. The products, coupled with easy to install sub-flooring panels, will ensure that your finished floor covering is free from cracks, sags and creaks for years to come.
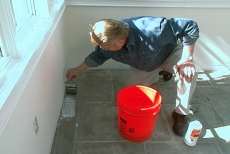
Apply a Bonding Agent to the Existing Concrete
A latex bonding agent must be applied to the existing concrete slab to ensure that the self-leveling floor compound adheres correctly. The bonding agent can be purchased at the home improvement store with the rest of your flooring products. Make sure that the surface is as clean as possible, and is free from any dust or debris. Apply the bonding agent around the corners with an inexpensive paint brush, and then complete the job using a mop.
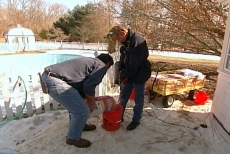
Establish a Routine for Mixing and Pouring
The floor leveler itself is a product that dries fairly quickly, so you need to be efficient in the process of mixing it up and pouring it. This is a process that is best done with a few people, so enlist some friends or family to help you set up an assembly line of sorts, with one crew mixing fresh product, while the other is transporting it inside to the crew that is pouring. Be sure to check the video clip for Ron's tip about pre-measuring the water for your mixture!
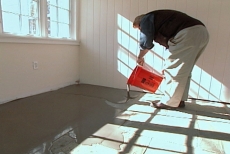
Tips for Pouring the Floor Leveler
Pour the floor leveling slurry slowly out onto the floor. Begin in one corner and work your way across the room. You will notice that you don't need to work with the product to move it into the right location, it will find its own way there as it seeks its level. It is very important that you work towards the door! Don't pour yourself into a corner! Once you've successfully made your way out the door, you can reach back in with a long handled garden rake to smooth out any lumps, although these should be minimal if you've mixed the product to the proper consistency.

Fill any Blemishes
If you are working with a large space, you may find that some of the floor level starts to set up before you are able to get back to it with the next bucket full. This can create a small ridge, as the product doesn't have the opportunity to flow together as one solid unit. These ridges can be eliminated with a different compound that is mixed and spread with a trowel. This same product can be used to fill any small cracks that may have been caused by holes or cracked grout in the existing floor.
Choose the Best Product for the Sub-Flooring
There are a number of products available for you to use as a sub-floor. This particular project is going to be completed with hardwood flooring, so we must install a subfloor that can be nailed into. The Dri-Core product is perfect for that. It is thick enough to be nailed into, and also has a water-resistant backing, just in case there are ever problems with moisture. Additionally, it is fairly easy to install, as it fits together with a tongue and groove system that doesn't require any nails or glue.
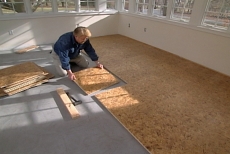
Tips for installing the Dri-Core Sub-flooring
When installing any sub-flooring product, it is important to leave a space of approximately 3/8" around the outside edge of the room. This will allow the floor to expand seasonally, without causing any of the panels or finished flooring to buckle. You can use a spacer to help you maintain a consistent gap, and then remove it once the sub-floor is down. You will also want to make sure the seams of your sub-flooring material are staggered. Much like laying brick, this creates a much stronger, more stable surface that is less likely to move under normal wear and tear.

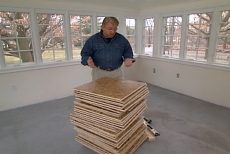
Ensuring the best results from hardwood flooring
To ensure the best long-term fit and results from hardwood flooring, allow it to rest in the room where it is to be installed for 48-72 hrs. before you actually put it down. This will allow the wood to acclimate to the temperature and humidity of the room and avoid later buckling.
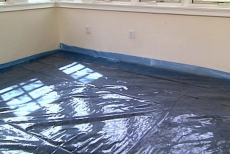
Determining where to begin and unrolling vapor barrier
Once you've determined the direction that you want the planks of your floor to run, it's time to begin. Run a chalk line to ensure the first run of planks is straight, and then snap it down. Don't rely on the wall to serve as a straight line, as they often aren't! Unroll the vapor barrier that will sit underneath the hardwood, running it up a few inches onto the wall. This will be trimmed away later. The pieces of the vapor barrier can be overlapped and then taped together with duct tape.
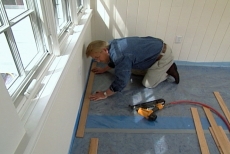
Starting the Pattern
Begin the installation of the hardwood flooring itself by opening a full carton and laying it out into a rough pattern that matches up the color variations and wood grains in a way that you like. Once you've establish a preliminary layout, install the first row on the chalk line we snapped in Step 8. You should be able to see it through the clear vapor barrier. The first row should be face nailed into place. These holes can be filled when the project is done.
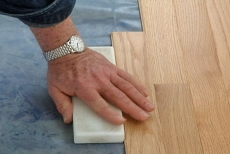
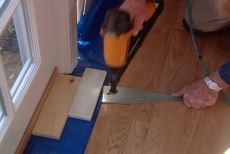
Using a Flooring Stapler
The tongue and groove system of installing hardwood flooring allow you to use an angled flooring stapler. The fasteners will be hidden, with each nail head hiding underneath the groove of each successive piece that you install. As you install the successive rows of hardwood flooring, you may find that some pieces fit together better than others. Stubborn pieces can be persuaded to fit into place by using a plastic block to lightly tap them to the grooves. Avoid using a hammer for this, as it will damage the tongue and groove system. A pull bar can also be used to work difficult pieces into place near walls or corners where your block may not fit. These tools are available at the home improvement store where you purchased the flooring.
Finishing touches
Once the final pieces have been trimmed and nailed into place, (you may have to face nail a few more if your stapler won't fit into corners or up against walls), it's time to install the baseboard. This is also the time to use a matching hole filler to fill any nail holes you created in the floor by face nailing.
Blog Articles

Maximize Your Yield with DIY Netting for Strawberry Beds
Keep your strawberries safe from pests with our DIY strawberry cage netting solution. Learn how to create sturdy frames and find the best netting for your strawberry plants.

Change It Up: Swapping Out Your Light Switch Plates
Tired of boring light switch covers? Upgrade your home decor with this simple guide on replacing light switch plates and make a statement in every room.

Revamp Your Outdoor Space: How To Stencil A Concrete Patio
Learn how to create a stunning patterned concrete patio with our easy-to-follow instructions for stenciling. Upgrade your outdoor space in no time.


