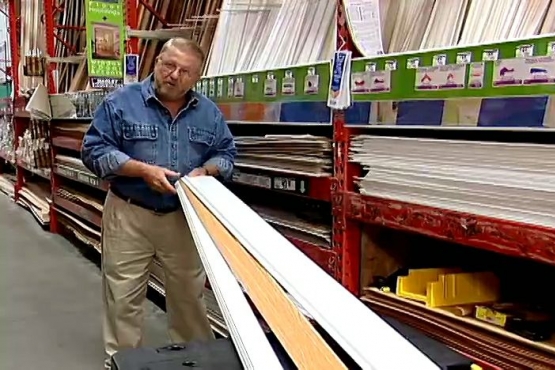
RON HAZELTON:
Well, I’ve got the itch to hit the road again, I am headed for the mile high city Denver Colorado.
We're on our way to a neighborhood that got its start in the last century and a house that is one of the oldest in that part of town. It's owned by a brother and sister team, Brett and Alex. And today, sister Alex has agreed to give her brother a hand.
Hey guys.
[SEVERAL SPEAK AT ONCE]
RON HAZELTON:
Brett has come up with a bright idea for his living room. He wants to install cove lighting and has ideas on where it should go.
BRETT:
What I'd like to see here is to bring it down about 8 inches and go ahead and leave the reached brick above the window.
RON HAZELTON:
Very nice brick by the way. Did you expose that by yourself?
BRETT:
Yes, I did.
RON HAZELTON:
So what are you after here, light bouncing off the ceiling? Or kind of a soft glow up BRETT:
I'm rthere -
BRETT:
I'm hoping a soft diffused light on the ceiling may widen the room.
RON HAZELTON:
I had a good idea of what Brett wanted and showed him what I had in mind. So here's what I think we should do. We'll start by putting up a one by 4 ledger like this. And we'll run it all the way across the wall. And then to that, we'll attach this piece of crown molding like this.
Now the nice thing about this, it's gonna give us a natural sort of trough up here and then we can put the lighting right in there and hide it.
ALEX:
I think that's gonna look nice.
RON HAZELTON:
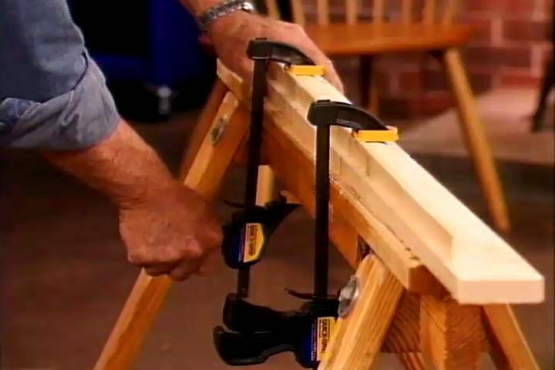
The decision is unanimous. So we get out to the backyard and get started. The ledger or backboard will be made from one by 4 lumber. To give things a little more interest, we decide to create a detail on the bottom edge.
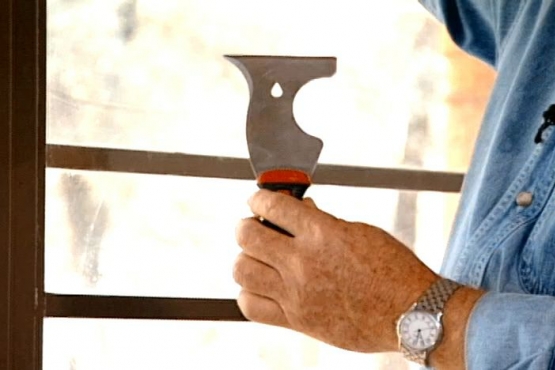
So Brett, if you'd plant that down there. Alex, you clamp this up here. Keep your clamps pretty much close to this rear edge right here. There you go. Now we're gonna shape a detail on the edge of this wood using this tool called a router. Ever use one of these before?
BRETT:
Never.
ALEX:
Never.
RON HAZELTON:
Well it's a rotary cutting tool. There's a cutting bit in here - you can see it spins around. And a piece of carbide steel right here on the edge. To use this, all we do is set the plate on the wood like this and then move it along like this.
I'll demonstrate and then you guys try it out. So let's start down here at this end of the board -
This bit has a ball bearing guide that rolls along the edge of the wood preventing the bit from cutting in too deeply. Now lets come around here, why don't you try it.
ALEX:
Okay.
BRETT:
The on off switch is over here.
[OFF-MIKE OFF TOPIC]
RON HAZELTON:
in no time, Alex gets the hang of it. Then it's Brett's turn. The cove we've just routed on the ledger will make it blend nicely with the crown molding. Painting the individual parts before we assemble them will save us a lot of time.
ALEX:
Just got paint on me.
RON HAZELTON:
Our next job is to attach small corner blocks to the ledger strip. These will give us a place to secure the cove molding and also hold the molding at the proper angle. Wood glue is applied to the back of the corner blocks which are then set into place.
Place the block right here on this ledger strip. Then using this nail gun, we're just gonna pin this in position. Put one pin on this side right here. And then one over here. There you go. Right and then this one you gotta be like at about 45 degrees.
Down a little lower.
With the blocks attached, we have only one thing left to do before we go inside. Drill some pilot holes into the ledger.
Just go ahead if you would Alex. You and Brett build the rest of these.
[OFF-MIKE OFF TOPIC]
Nice and straight on the drill, vertical. Okay guys, now it's time to put this up. I want to create a nice straight line. This is a chalk line here. So Brett, you go up the ladder there. Alex, you go up on this ladder and just stand by.
ALEX:
Okay.
RON HAZELTON:
Pull the string out.
ALEX:
Okay.
RON HAZELTON:
About a foot out and then - all right, you guys did a really nice job on that line.
[BOTH SPEAK AT ONCE]
BRETT:
All right.
RON HAZELTON:
Now this is the first piece of ledger right here. The bottom edge of this on that blue line.
While Alex and Brett hold the ledger in place, I insert a carbide tip masonry bit into the pilot holes to mark their position on the wall. Using the small holes as guides, I drill larger deeper holes. A piece of tape on the bit acts as a depth gauge. Into the larger holes, we'll place plastic wall anchors. Then install the screws that will hold the ledger securely to the brick wall. Now it's time to attach the strips of crown molding.
Now we're gonna both nail and glue these in place. This is construction adhesive. And we're just gonna put a dollop of this on each corner brace right here, just about like this. Just about a dime size dollop -
After the construction adhesive is applied. We set the crown molding in place one section at a time, attaching it to the corner blocks and bottom edge of the ledger with a nail gun. Now this is how we're gonna get the lighting behind that cove molding.
It's called cable lighting. It's great stuff to work with. And very easy to hook sections together. There's a little connector right here so you'll just simply slide this on the end. See these two little pins. Those pins go right in the end of the cable like this. And so - this plugs right in.
You can also cut this to length easily. Just have to cut it right at this little scissors symbol right here. I'm gonna use a pair of wire cutters here. Snip that. Okay. And then just screw on this end cap here. All right we plugged the lights in guys.
So now all we've gotta do is just put them right behind that crown molding -
[BOTH SPEAK AT ONCE]
- right in that trough up there.
ALEX:
That looks really nice, Ron.
RON HAZELTON:
Yeah. You like it?
ALEX:
[Affirmative].
RON HAZELTON:
It's like Christmas year round huh?
We couldn't help but admire the effect it was having on the room. The hour was late though and for me, it was time to say goodbye. It turned out just about the way I thought.
[BOTH SPEAK AT ONCE]
BRETT:
That looks great.
RON HAZELTON:
All right, I'm not gonna hang out - I gotta get up early in the morning so - it was a pleasure working with you.
[BOTH SPEAK AT ONCE]
ALEX:
Bye Ron, thanks.
RON HAZELTON:
Bye bye.
ALEX:
See and it really - really fancies up your room.
BRETT:
It looks better than we imagined it. It's really nice.
ALEX:
You owe me one.
BRETT:
Big time.
ALEX:
Big time.