How to Make Wall Panels with Molding
Learn how to construct and wallpaper decorative molding frames.
Originally planned as wallpaper border and decorative frames installed over a freshly painted living room wall, this project gains an upgrade with the addition of chair rail molding and a mirror over the fireplace. A little paint, wallpaper, and trim dramatically change the appearance and character of the room, picking up the colors in the furniture.
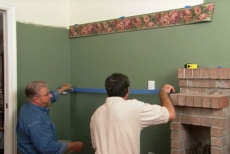
Lay out a Design Mock-up for the Decorative Wall Frames
Make a temporary panel mock-up for your decorating elements using masking tape to simulate chair rail and decorative wall frames and to get a feel for the best elevation. Tape up a strip of wall paper border for effect.
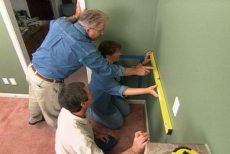
Mark Final Measurements and Layout for the Decorative Wall Frames
Transfer measurements and positions for the decorative wall frames on the wall to guide actual installation. Remove the temporary tape and use a bar level to ensure lines are level and plumb for each panel.
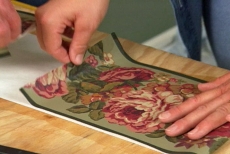
Prepare the Wallpaper Border for the Decorative Wall Frame Project
Use a small paint roller and paint tray to apply paste activator to the wallpaper border to go above the decorative wall frames. Book the wallpaper, folding the pasted sides together for a few minutes to thoroughly moisten the adhesive.
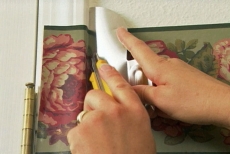
Apply the Borders above the Decorative Wall Frames
Position borders at the appropriate pencil marks. Ensure the wallpaper pattern matches in each element of your decorative wall frames project. Press the border in place, removing air bubbles and wrinkles with a squeegee. Trim with a utility knife.
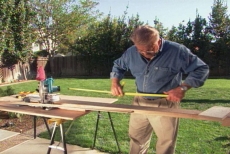
Make a Support System for the Decorative Wall Frame Trim
Make a work support system with a stop block to hold the wooden trim/molding for the decorative wall frames and ensure that pieces are cut to exact length. Lay the molding across saw horses and paint it before cutting.
Cut the Decorative Wall Frame Trim and Chair Rail
Miter the ends of the decorative wall frame trim as required and cut the required lengths. Cut and miter the ends of the chair rail so that it fits together vertically on the inside corners of the room.
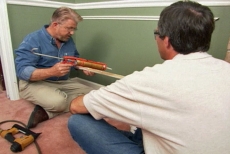
Glue and Nail the Decorative Wall Frame Trim in Position
Position and secure the horizontal decorative wall frame trim to the studs with a nail gun. Glue the vertical pieces with construction adhesive and drive in nails at opposing angles for additional support.
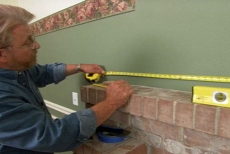
Measure for a Decorative Wall Frame above the Fireplace
Measure dimensions for a decorative wall frame above the fireplace surround. Cut the trim and add attractive plinth blocks to eliminate the need to miter the corners. Hang a mirror in the center of the frame as a focal point for the room.

Fill the Nail Holes in the Decorative Wall Frame Trim
Fill nail holes in the decorative wall frame trim. Apply spackling compound with your finger if the trim is to be painted, and then touch up with paint. If the trim is stained, use wood putty in the correct color.
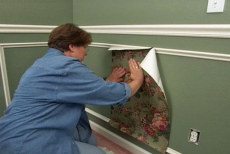
Add Wallpaper inside the Decorative Wall Frames
Paste wallpaper inside the decorative wall frames and trim the overhang with a straightedge and utility knife. Remove air bubbles and wrinkles before the paper dries and ensure that the pattern matches in all wallpaper elements.
Related Tips


Blog Articles

Maximize Your Yield with DIY Netting for Strawberry Beds
Keep your strawberries safe from pests with our DIY strawberry cage netting solution. Learn how to create sturdy frames and find the best netting for your strawberry plants.

Change It Up: Swapping Out Your Light Switch Plates
Tired of boring light switch covers? Upgrade your home decor with this simple guide on replacing light switch plates and make a statement in every room.

Revamp Your Outdoor Space: How To Stencil A Concrete Patio
Learn how to create a stunning patterned concrete patio with our easy-to-follow instructions for stenciling. Upgrade your outdoor space in no time.


