RON HAZELTON:
Laurie and David Oreol of Naples, Florida have asked for a little help so I'm off to see if I can lend a hand. The couple took on an extensive remodel themselves. Though lately they're dedicating more time to their competitive show cats.
Including Tilas Lars, a grand champion abyssinian. But today they're getting back in the do it yourself spirit. And have invited me to help accent their beautiful home by installing a decorative wall niche. So - you guys picked this out of a catalog?
DAVID:
Yes we did. At our local home improvement store.
RON HAZELTON:
Okay. Then it was special - it was ordered for you.
DAVID:
It was special order.
RON HAZELTON:
Okay. And what's this made out of? Lightweight, hm?
DAVID:
Yeah it is. It's a high density polyurethane foam.
RON HAZELTON:
Very pretty.
LAURIE:
It is, it's very attractive. I think it will add a lot to that wall.
RON HAZELTON:
This is where you're gonna put it.
LAURIE:
Absolutely.
RON HAZELTON:
I can see one problem right - this is your intercom right here.
LAURIE:
Right.
RON HAZELTON:
What are you thinking about doing with that?
LAURIE:
Just taking it right out. We have an intercom in every other room and the door is right there so -
RON HAZELTON:
So you won't miss that one. All right. I want to hold this up on the wall first of all.
LAURIE:
Okay.
RON HAZELTON:
Let me actually - Steve, give you that pencil. I'm gonna hold this up on the wall because I want you guys to get a sense of how high - don't worry about centering it all right now, but just height that you like. And I'll - I'm gonna be the mover upper downer here.
So you just tell me.
LAURIE:
I think it's just - ooh, that's a little high. That looks good.
RON HAZELTON:
Okay. You want to mark it, Steve.
STEVE:
Yeah.
RON HAZELTON:
Right up on top here.
STEVE:
All righty. Got it.
RON HAZELTON:
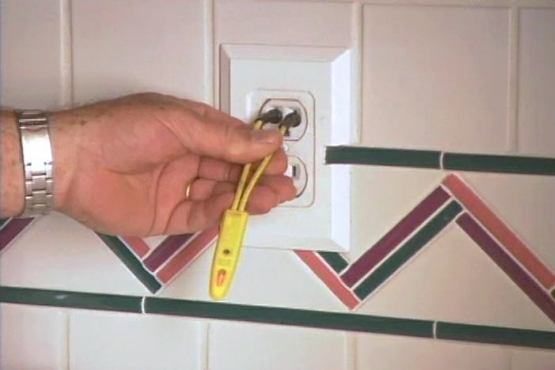
After turning off the power at the circuit breaker, Steve and Laurie's first job is to remove the intercom and light switch. They take off the face plates, disconnect the wires and pull the units out. Meanwhile I locate and mark both the center point of the niche and the center point of the wall.
So here's the center mark on the niche right here, there's the center mark on the wall. So we're just gonna put these two together and that automatically centers the niche in this -
[SOUNDS OF BANGING]
STEVE:
This is, these are the things you don't see on TV, right.
LAURIE:
Good thing that's polyurethane foam.
RON HAZELTON:
Did you see the way it bounced?
LAURIE:
Yeah.
RON HAZELTON:
Like a ball. Well inadvertently, I made a point here. Polyurethane is far more durable than the plaster it's designed to mimic. With a better grip on things, we line up the center mark on the niche with the one on the wall. Then while Steve and I hold it in place, Laurie traces the outline onto the wall with a marking pen.
Very nice. Sistine chapel quality I would say. Well we've located our studs near this opening that we're about to cut. Here's one here, one here and one here. And what we're looking at is sort of a road map of what's behind the wallboard.
You got a couple of problems. The opening as we've originally drawn it kind of falls right on top of this wall stud over here and we've got this switch that we've gotta deal with. This is a switch that's duplicated by another one on the inside of the bathroom.
We're gonna take this one out. But we're left with this opening right here. So our solution to clear this wall stud and to cover this box with the lip of our niche right here is to move everything to the right just about one inch.
That will be enough to accomplish what we want. But not so much that it appears to be off center. Now before we start cutting into the wall, we take a precautionary step. Steve uses a flashlight and compact mirror to take a peek inside through the intercom opening to make sure we're clear of any pipes, wires or heating ducts.
Over here in this bay between these 2 studs, we don't have an access port. So we're gonna cut one. I cut the inspection port with a drywall saw. Then Steve confirms that we're clear to make the big cut. While Steve and Laurie go to work with the drywall saws, I take a little time getting to know Tilas Lars, the first grand champion abyssinian I've ever met. Okay, all finished huh?
STEVE:
Yeah.
RON HAZELTON:
Okay, Laurie, grab right here. Steve, get your bands in here. Just kind of wiggle it back and forth a couple times and pull it off.
STEVE:
You sure this is what you want to do Laurie?
LAURIE:
Yeah.
RON HAZELTON:
Okay, pull it off. Take it off.
LAURIE:
Oh, it came off in one piece.
RON HAZELTON:
Beautiful. A small strip along the edge is still attached to a stud. So we remove it with a pry bar. Well we're about to take on the most interesting part of this project, removing these sections of wall studs right here that are in our opening.
Now 2 things are important here. I want to make sure that this is not a load bearing wall. What's a load bearing wall? Well that's a wall that supports some weight from above. Usually sealing joists. We went up in the attic and determined that this in fact was not a load bearing wall.
If you're going to take on a project like this, make sure that you do the same. And if you don't know, then that's the time to call in an expert and have them tell you. Secondly, I want to minimize the damage of the surrounding wall as I'm taking these out, so with that in mind, I've drawn some lines down here and cut some slots, just about an inch and a half below our opening and I'm going to insert this saw -
- this is called a reciprocating saw, the blade - because the blade reciprocates back and forth. We're gonna put it through this slot right here and I'm gonna cut off the bottom portion of this stud. Okay Steve. Want to give it a shot?
STEVE:
Sure, I'd love to.
RON HAZELTON:
See these are loose now but they are attached with screws that are coming through the dry wall from the other side, wallboard. So we're gonna have to kind of pull these out.
To get a better grip, Laurie and I attach a couple of clamps to the stud and then rock it back and forth. Just take the clamps off. Okay. And see if you can drop it down a little bit. There you go.
LAURIE:
Ooh, that came out easy.
RON HAZELTON:
Stud number one. Now we need to frame out the top and bottom of our opening with short two by fours. This one at the top called a header is cut for a snug fit. And attached to the cut ends of the studs with 3 inch screws. The bottom piece called the sill is attached the same way.
Together the header and the sill will secure and strengthen the cut ends of the studs. The only patching you'll need to do before installing our niche is to fill these cutting slots. Patience is before us. We are gloved, ready to apply the adhesive.
This is a polyurethane adhesive. The reason that you guys have put the gloves on is if it gets in your hands, it does not come off.
I apply the adhesive in a serpentine pattern along the lip. And add a few dollops on the back. I think we're ready. Maybe we should have done a test bit first.
LAURIE:
Oh.
STEVE:
Would have been a good idea.
RON HAZELTON:
Oh man - here we go. How you doing over there?
STEVE:
Pretty good, pretty good.
RON HAZELTON:
Make it?
LAURIE:
How long does it take for that glue to adhere.
[BOTH SPEAK AT ONCE]
RON HAZELTON:
Like a glove. About 25 to 30 minutes. Now there are a couple ways to do this. We could drive a couple small finish nails in here. But you know this is fitting so well because you guys did such a perfect job of cutting, I think that's gonna be fine.
We'll leave it just like that. Now Lars, this is a niche fit for a championship cat if I ever saw one. You look magnificent up there. Just majestic.
LAURIE:
Well wait a minute, you're not supposed to be up there.
RON HAZELTON:
I guess, I guess you're gonna be replaced by a vase.
LAURIE:
Yes.
RON HAZELTON:
Wow. So what do you guys think?
LAURIE:
Oh I think it adds great character to a wall that was very hard to put anything on.
RON HAZELTON:
Yeah it was too short to really do, do much with.
LAURIE:
Absolutely. You couldn't put another piece of furniture there.
RON HAZELTON:
How was it for you doing it?
STEVE:
I thought it was pretty easy. I was a little concerned what we would find when we cut into the wall and we had the problem with the -the wall studs that was easy to overcome in the end. So it was easier than what I thought it was gonna be.
RON HAZELTON:
You did a great job cutting those out, by the way. Good steady hand. Well wall niches are pretty simple to install. And come in a variety of styles and shapes. All said, they're a great way to add an elegant architectural element or a cat perch to just about any room.