RON HAZELTON:
Well, I'm on the road again, headed to Mechanicsville, Virginia to visit Steve and Katie Gormanlove. Steve and Katie explained that they really don't have any building experience. However, the arts and crafts room they created for their children, shows off Katie's keen eye for design.
Oh, look at this.
KATIE GORMANLOVE:
The '63 Comet, we had a friend of ours build for us.
RON HAZELTON:
They must just love this.
KATIE GORMANLOVE:
They like it, yeah.
RON HAZELTON:
And I would have loved to have had this as a kid.
KATIE GORMANLOVE:
Me too, me too.
RON HAZELTON:
That's why you probably did it.
KATIE GORMANLOVE:
That's why we've done it, right.
STEVE GORMANLOVE:
Right.
RON HAZELTON:
Well, tell me about the project.
KATIE GORMANLOVE:
Well, what we thought was, we want to have recessed shelves here, so they can —
RON HAZELTON:
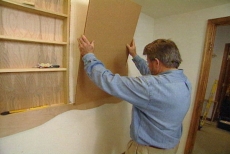
Rather than remove wall studs to create our recessed shelves, we're going to build these shelves into the spaces or bays between the studs.
KATIE GORMANLOVE:
They can just reach in and get their magic markers, their cotton balls, their shelves, whatever they happen to be working on.
RON HAZELTON:
Our game plan is to first locate the wall studs, then cut open the spaces in between, and finally build individual cabinets to fit those openings. An electronic stud finder quickly locates the wall studs. For confirmation, though, I always resort to my reliable hammer and nail method.
Okay, there's nothing there. I'm just going to move it over like a quarter of an inch at a time. [BANGING NOISES] There you go, right there. Okay? So this is the actual edge of the stud right here.
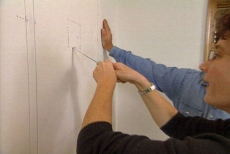
Now that we nailed down the stud locations, Steve and I draw their positions on the wall, so we'll know exactly where to cut the opening.
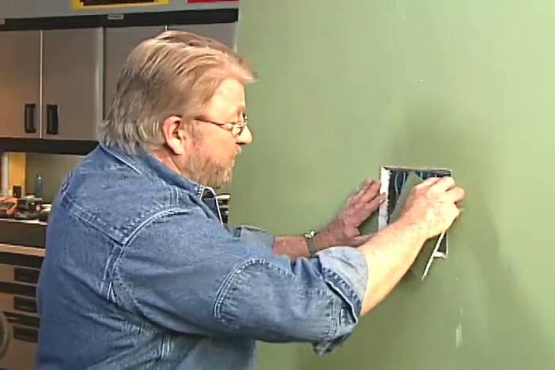
Before we actually cut this out, let's cut a little inspection hole.
A small inspection hole will allow us to take a peek inside the wall and discover potential surprises, such as pipes and wiring before we commit to major surgery.
Go more. There you go. That's it.
Sawing the edges of the inspection hole at a 45 degree angle will keep the cutout from falling into the wall and allow it to be used as a quick patch if our inspection reveals a problem.
I'm very glad we did this.
KATIE GORMANLOVE:
What do we see —
[BOTH SPEAK AT ONCE]
RON HAZELTON:
I'm very glad we did this. Now what I want you to do is to put your hand in this hole and reach to the left.
KATIE GORMANLOVE:
Okay [[CLEARS THROAT]. Oh, sure enough. We've got some plumbing back there, don't we?
RON HAZELTON:
Ah, the best laid plans — well, it looks like it's time to reconsider.
Okay, this one we can't use — too many pipes.
KATIE GORMANLOVE:
Okay.
RON HAZELTON:
This one's okay.
STEVE GORMANLOVE:
Got one small wire here.
RON HAZELTON:
We could check this out. This might be available to us and then we'd have a bay here and a bay here. Are you concerned about it being off center?
KATIE GORMANLOVE:
No, I think that's fine. We’ll still have storage we had planned on and we can consider another alternative.
RON HAZELTON:
Like?
KATIE GORMANLOVE:
Maybe a bulletin board, a thing, might be fun.
RON HAZELTON:
Okay.
[BOTH SPEAK AT ONCE]
I could frame, you know, offset these two, okay.
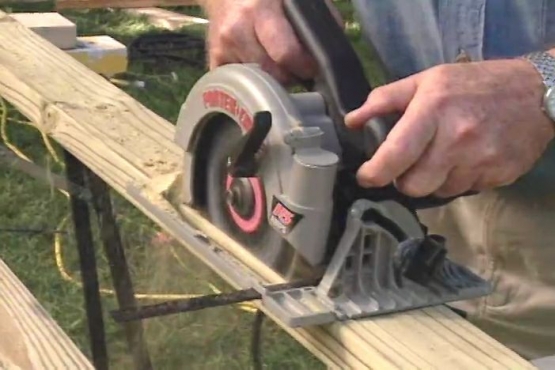
Now we're ready for some cutting. Now Katie, you thought this might be a good time to use power tools, but this is a job better done with a handheld wallboard saw. It cuts quickly, makes less dust and lessens the chance we'll accidentally cut through some hidden plumbing or electrical line.
You could probably stop right here, Katie. There's a there's a cable running down here which we'll have to be very — okay, good, okay.
KATIE GORMANLOVE:
There we go — look at that.
RON HAZELTON:
Now these electrical wires here are going to be a problem, so here's what we're going to do. I'm going to take this electrical box out, pull these wires up and run them through this wall stud, down on the inside of the wall on this side and put a new box in here.
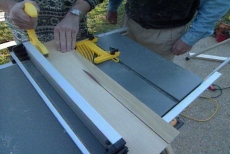
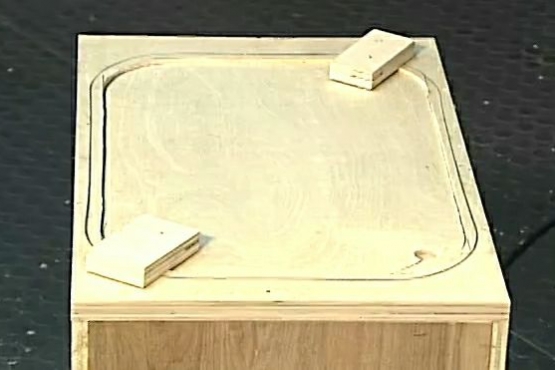
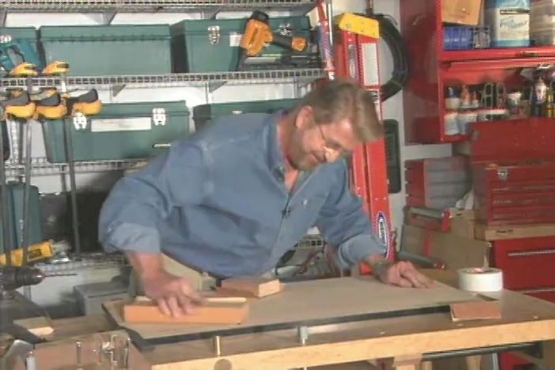
With the wall prepared, it's time to start building our cabinets. They'll consist of a top, bottom, sides, back and shelves. [SAWING] First, we'll rip all the parts except the back to the same width, using the table saw. [SAWING]
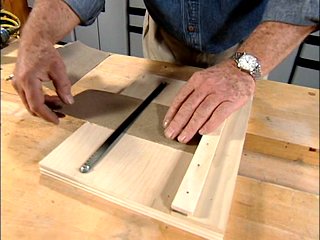
When it comes time to cut the pieces to length, it's obvious that Hannah is an eager learner. Yeah, see this corner right here? Just imagine you're going to push the wood right into that corner with this other hand, okay? Okay. Then go ahead and cut.
Back indoors, we lay out the cabinet sides on a work table. On top, we place samples of the various storage containers the girls will be using. Now the idea here is to figure out the best shelf spacing. Once we've done that, we draw the shelf locations on all four sides at the same time.
Want to put some on? Say yeah, all right.
RON HAZELTON:
Young Gracie applies wood glue to the end of a shelf, as we begin to assemble our cabinet.
STEVE GORMANLOVE:
A little more, there you go.
KATIE GORMANLOVE:
Wonderful. Thank you.
STEVE GORMANLOVE:
All right.
RON HAZELTON:
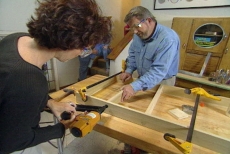
The top, bottom and shelves are placed in between the sides, held in position temporarily with clamps and then secured with nails.
Hannah, you're a natural. I think I'd ask Mom and Dad for a cordless screwdriver for Christmas.
Not to be outdone by her sister, Hannah lays down a near-perfect bead of glue for the back of the shelf.
Now, the idea is to get it flush with all the edges. Just use your fingers and feel —
Once in place, the 1/4-inch plywood back is attached with nails and guess who does the nailing?
[MUSIC]
RON HAZELTON:
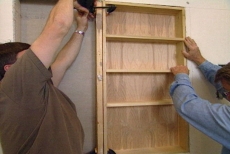
We're back in Mechanicsville, Virginia. Hannah and I are just finishing up our first recessed cabinet for the arts and crafts room.
There you go. Your first shelf. What do you think?
HANNAH:
Looks great.
RON HAZELTON:
Yeah, it does look great. Okay, Steve, let's see if this fits.
STEVE GORMANLOVE:
All right — that looks great.
[BOTH SPEAK AT ONCE]
RON HAZELTON:
Hannah, could you bring some clamps over there.
[INAUDIBLE]
STEVE GORMANLOVE:
You did a fine job on there. Good job, perfect.
RON HAZELTON:
You like that?
A real nice fit. Now we clamp the shelf to our wall stud, making sure the face of the shelf is perfectly flush with the face of the drywall.
STEVE GORMANLOVE:
Okay. Yeah, I was apprehensive at first and —but once I got in the thick of it, the first couple cuts and I got used to it. It was fun. It was a lot of fun.
RON HAZELTON:
After drilling a pilot hole and countersink, we attach the shelf to the stud. Shims help us keep it level and plumb.
STEVE GORMANLOVE:
All right, it looks good.
RON HAZELTON:
Very nice.
Katie wants the shelves to have a whimsical frame with sweeping curves.
KATIE GORMANLOVE:
And up and down. There we can go up —
RON HAZELTON:
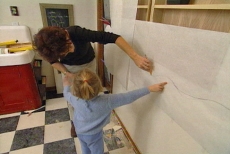
So she first tapes paper on the wall, then mom and daughter sketch the frame outline.
KATIE GORMANLOVE:
Yeah, we’ll, straighten that up.
RON HAZELTON:
We carefully take the paper down and then, up go strips of 1/4-inch thick plywood. The installation is temporary, so we just tack the plywood in place with a few small nails. The spray adhesive is applied so that we can temporarily attach the strips of paper to the surface of the plywood.
Hold this up Katie,if you can align those —
KATIE GORMANLOVE:
Okay.
RON HAZELTON:
— reference marks now.
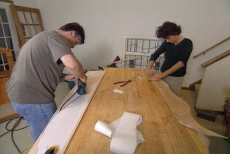
After trimming off the excess paper, we remove the plywood and cut it to shape, using the paper pattern as a guideline.
KATIE GORMANLOVE:
This is a very satisfying creative challenge, because we're able to incorporate a lot of elements here. We're able to take something that's solid like wood but it's also organic and we can make it appear fluid.
Okay, good. Now I've never done this either. I've been always wanting to experience it.
RON HAZELTON:
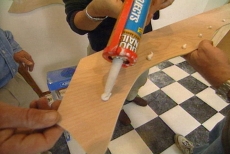
Now it's time to install the family work of art. We apply some pan adhesive to the back of the frame sections, then nail them to the edge of the cabinets. [NAILING]
Now remember, this is the bay that we couldn't use because it had the plumbing inside and Katie came up with a great idea, which was to put a bulletin board up here. So that's exactly what we're going to do now. We've moved the electrical outlet from down here, up here.
We’ve patched up our hole and I'm ready to put this up. So we'll start by putting some construction adhesive or pan adhesive on the back of our cork board here. All right, so let's drop this inside our frame. Cut this to fit.
One last piece of trim completes this Gormanlove original and our shelves are now a piece of art.
Just doing my last bit of nailing here.
[MUSIC]
Well, what do you think?
KATIE GORMANLOVE:
Love it.
STEVE GORMANLOVE:
It's great. Better than expected, I might say.
[BOTH SPEAK AT ONCE]
KATIE GORMANLOVE:
Excellent —
RON HAZELTON:
It was so much fun having the kids involved in building something for their own room.
KATIE GORMANLOVE:
Mm-hmm [AFFIRMATIVE].
RON HAZELTON:
And Hannah has definitely got a future in power tools as far as I’m concerned.
[LAUGHTER]
I have a favor to ask you. When you get this painted, would you send me a videotape of that?
KATIE GORMANLOVE:
Sure.
[BOTH SPEAK AT ONCE]
STEVE GORMANLOVE:
Absolutely.
RON HAZELTON:
I'd love to see the finished product.
KATIE GORMANLOVE:
Sure.
STEVE GORMANLOVE:
Sure.
RON HAZELTON:
Thanks, guys. It was wonderful being here.
KATIE GORMANLOVE:
Thank you, thanks, Ron, loved it.
STEVE GORMANLOVE:
We enjoyed it, thank you.
KATIE GORMANLOVE:
Oh, absolutely.