How to Repair Broken Corners and Edges on Furniture
A technique for replacing and restoring missing or damaged edges and corners on furniture and cabinets.
This attractive armoire was rescued from a landmark New York City hotel that was going out of business. The piece was in great shape except for one corner that was broken off and missing. Whether you’ve also had a mishap that led to a broken piece of furniture or inherited something that was already broken, this technique can give it another life. With just a few steps, I’ll show you how you can repair broken corners and restore your furniture for years to come!
Materials Needed:
- Polyester Resin
- Utility Knife
- Sandpaper and micro-blade
- Acrylic Paint & Lacquer for finishing
The basic steps to this technique are to replace the missing material, shape and smooth the surface, and restore the color and finish. The first objective is to use polyester resin to fill the void of the broken corner or missing material. The idea is to slather this putty onto the broken furniture so that it will harden in a way that you can then shape it. Once the resin has hardened, the task is to shape it to look as natural to the furniture piece as possible. I found that using a micro-blade is very precise and wrapping a dowel with sandpaper can help you get into spaces more easily. The last step is to match the furniture color and finish.
With these steps and only a few materials, you can repair broken corners on furniture and restore them. If you enjoy rehabilitating furniture, you may also enjoy how I repaired and refinished an antique chair and repair gouges in kitchen cabinets.
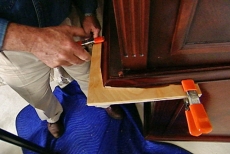
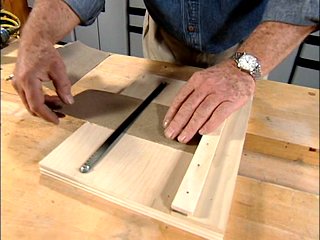
Support the Wood Filler with a Small Board during Application
Clamp a flat smooth scrap of wood beneath the repair area to support the polyester resin during application. Spray the board first with WD-40 lubricant to limit sticking and make it release easily after the resin dries.

Mix the Catalyst and Wood Filler Resin before Repair Application
Scoop a small amount of resin wood filler onto a flat surface and mix in the supplied catalyst before applying it to the furniture repair. Per directions, more catalyst will speed up the chemical reaction that hardens the resin.
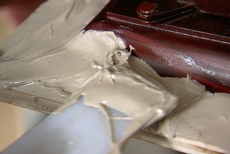
Apply the Activated Resin Wood Filler Quickly before It Hardens
Apply the mixture to the broken furniture quickly to fill gaps and form a thick edge that can be shaped like the original later. Neatness is not too critical, but applying sufficient mixture before the resin hardens is important.
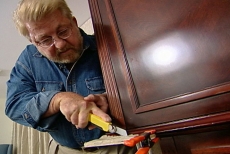
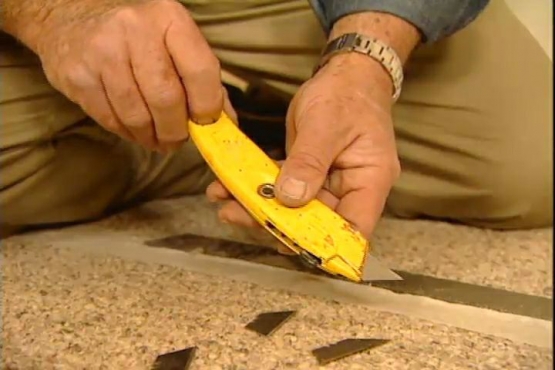
Cut away Excess Resin Wood Filler with a Utility Knife
Let the resin wood filler set to a firm-but-pliable consistency. Remove most of the excess material from the furniture repair. Start by cutting the edges with a utility knife, leaving enough margin for finer shaping in the next steps.

Shape the Fully-hardened Resin Wood Filler
Unclamp the wood support and begin shaping the fully-hardened resin wood filler. Use a wood rasp or stainless steel micro-blade that is designed to remain free of debris. Contour the surface to mimic the undamaged area of the furniture.
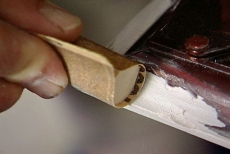
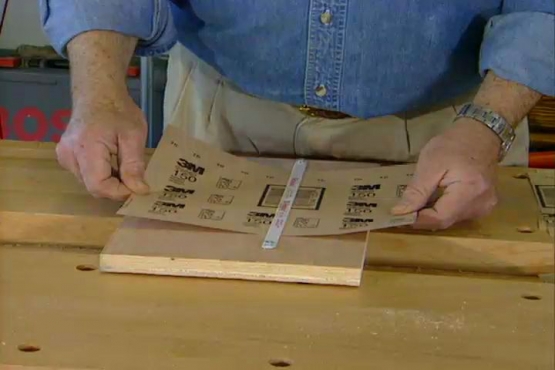
Smooth the Resin Wood Filler Furniture Repair with Sandpaper
Wrap sandpaper around a wooden dowel to smooth small curved surfaces of the furniture repair, using the free edges to hold the make-shift tool. Match the diameter of the dowel to the size of the curved resin wood filler surface.
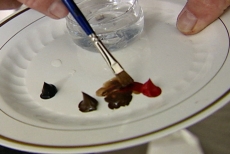
Paint the Completed Resin Shape with Artist's Acrylic Colors
Paint the smoothed resin wood filler with artist's acrylic colors. The resin does not accept wood stain. Mix earth tones with red or other highlights to match the wood and apply another coat if the color is not exact.

Mask Off the Furniture Repair and Protect the Surrounding Finish
Mask off the resin wood filler repair when the acrylic paint dries. Painter's tape and newspaper work well. Add a face mask for your own protection, because you will be working with an aerosol lacquer in the final step.
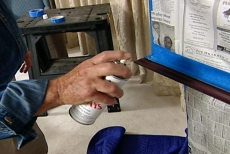
Spray the Resin Wood Filler with Lacquer for Gloss
Coat the resin wood filler repair with lacquer, holding the spray can a foot from the surface. Move back and forth in several light passes, removing your finger from the spray button at the end of each pass.
Related Tips


Blog Articles

Maximize Your Yield with DIY Netting for Strawberry Beds
Keep your strawberries safe from pests with our DIY strawberry cage netting solution. Learn how to create sturdy frames and find the best netting for your strawberry plants.

Change It Up: Swapping Out Your Light Switch Plates
Tired of boring light switch covers? Upgrade your home decor with this simple guide on replacing light switch plates and make a statement in every room.

Revamp Your Outdoor Space: How To Stencil A Concrete Patio
Learn how to create a stunning patterned concrete patio with our easy-to-follow instructions for stenciling. Upgrade your outdoor space in no time.


