How to Replace Pocket Door Hardware for Smooth Opening and Closing
Upgrade your door hardware with new pocket door pulls and track to give new life to existing pocket doors in your home.
Pocket doors are a great feature of many older homes, but as homes and door jambs settle over time, the pocket doors can start to show gaps when closed. Additionally, the hardware can start to drag after years of use, making the door difficult to open and close. By replacing the operating hardware on the door, you can revitalize the functionality of the pocket door, and improve the way that it looks.
The heavy duty, commercial grade pocket door hardware used in this project is from Johnson Hardware. Click here for more information.
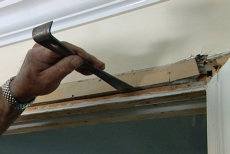
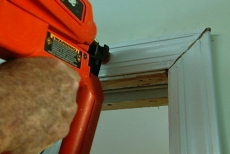
Remove the Door and Trim
Begin by removing the door from the opening. Pull it towards you and lift the rollers out of the track. Use stiff putty knives or pry bars to remove the trim, door stops, and any head jamb pieces that will keep you from having access to the track. Be careful as you remove these pieces, especially if you plan to reuse these pieces as you finish the project. You will be able to see the screws that hold the track in place over the door opening. Go ahead and remove these, even though you won't be able to get to the track screws that are hidden inside the wall yet.
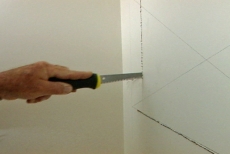
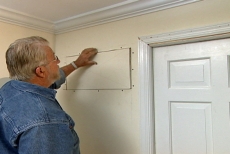
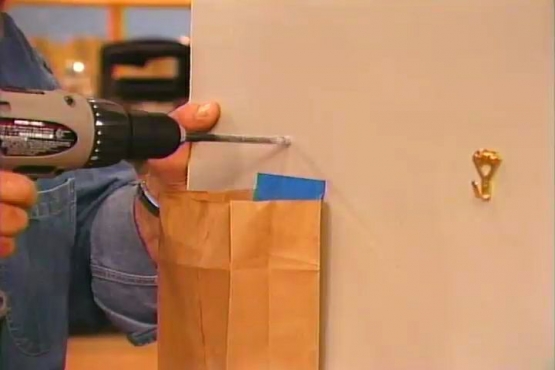
Open the Wall
In order to remove the remaining screws that hold in the track, and to then install the new one, you will have to make an opening in the wallboard. Use a stud finder to mark the location of the internal framework of the pocket door and mark it with a pencil. You need to make the opening large enough to accommodate your screwdriver or drill, but not any larger than necessary. Once you've outlined the opening, use a wallboard saw to cut a square opening. Take care not to damage the cutout, because you can reuse that piece to repair the hole when you are done. Set it aside to prevent it from breaking.
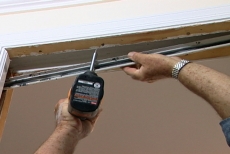
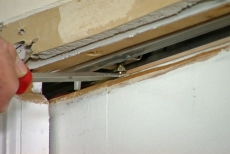
Remove and Replace the Old Track with the New
Now that you have access to the hidden portion of the track, remove the remaining screws and pull the track out through the door opening. If there were gaps in the door's fit, now is the time to take care of that. Ensuring that the new track is level will compensate for most gapping issues. Use shims under the new track to compensate for any settling that the house may have done since the original pocket door was installed. After you are satisfied that the track is level, screw it into place per the manufacturer's instructions. Remember, many new styles of pocket door track require that the rollers be in place when you install the track and cannot be inserted after you have screwed it in. Check this out before you install it to avoid frustration.
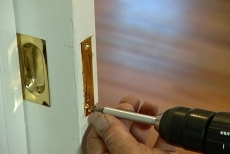
Replace the Hardware on the Door Panel
The roller hardware that is on the door panel can now be removed. After the new hardware is screwed into place, re-hang the door. Use a pry bar and shims to help you lift the door into place, and then hold it at the proper height while you secure the hardware at the top of the door.

Adjust the New Hardware
You may find that the door is not quite level or isn't positioned properly in the opening. Don't worry. Most new pocket door hardware systems are adjustable and can be easily manipulated so that the door fits perfectly. Follow the instructions that came with your hardware system about raising and lowering the respective corners of the door to eliminate any gaps and to ensure that the door moves smoothly through the opening.
Replace the Trim and Stops
Now you can put the trim pieces back. If you were careful when you removed the old ones, then there is no reason why you can't simply put them right back up. If you want to replace them with new pieces, you certainly can, but reusing the old ones saves time and money. Plus, if you live in an older home, it can be a challenge to find new molding pieces that match the profile of your old moldings.
Repair the Wall
Now that your door is in place and the new hardware is working properly, you'll need to repair the access hole that you cut in the wallboard. If you were careful with the cut out, then you can re-use that piece. Use drywall screws to install backers into the opening, leaving a lip of about 1 inch exposed into the hole. Not only will this give support to the loose piece, but it will give you something to screw it into. After it is screwed into place, use a quick drying joint compound to fill the screw holes and the seam. After it's dry, sand the area smooth and it will be ready to prime and paint.
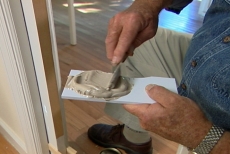
Replace the Pocket Door Pull
For this project, we were unable to find a new pull that exactly matched the profile of the old one. The remedy for this problem is to fill in the old holes and mortises with wood filler and to create a new surface to work with. Fill all of the holes and mortises in the door liberally with filler and then allow it to set up. As the filler begins to get rubbery (but before it hardens completely) use a utility knife to trim away some of the excess. This will save you a lot of sanding later on. After the remaining mixture completely hardens and cures, you can sand it smooth and reveal a virtually new surface to install the hardware of your choice on to.
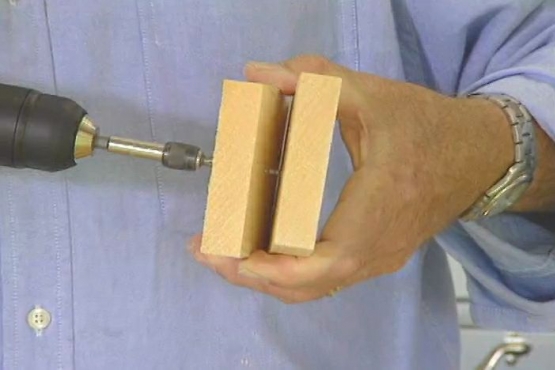
Create an opening for the Latch
Using a Forstner bit, drill a series of overlapping holes to form an opening for the latch mechanism. You can create a hole that is approximately the right size and shape for your latch with the drill, and then come back with a sharp chisel to make any small adjustments to the opening or to remove any small sections of wood that exist between the drilled holes. The latch opening doesn't need to be perfect because it will be covered by the faceplate, it simply needs to be big enough to allow the latching mechanism to function properly.
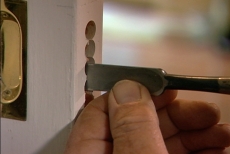
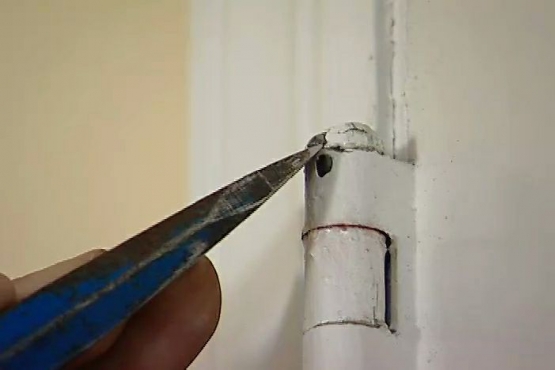
Chisel the Mortise for the Faceplate
Set the latch into place and temporarily screw it into place. You can use a sharp utility knife to score around the outside of the plate. Once you've clearly marked the outer edge of the faceplate with the knife, then you can remove the latch. You will see a perfect outline of the faceplate that you scored with the utility knife. Use your sharp chisel to gently and slowly remove the wood inside the scored area. You will need to remove enough wood to allow the face plate to recess into the edge of the door and create a flush fit. Since you use the faceplate itself as a template, the final fit and appearance should be just about perfect.
Related Tips


Blog Articles

Maximize Your Yield with DIY Netting for Strawberry Beds
Keep your strawberries safe from pests with our DIY strawberry cage netting solution. Learn how to create sturdy frames and find the best netting for your strawberry plants.

Change It Up: Swapping Out Your Light Switch Plates
Tired of boring light switch covers? Upgrade your home decor with this simple guide on replacing light switch plates and make a statement in every room.

Revamp Your Outdoor Space: How To Stencil A Concrete Patio
Learn how to create a stunning patterned concrete patio with our easy-to-follow instructions for stenciling. Upgrade your outdoor space in no time.


