How to Put up Wainscoting and Chair Rail
Learn how to cut miter and scarf joints to install wainscoting, chair rails, baseboards, and quarter round molding.
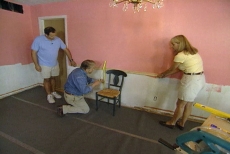
In bygone days, a wain was a large open wagon. Today, the term "wainscoting" describes decorative wooden wall paneling that is suggestive of the wide boards that covered the sides of the wagon. Typically, wainscoting covers only the lower portion of the wall and may be capped with a chair rail or a picture rail in the case of high wainscoting. It takes its character from the type of wood and construction used - salvaged planks from a barn make a rustic look, ready-made paneling cut to height looks more functional, and individual milled boards can add refinement to your room. This dining room project uses 1/4-inch thick milled tongue and groove planks with decorative routing and then caps the wainscoting with chair rail.
Determine the Desired Height for the Chair Rail
Place a dining room chair against the wall and measure from the floor to the top of the chair back. This measurement also determines the length and elevation of tongue and groove panels to be installed for the wainscoting.

Transfer Measurements to the Walls and Snap a Chalk Line
Transfer the measurement for the top of the tongue and groove paneling to each end of the walls. Snap a chalk line across each wall between the marks to position the panels once they are ready for installation.
Locate and Mark Each Stud to Secure the Chair Rails
Use an electronic stud finder to locate wall studs in the walls where wainscoting will be installed. Mark them with a pencil above the chalk line for the top of the tongue and groove panels.
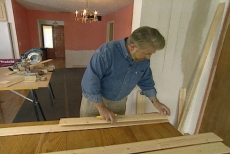
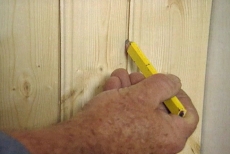
Make a Pattern for Cutting Tongue and Groove Paneling Lengths
Measure and cut a single length of tongue and groove paneling to use as a pattern for the other paneling cuts for the wainscoting. Always use the same board as a guide so that the length doesn't gradually creep upward.
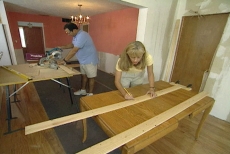
Create an Assembly Line for Faster Repetitive Cuts
Set up an assembly line with a helper to make fast and efficient repetitive cuts for the wainscoting tongue and groove panels. One person can mark and measure while the other makes the cuts with a miter saw.

Nail Paneling to the Wall at the Chalk Line
Position the top of the wainscoting paneling at the chalk line and nail it with a pneumatic nail gun 1/2 inch from the top and bottom of the panels. Nail heads will be invisible, covered by baseboard and chair rail.
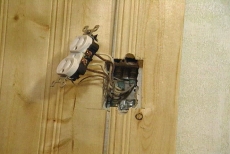
Notch Tongue and Groove Panels around Electrical Outlets
Switch off power to electrical outlets and remove the covers. Mark necessary cuts around outlets and notch them on wainscoting panels with a jig saw. Cut notches to accommodate the receptacle mounting screws. Secure panel with nails.
Measure and Cut Narrower Corner Panels
Tape a panel in the next-to-the-last position before the corner. Butt another panel into the corner and trace its overlapping edge as a cutline on the taped board. Remove both. Rip the marked board, installing it in the corner position.
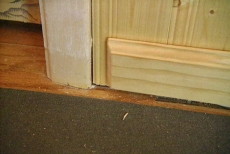
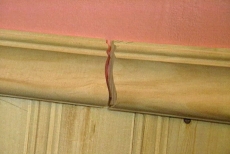
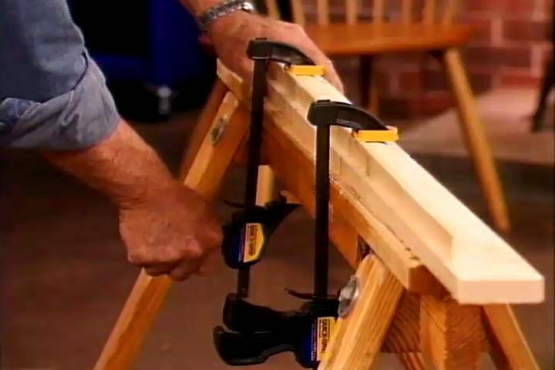
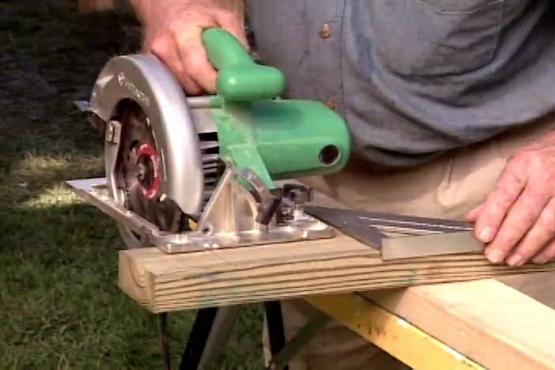
Bevel or Miter Ends of Baseboards and Quarter-round Molding
Bevel cut baseboards and quarter-round molding where they meet door framing. Make 45-degree miter cuts where two lengths meet at corners. Form scarf joints where lengths must overlap in the middle of a wall. Secure with a nail gun.
Cut Chair Rail and Nail Directly into the Wall Studs
Measure and cut chair rail. Fit it against the top of the tongue and groove panels and nail directly into the wall studs above the wainscoting. Bevel, miter, or make scarf joints as required using the techniques demonstrated earlier.
Related Tips


Blog Articles

Maximize Your Yield with DIY Netting for Strawberry Beds
Keep your strawberries safe from pests with our DIY strawberry cage netting solution. Learn how to create sturdy frames and find the best netting for your strawberry plants.

Change It Up: Swapping Out Your Light Switch Plates
Tired of boring light switch covers? Upgrade your home decor with this simple guide on replacing light switch plates and make a statement in every room.

Revamp Your Outdoor Space: How To Stencil A Concrete Patio
Learn how to create a stunning patterned concrete patio with our easy-to-follow instructions for stenciling. Upgrade your outdoor space in no time.


