How to Stencil Paint a Bathroom Tile Floor
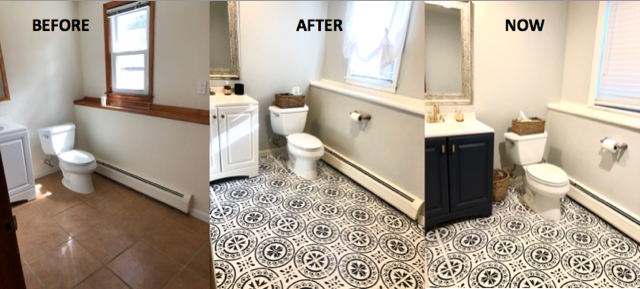
My friend, Bianca, recently purchased a "fixer-upper" home and wanted to update her bathroom. She decided to stencil paint a bathroom tile floor. Here is her story and how she did it.
Step-by-step instructions on how to stencil paint a bathroom tile floor for a bathroom makeover.
We had purchased our home about 8 months before I started this project. This was our first home and it was a little bit of a fixer-upper. I completely loathed the downstairs bathroom; it just wasn’t our style. I didn’t want to rip up the tile since I knew it would be so very messy and just didn’t want to deal with that. One day I had this crazy idea to paint the tile but I wasn’t sure if it could be done. After hours and hours of research, I learned that it was possible! I went into this project excited for the outcome but totally prepared to replace the title if this didn’t work out. So, I ran to Home Depot and the local Ring’s End to purchase all of my materials.
MATERIALS
- Krud Kutter Cleaner/Degreaser
- Zinsser Bulls Eye 1-2-3 Primer for all surfaces Water-based
- Snow White Chalk Paint
- Benjamin Moore Hale Navy Water-based Paint
- Satin Water-based Polyurethane
- Painters Tape
- Stencil
- Sandpaper
- Small Foam Roller
- Paint Trays
- Paint Brush & Small Craft Paint Brushes
PREP THE FLOORS
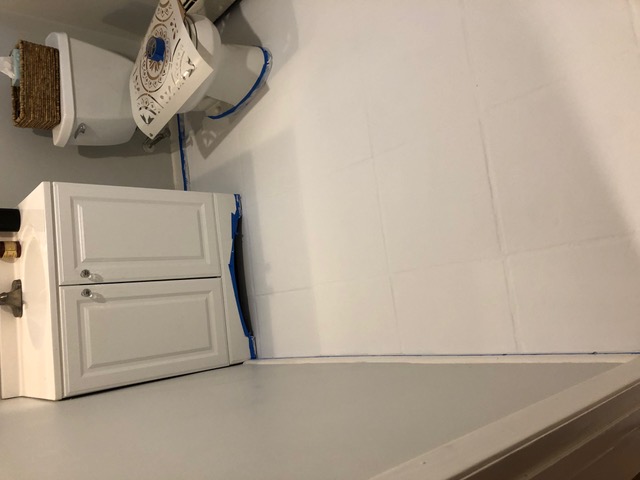
 I spent a long time prepping our floors. I started by taking everything out of the bathroom and thoroughly washing them. I used Krud Kutter with a brush and really scrubbed, especially on the grout. After that, I used our Bissell Steam Mop and washed the floors a few times to make sure all the cleaner was washed off. Then I did a quick sand with our electric sander. If you don’t have an electric sander, you can easily use a sanding block, too. I vacuumed and washed our floors again to make sure that any dust or residue was removed from the floor. It’s important to not cut corners during prepping and washing of the floors. Dust-free floors are key to a good finish. After washing the floors, you’ll want to avoid wearing shoes in the space and only wear clean socks. This is because you don’t want to track any dirt or dust from other areas of your house into this now-clean space.
PAINTING THE FLOORS
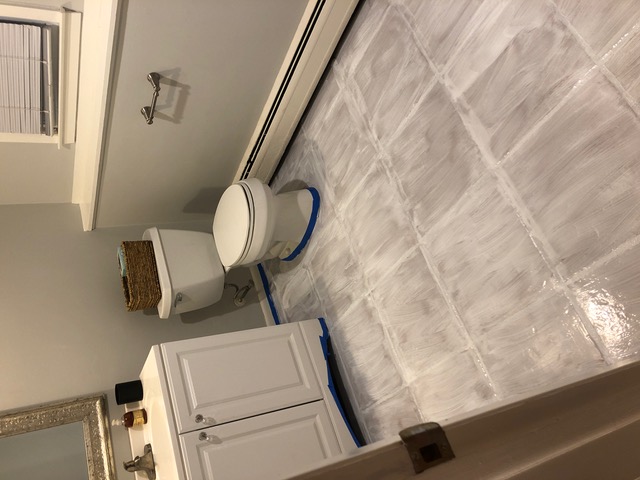
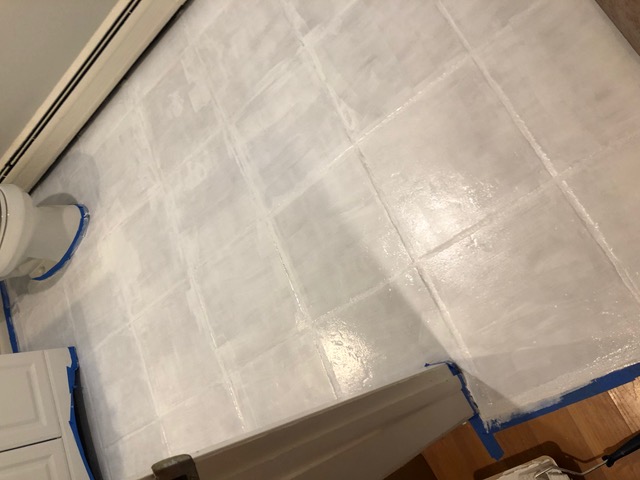
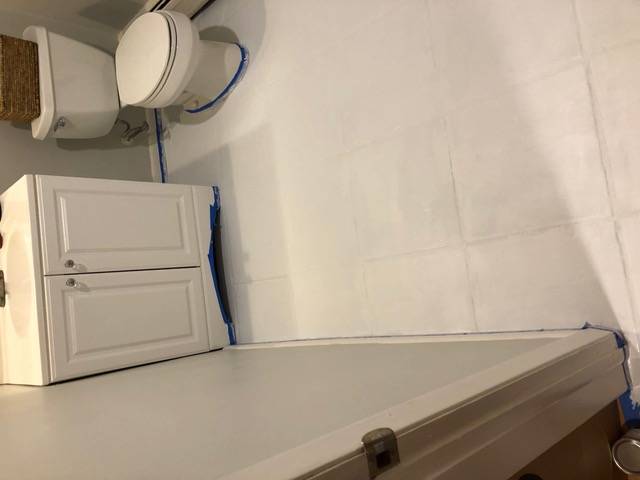
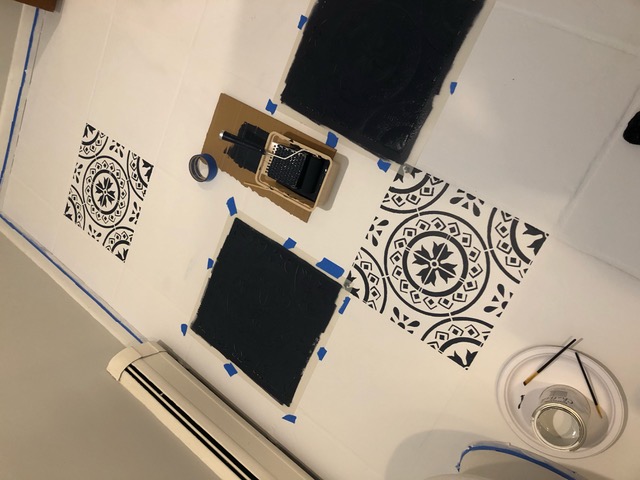
Before I started to paint, I taped off all of the baseboards, the toilet, and the vanity. When I started to paint, I made sure to start in the furthest corner of the bathroom and slowly make my way out to the door. I primed the floors with two coats of Zinssers Bulls Eye 1-2-3 Primer. After the primer was completely dry, following the primer directions, I moved on to paint two coats of the Chalk Paint in the Snow-White color, again making sure between each coat the floors were completely dry.
STENCILING
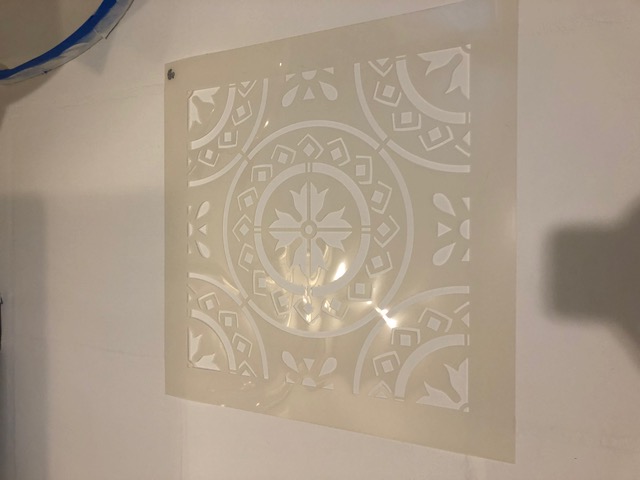
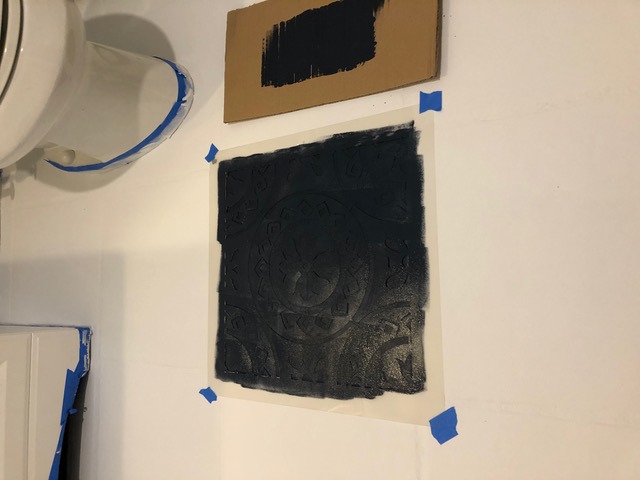
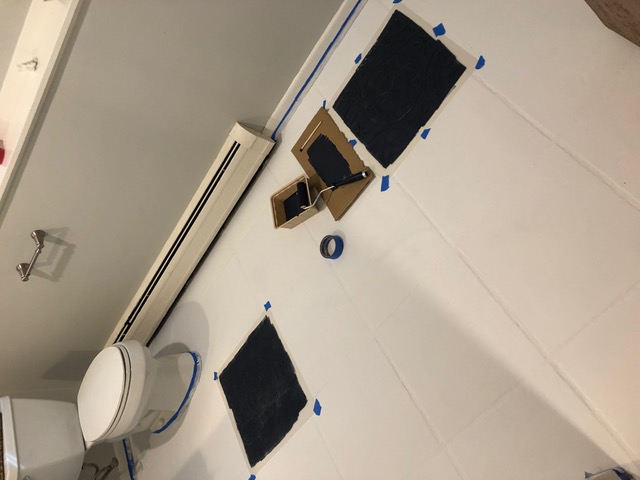
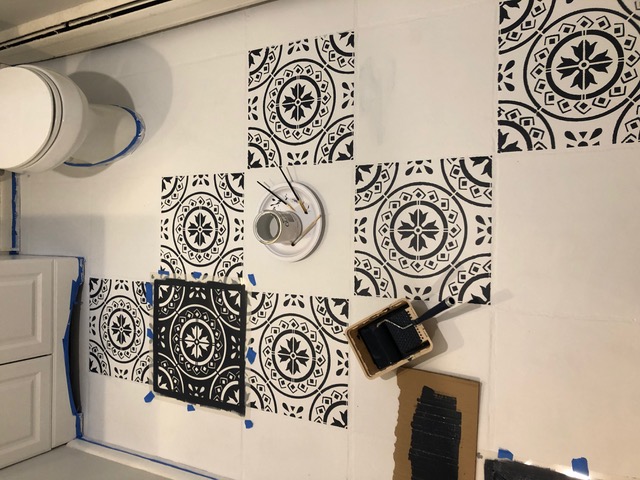
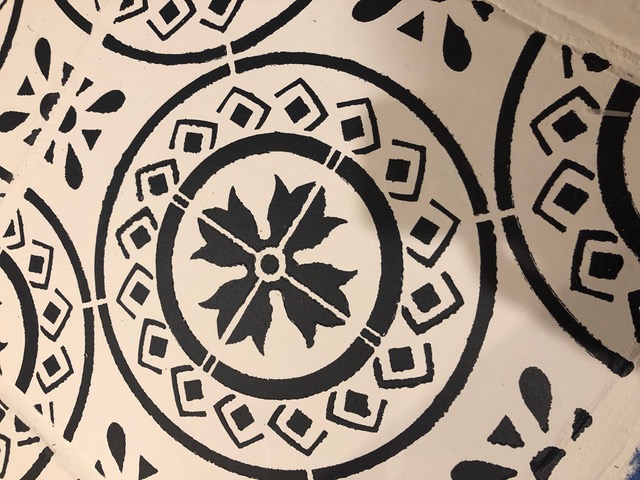
Stenciling was the hardest part of this project because it was extremely tedious. It also took some time to find a pattern that I loved in a high-quality stencil that would hold up throughout the project. After many hours of research to find the perfect stencil, I ended up going with a stencil called Morello Design 16” by an Esty shop called “Dizzy Duck” (based in the UK). I knew I wanted to keep our grout lines, so I measured our tiles and ordered exactly 15 5/8” which they were able to accommodate. The stencil comes with two stencils and two-quarter stencils, which was great for tricky areas. I started in the furthest corner with the first full tile. I used a foam roller and had a piece of cardboard on the side.
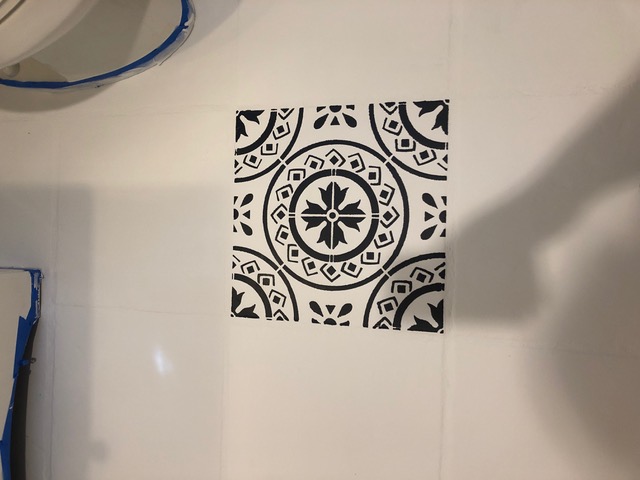
LIGHT COATS of paint are key, especially for the first coat with the stencil. After I painted my first stencil, I staggered the second stencil. By the time the second stencil was finished, it was time for the first stencil’s second coat. This made the process go by quickly, so I highly recommend having two stencils.
A couple of things I learned along the way: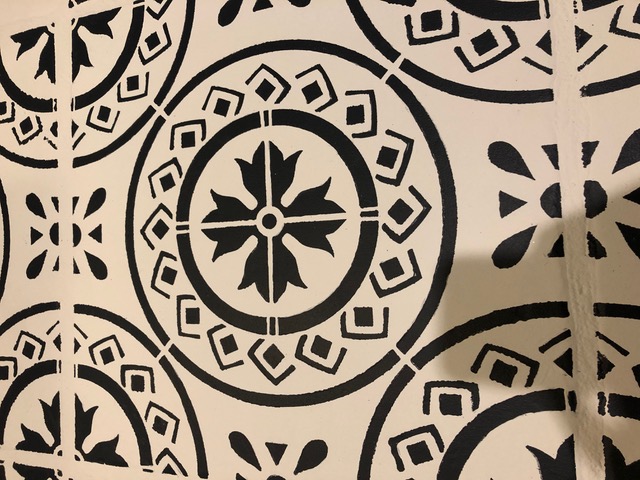
- Always roll in one direction.
- Don’t let the stencil get too dirty, try and wash it every night if possible. If the stencil's edges get caked with paint you won't get crisp lines.
- Don’t rush laying the stencil, make sure it's perfectly lined up each time.
- After every layer of paint make sure it's fully dry.
- And, the most important thing, which I’ve already mentioned, LIGHT COATS are key!
- Consider purchasing small craft brushes for touch-ups. Our tiles are textured and don’t have an even surface. I did not want our tiles to be perfect, but I wanted them to look handmade with smoother edges. This process took the most time and effort. After all of the full tiles were stenciled, I was able to strategically start cutting the full stencils that I needed for the awkward areas like around the toilet and near the vanity. Again, don’t rush this. You really need to sit and think about the areas you have left before you start cutting the only two full stencils you have.
SEALING THE FLOORS
Finally, the home stretch! Before sealing the floors, I made sure the paint was completely dry. I let it dry for a day or two to be 100% su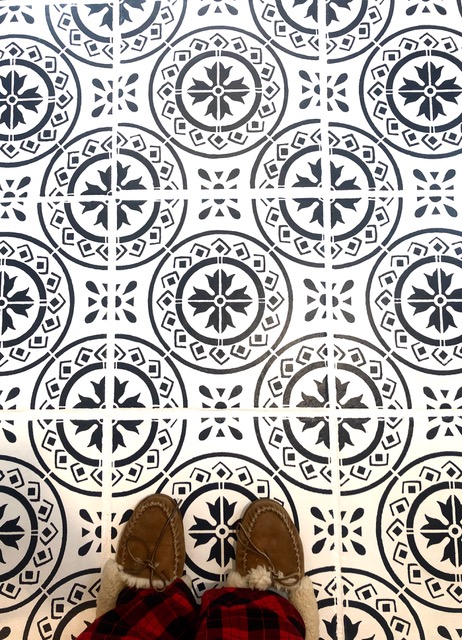 re the paint was dry. This is not a project you want to rush! I did FOUR coats of polyurethane with at least 2 hours of dry time in between coats. You really want to be sure your socks are clean during this phase. We have two dark-haired cats and it was a job in itself to be sure there was no pet hair that somehow made its way into the bathroom while sealing the floors. After all the coats were finished, we closed the door for a few days to make sure the polyurethane dries.
THE BREAKDOWN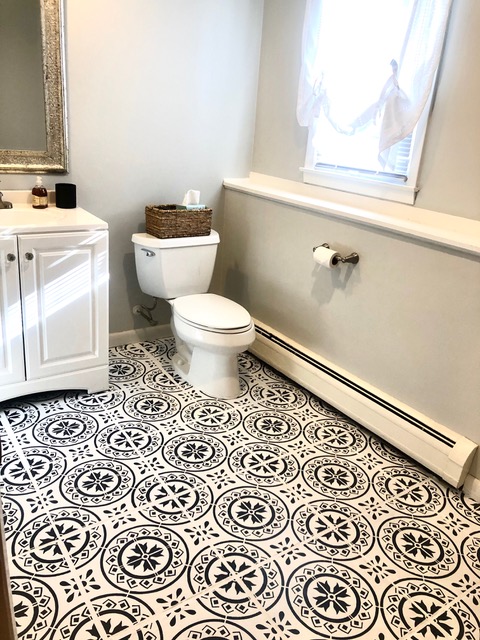
This DIY project was a true labor of love but by no means difficult. At the time, I was working two jobs so this project took a little longer than I had originally anticipated. I think in total about a week or a week and a half – still not terrible! The total cost was around $150 – the stencil was just over a third of the cost.
HOW THE FLOORS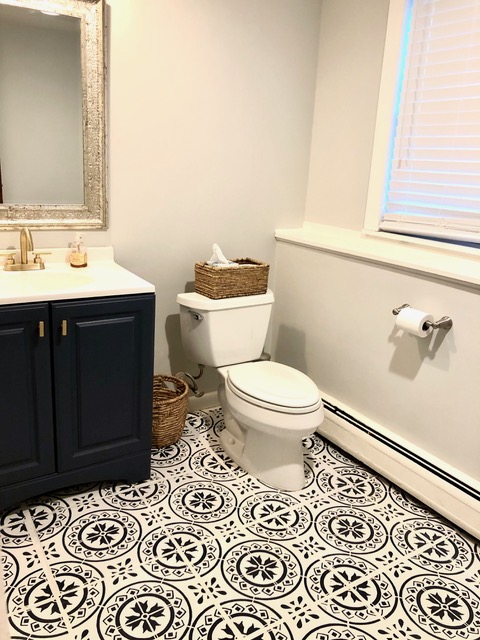 ARE HOLDING UP
It has been exactly one year since I painted our floors and I have to say, they are holding up really well! I did have to touch up one area though. Remember when I said our house was a fixer-upper, well our radiator in that bathroom recently started to leak and the hot water made the polyurethane flake off a little. Not a major issue though, just cleaned it off and resealed that area. Even after this transformation, I felt like the space wasn’t finished. I recently had the urge to paint the vanity, and change the hardware, faucet, and mirror. I painted the vanity the same color as the floor, Benjamin Moore’s Hale Navy. I chose to go with the very trendy all-brass hardware, faucet, and mirror; the mirror is arriving soon. As odd as it sounds, this bathroom has become one of my favorite rooms in this house. It is amazing what $150 and a little elbow grease can do to a space!
Recommended Articles
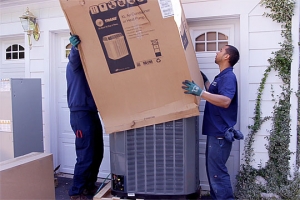
The How’s and Why’s of Upgrading a Central AC System
A step-by-step video demonstration showing removal and replacement of a central air conditioning system. Includes advantages of new, state-of the-art AC systems.
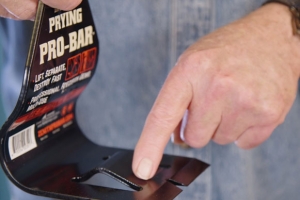
If You’ve Got a Project That Involves Demolition, You’ll Want to Know About This Tool.
I try out a new tool designed and engineered to do one task exceptionally well -- demolition.