A Clamp Jig for Miters
A Make-Your-Own Clamp Jig Perfect for Miter Joints
If I had to count all the times I had to join and clamp my workshop projects, I would be counting forever. There are so many projects that require fitting and fixing pieces together that I decided to create my own shop-made clamp that is particularly good at clamping miters. This jig works with standard bar clamps and is most ideal for miter joints. And that’s a good thing because those right-angle joints can be a real pain, slipping out of alignment before the glue dries. This clamp jig takes away all the hassle, keeps things square, and prevents racking. In this blog and video, you’ll see exactly how you can make your own clamp jig to keep in your workshop.
Materials for this project:
¾ inch plywood or MDF (medium-density fiberboard)
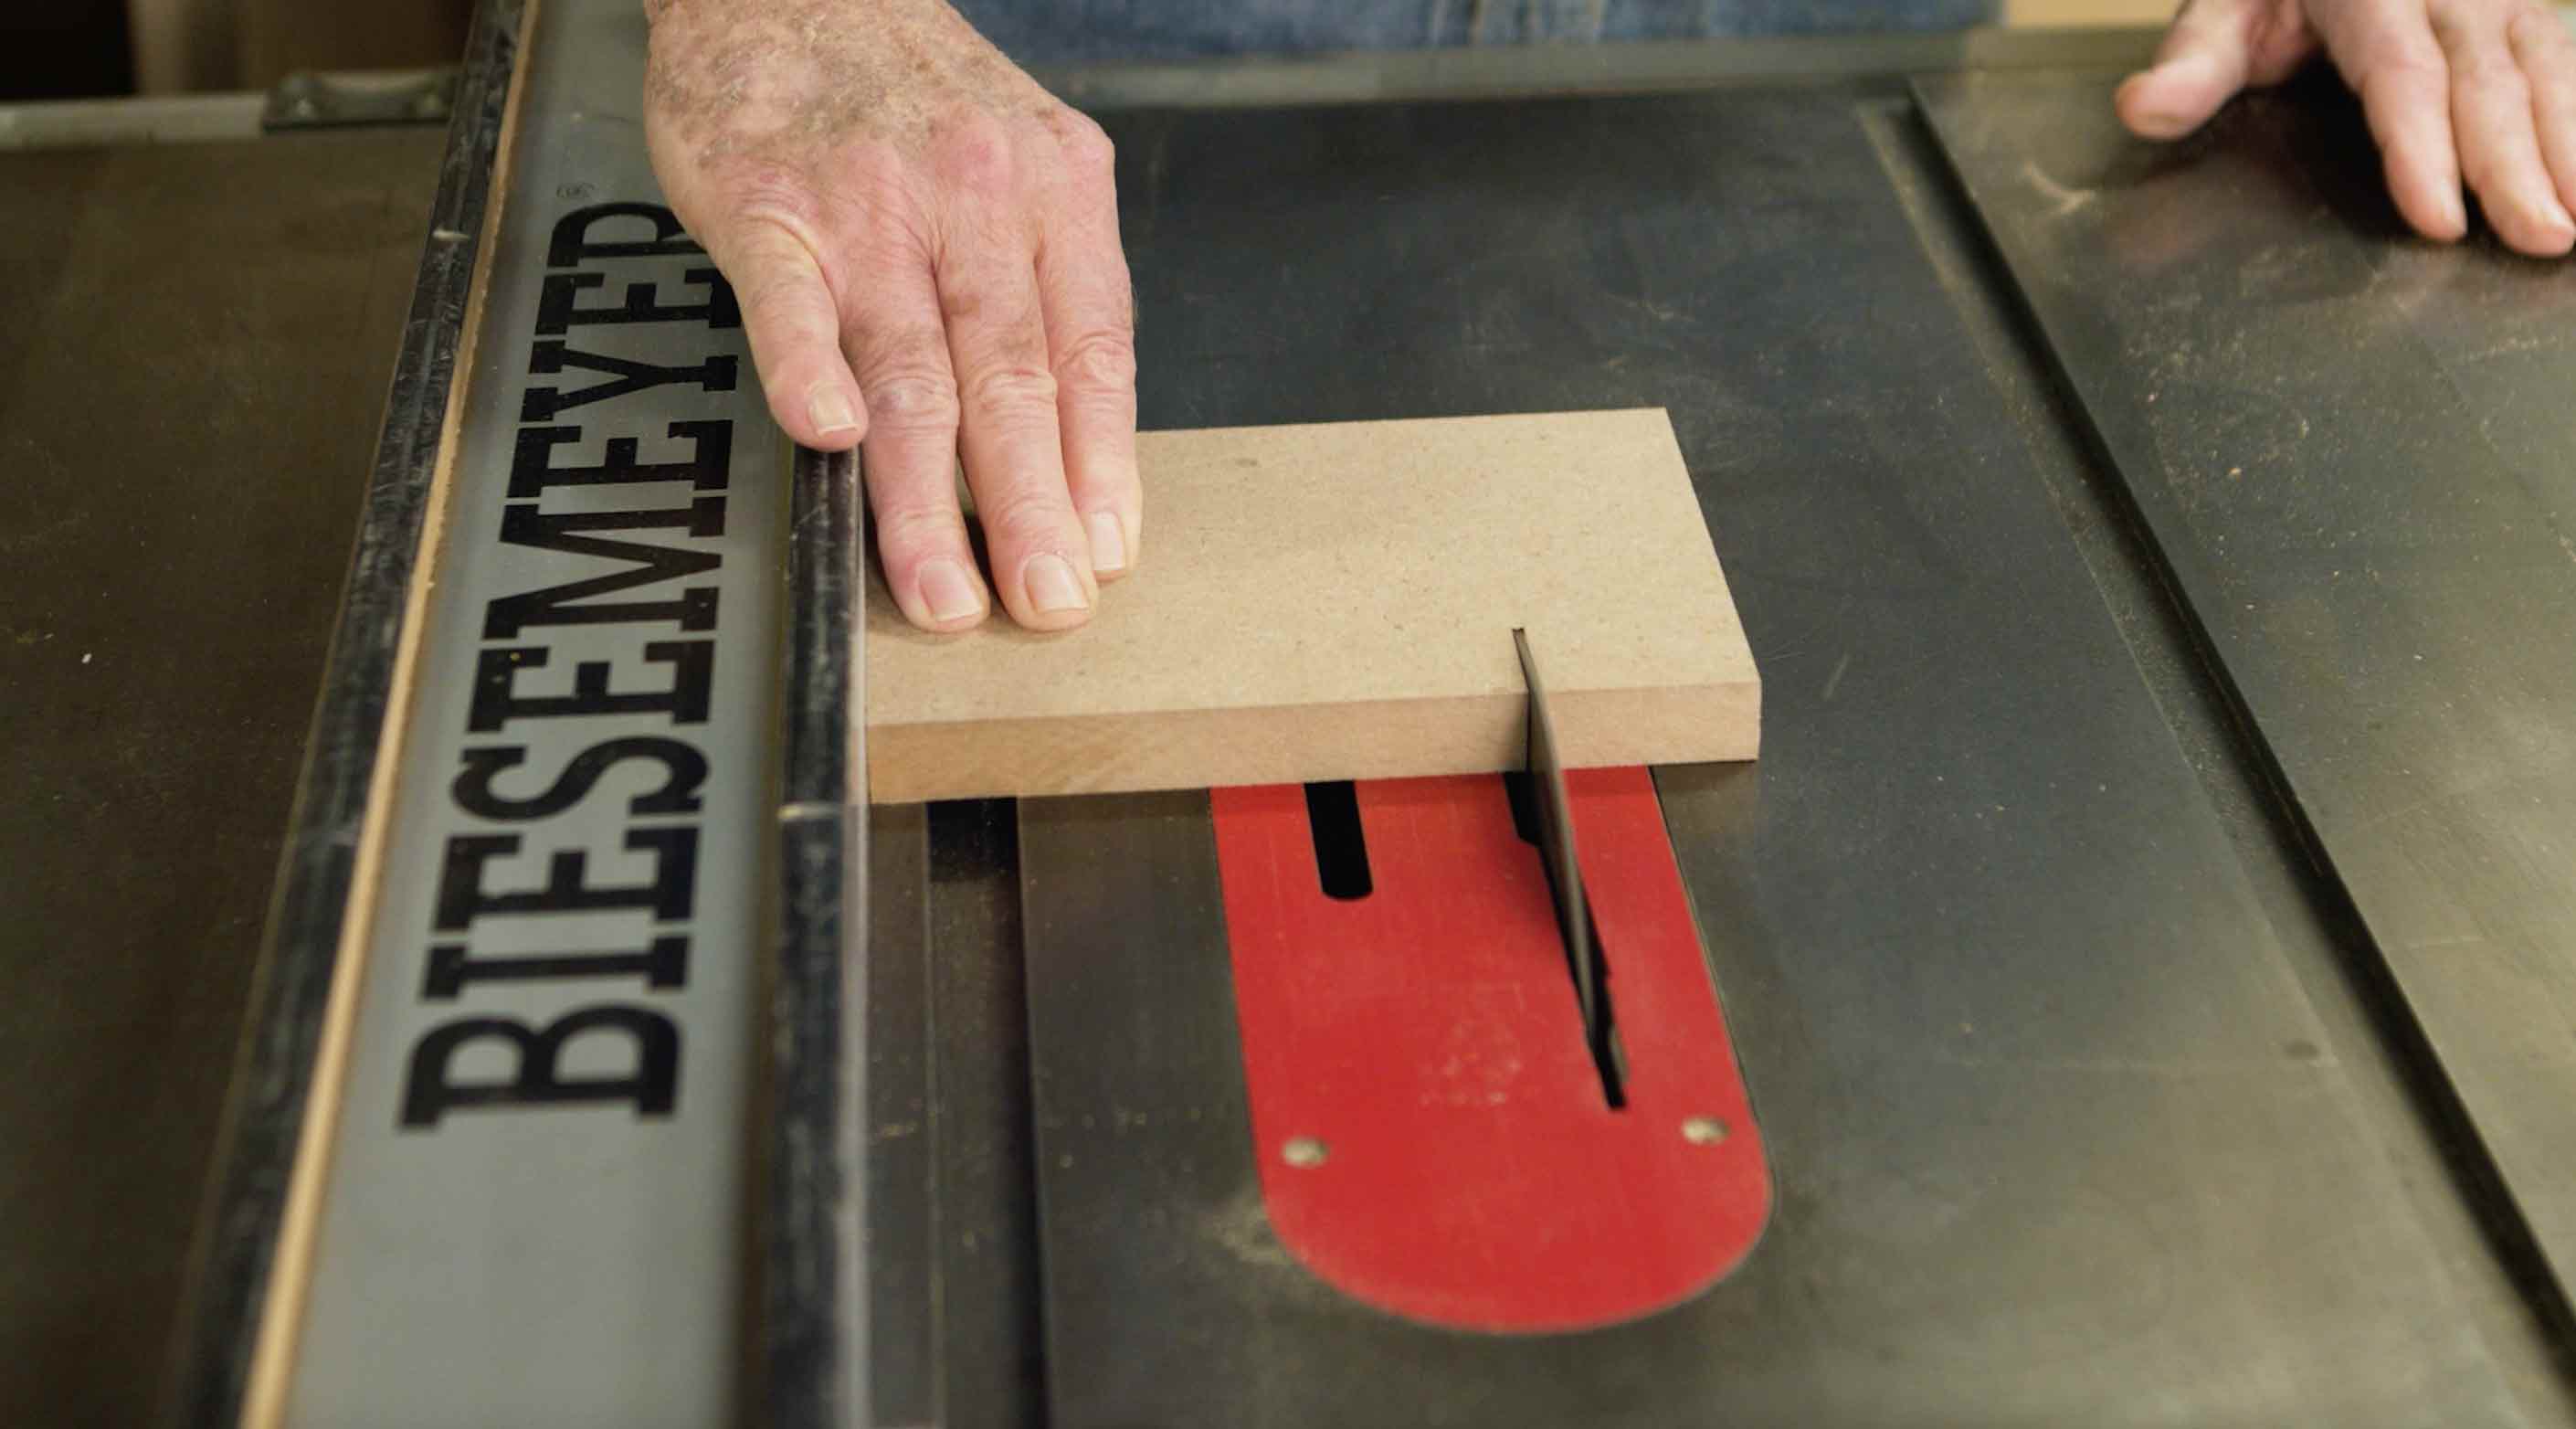
Table Saw
Drill press with hole saw
Band Saw (If you don’t have a band saw, you can use a conventional hand saw, Japanese hand saw, or a jigsaw will do the trick)
 Making the Clamp Jig
The clamp jig that I am about to make in my shop can be used with ordinary bar clamps and is especially good for miters.
I start by cutting a piece of ¾-inch plywood or in this case, MDF – medium density fiberboard – into a six to seven-inch square.
Then I draw two diagonal lines from corner to corner. The point where they intersect is the exact center.
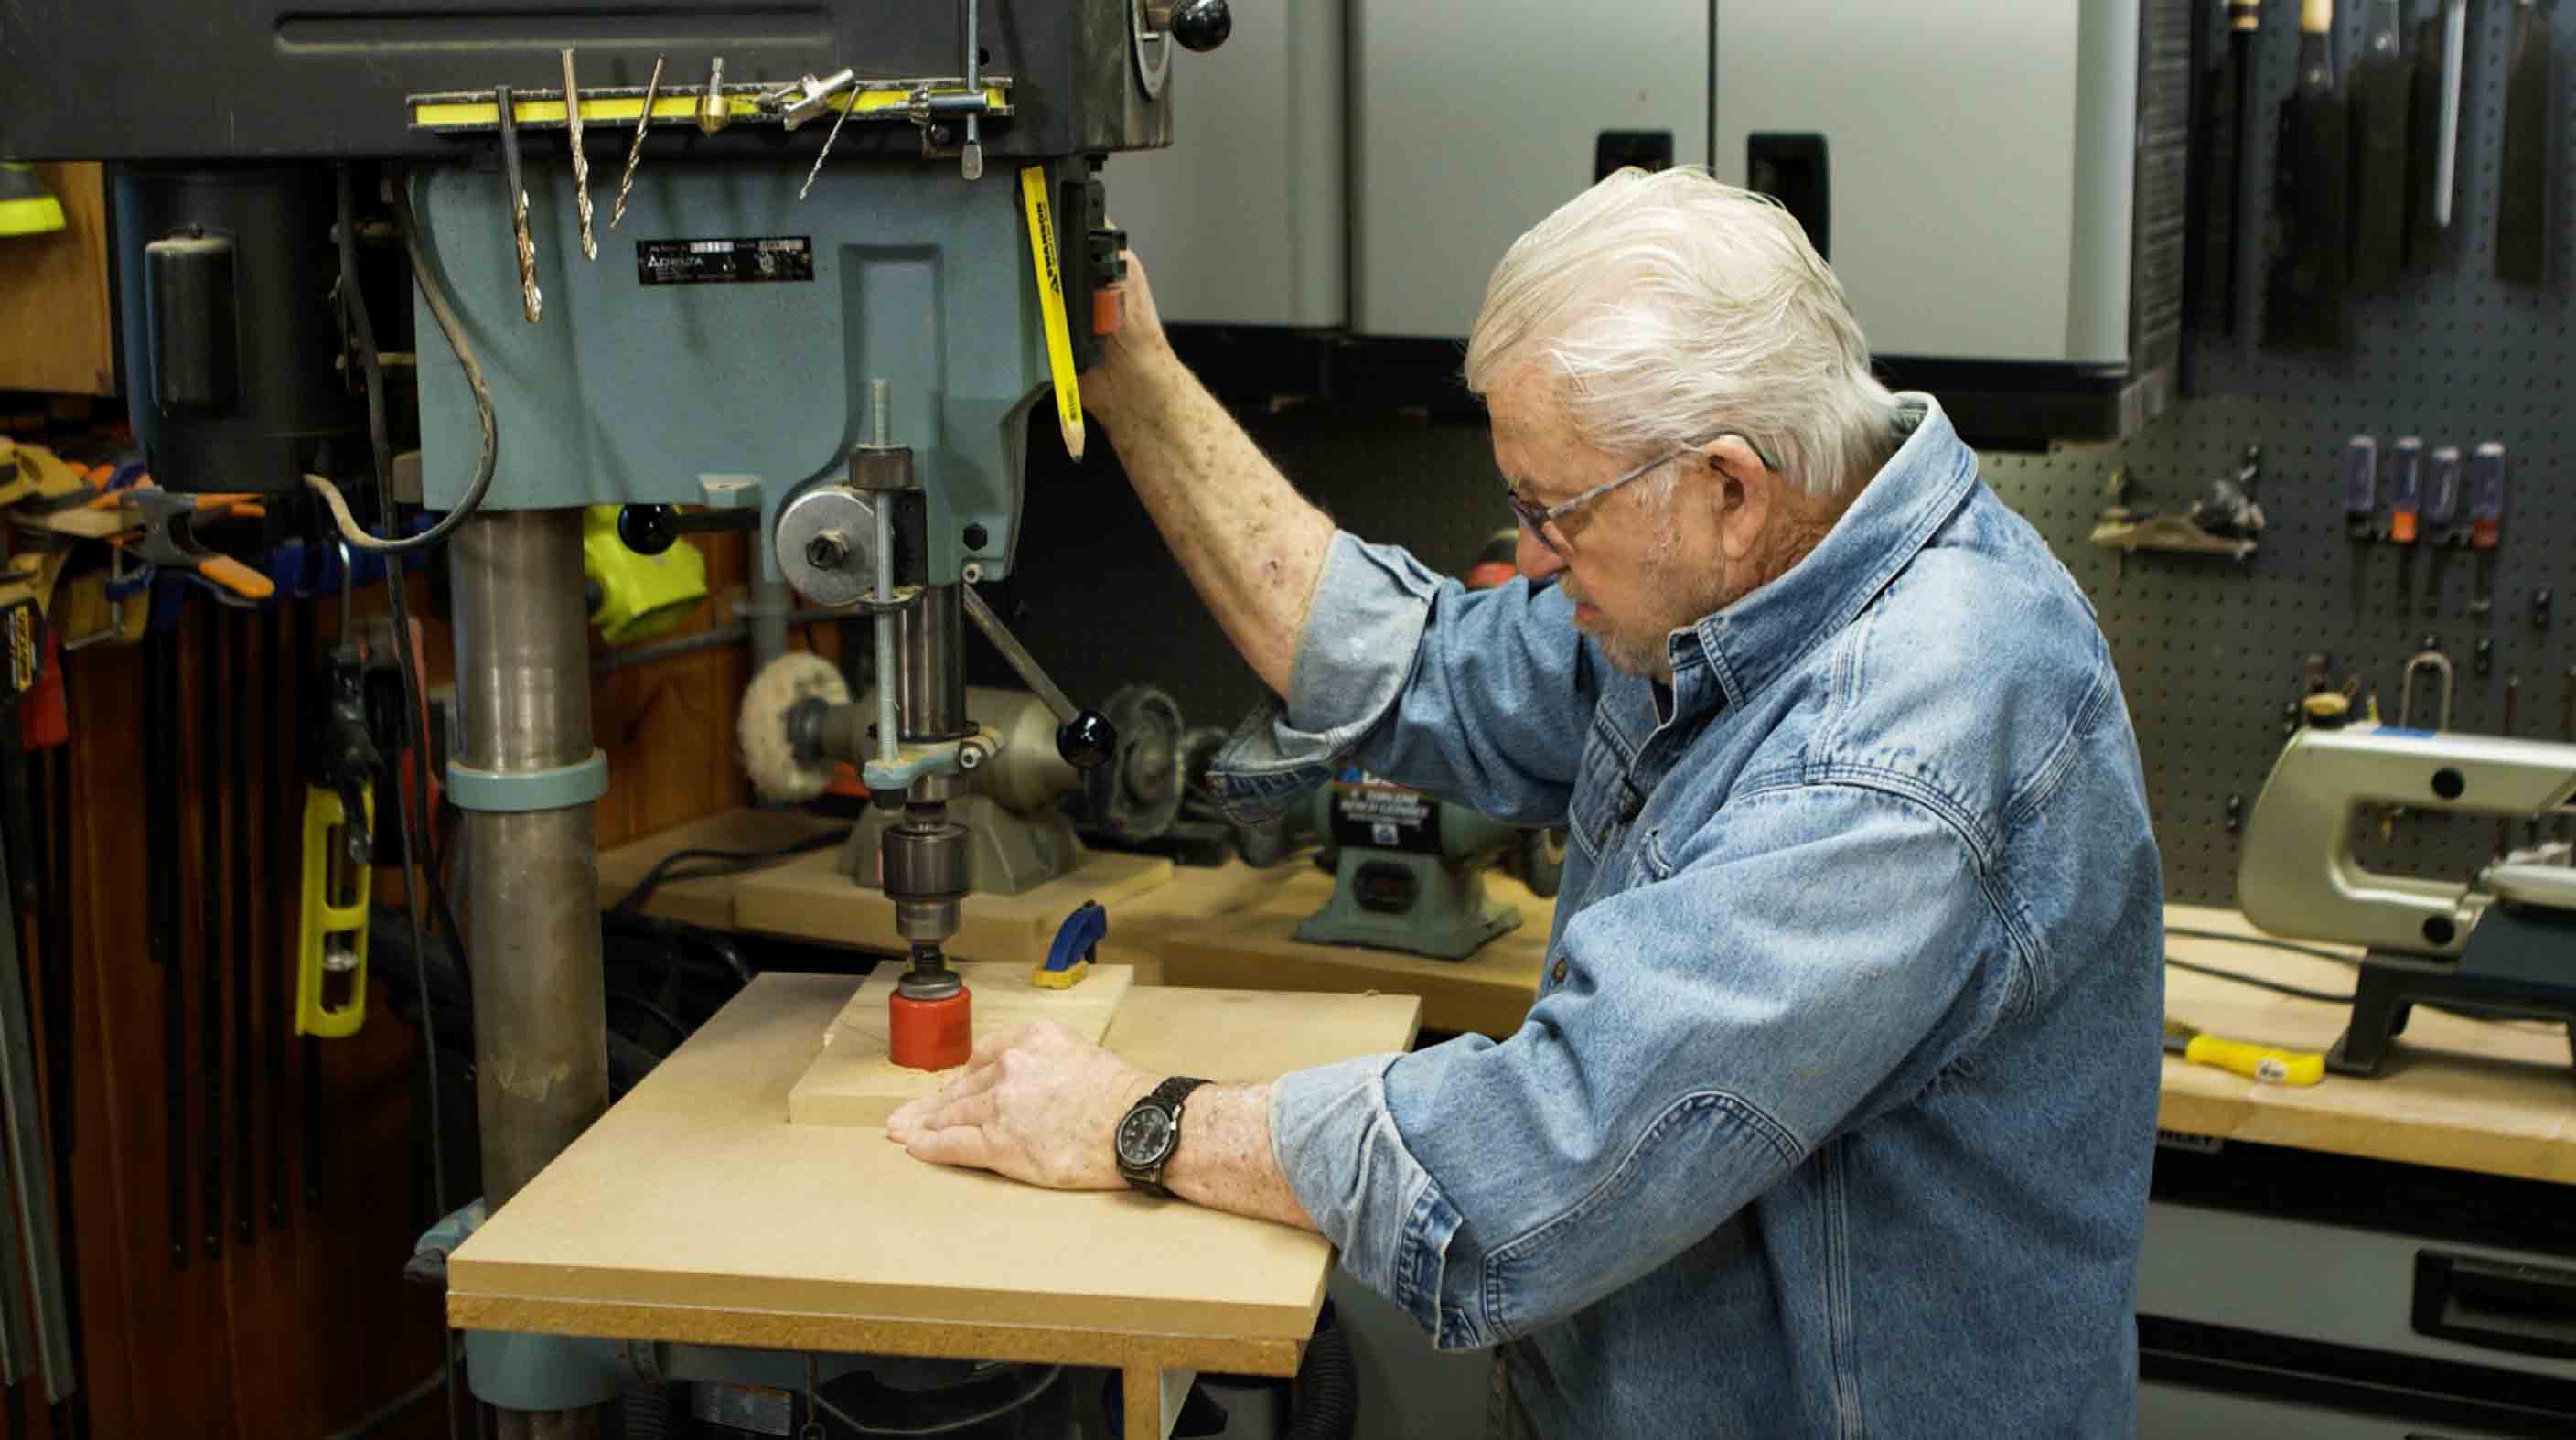 Over at the drill-press, I begin boring a hole at the center mark using a 1 ½ inch hole-saw. PS- Can you spot my magnetic pencil on the drill press?
If you’re using MDF like me, you’ll soon encounter a problem where the teeth on the hole saw are loading up with sawdust. This reduces efficiency and taxes the machine, building up excessive heat.
So, how do you prevent this from happening?
Bore a ¾-inch hole on the perimeter of the hole saw cut. This allows the sawdust to fall into the hole rather than collect in the teeth of the saw. You’ll instantly notice a difference as the sawdust will fall into the hole rather than collect in the teeth of the saw. Plus, now the blade will cut faster and won’t get as heated.
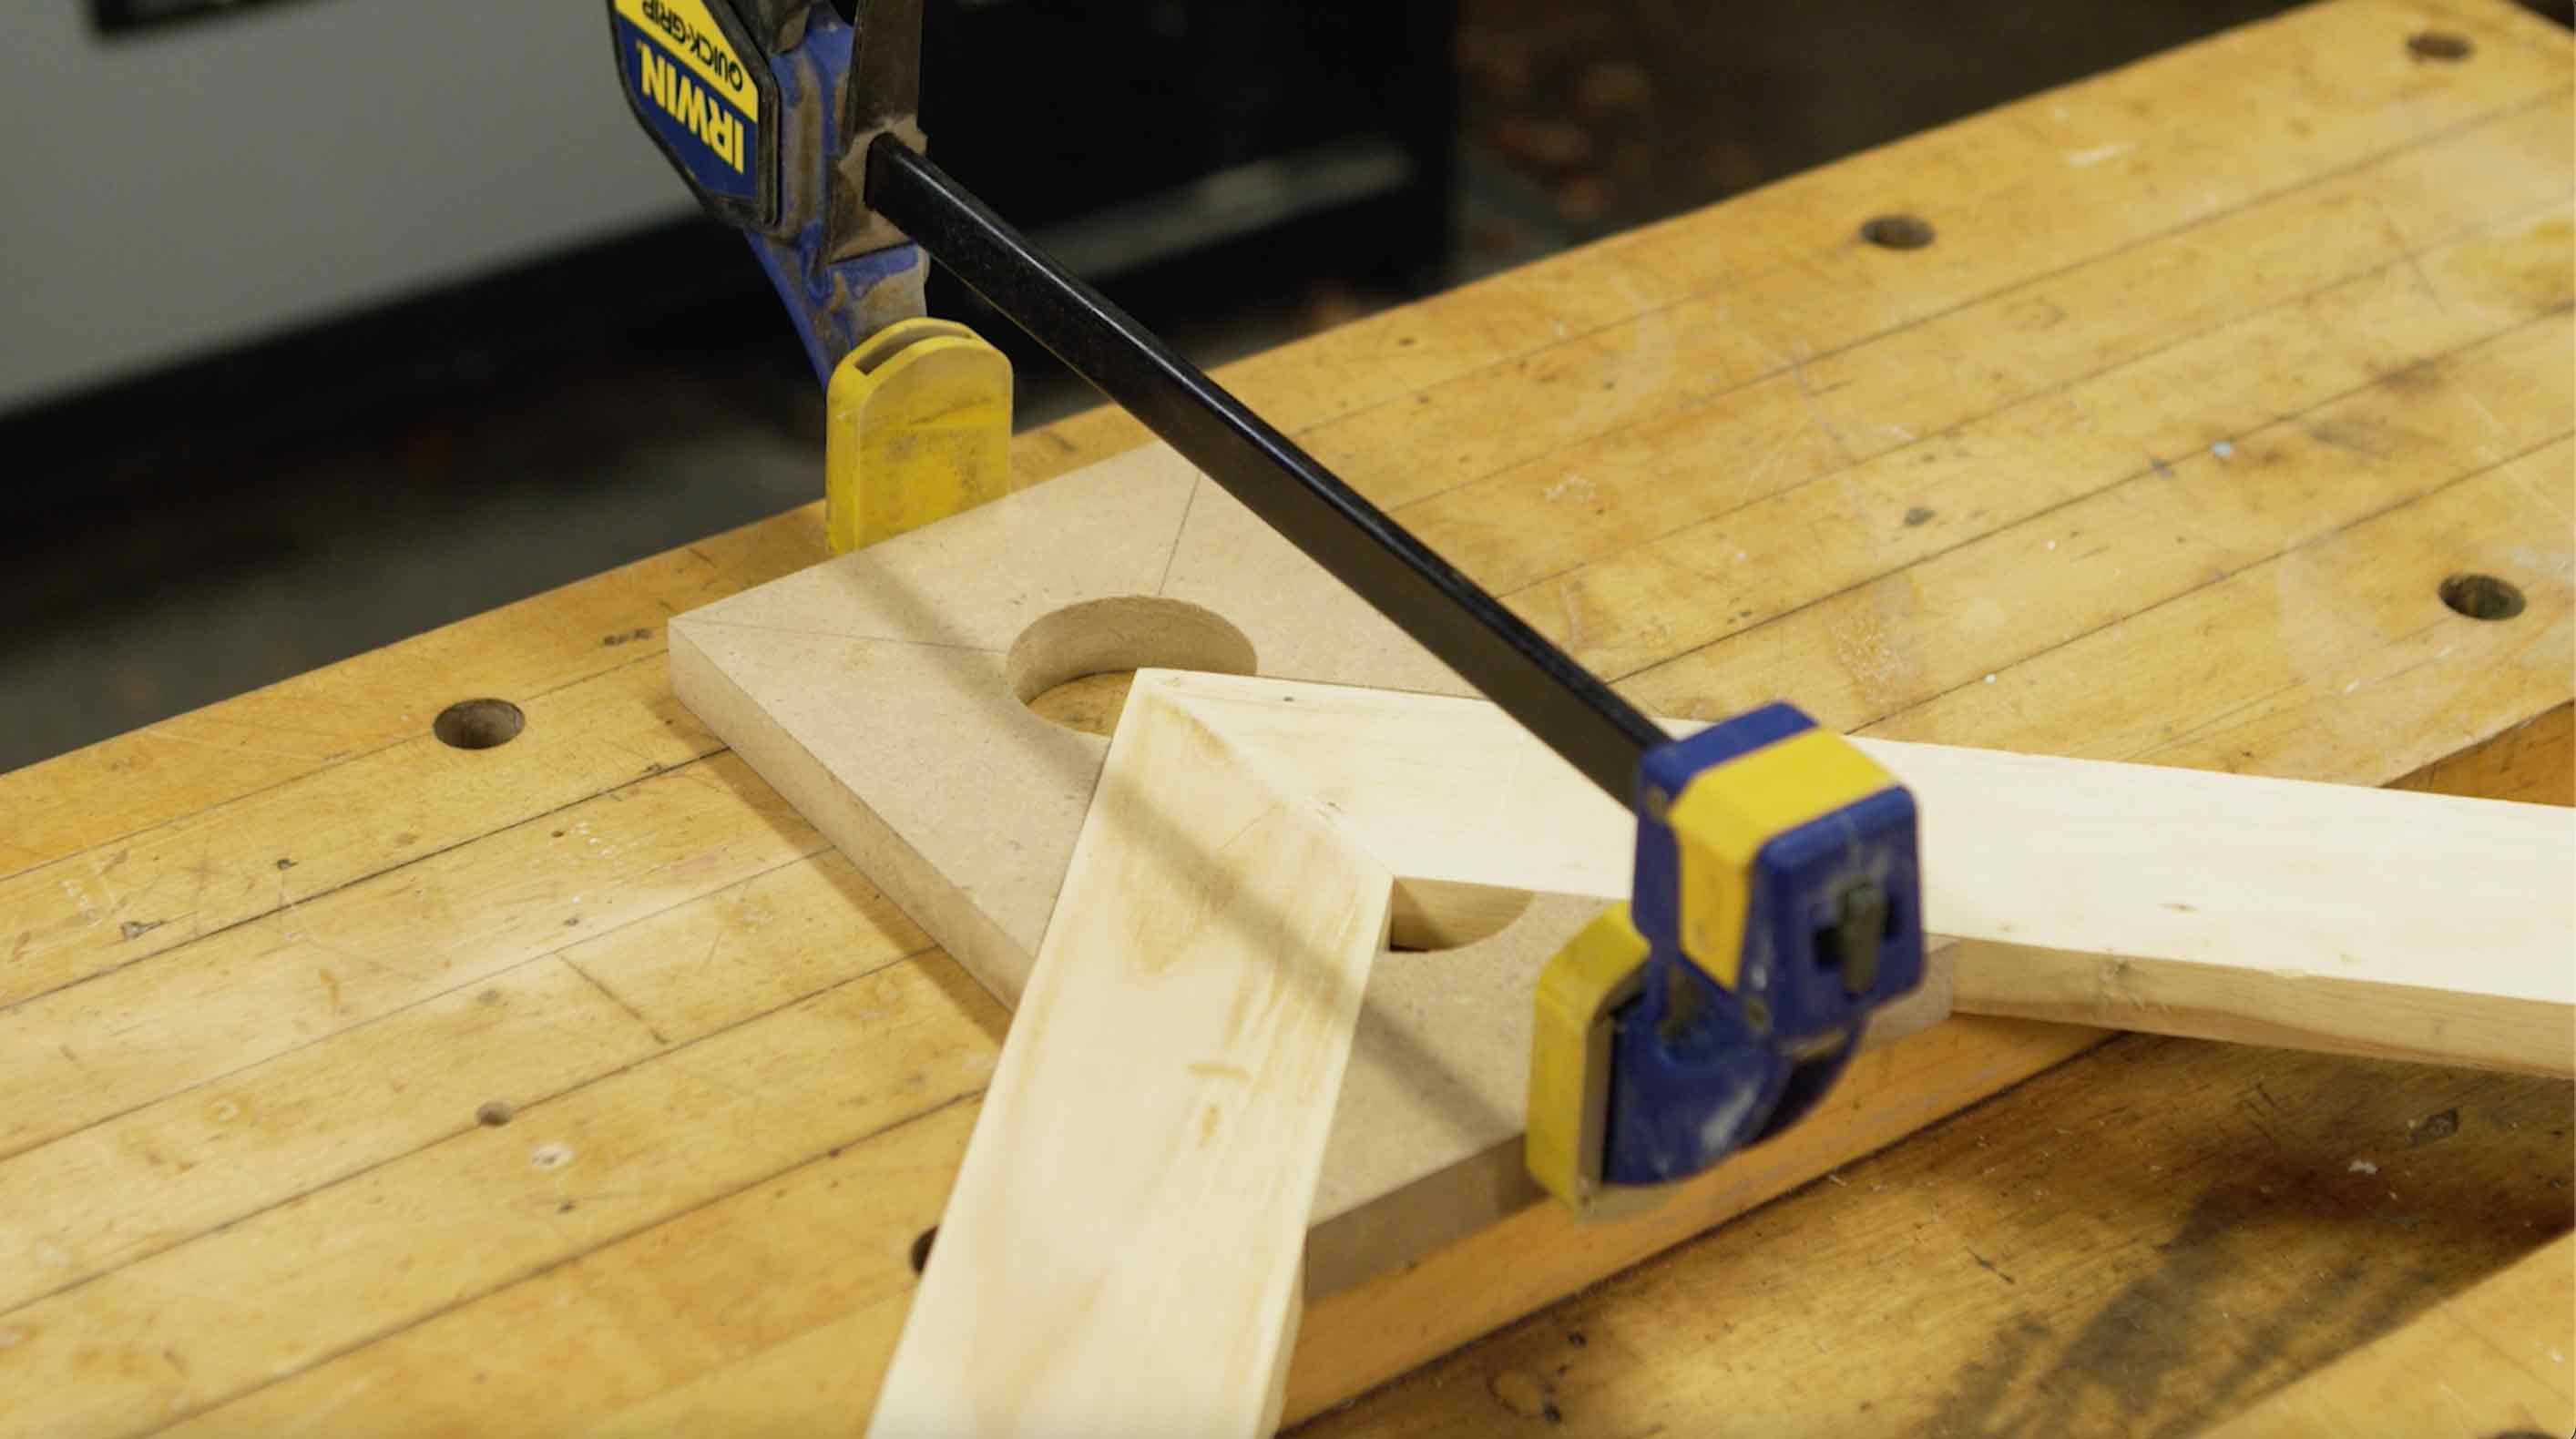
At the band-saw I make cuts towards the center, starting at the two corners and follow in the lines I drew earlier. If you don’t own a band saw, you can alternatively use hand tools like a Japanese hand saw, coping saw, or even a fret saw if you have it.
 Using the Clamp Jig
The clamp jig works by placing the larger section outside of the miter joint and the smaller section inside. The two sections are then clamped together using a standard bar clamp. Too much force can force the wood out of alignment, so moderate pressure with your clamp should be sufficient.
Can I Re-use it?
Yes, and that’s the best part! Once you make the clamp jig it can become part of your workshop and you can reuse it many times. It also makes a great gift for a fellow craftsman do-it-yourselfer. Hope you enjoy this for yourself - and/or someone else!
Recommended Articles

The How’s and Why’s of Upgrading a Central AC System
A step-by-step video demonstration showing removal and replacement of a central air conditioning system. Includes advantages of new, state-of the-art AC systems.
If You’ve Got a Project That Involves Demolition, You’ll Want to Know About This Tool.
I try out a new tool designed and engineered to do one task exceptionally well -- demolition.