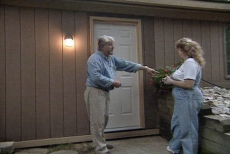
How to Install an Exterior Door
Do a Little Demolition to Remove Rotted Wood before Replacing the Damaged Wooden Exterior Door with a Six-paneled Replacement Door
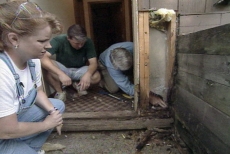
Tear it down before rebuilding! Before installing an exterior door, go the distance to discover and demolish all the rotted wood damage caused by leaking gutters and the backflow of rain toward your home's foundation. Digging deeply to expose all the wood rot also exposes the solid wood you will use as the foundation for hanging the replacement exterior door.
Remove All Necessary Trim and Structure from the Exterior Door
Tear out all the rotted wooden components of the doorway until solid foundation lumber is exposed for the replacement exterior door. Remove the door, threshold, door frame, exterior siding, frieze board, and rotted ends of the wall studs, as necessary.
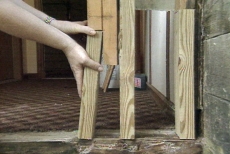
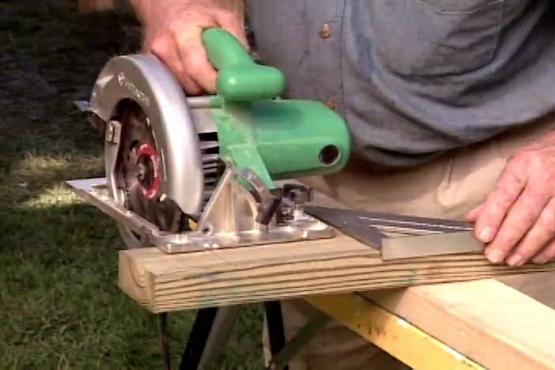
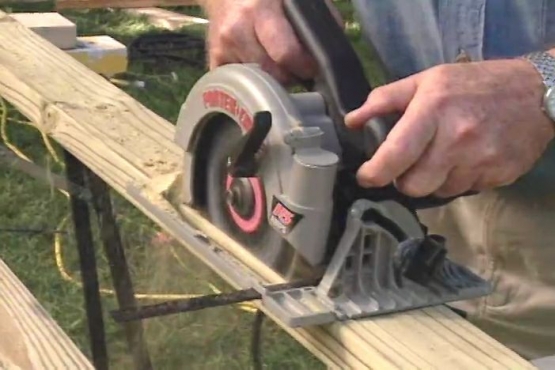
Cut off Rotted Ends of Framing around the Exterior Door
Cut two-by-fours to replace portions of rotted wall studs and framing removed around the exterior door. Drill pilot holes and secure replacements to the remaining studs/framing, to each other, and to the floor decking with 3-inch rust-proof screws.
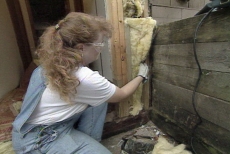
Install Old or New Fiberglass Insulation around the Exterior Door
Reinstall the old insulation or replace it with new batting to insulate around the new framing for the exterior door. Be sure to handle fiberglass batting with gloves and use safety gear to protect yourself from the fiberglass particles.
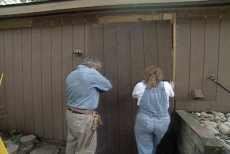
Secure New Siding over the Exterior Door Repairs
Cover the repair area around the exterior door with siding, lifting it off the ground while sliding the edge under the existing siding sheet. Secure it with hot-dipped galvanized nails to secure it to the framing.
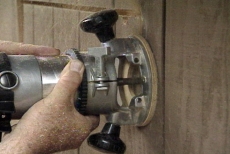
Cut out the Exterior Door Opening from the Siding
Re-cut the exterior door opening. It could have been cut before the siding was mounted, but a router bit that follows the interior door frame as a template makes a perfectly sized opening with a clean edge.
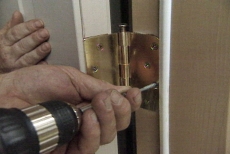
Position the New Exterior Door, Driving Screws through the Hinges
Rest the exterior door assembly on the threshold, making it plumb and level with shims, if necessary. Secure the hinged side with long screws driven through the hinges, frame, and shims, and then into the house framing.
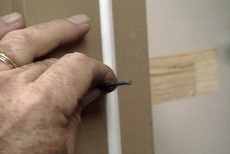
Secure the Unhinged Side of the Exterior Door Assembly
Secure the unhinged side of the exterior door assembly, driving finishing nails through the door assembly and two-by-four house framing. Be sure to catch any shims with the nails to prevent them from shifting.
Reinstall the Original Frieze Board over the Exterior Door Repairs
Position and re-nail the original frieze board removed earlier as part of the exterior door demolition. It will be the last component to reinstall, resting on top of the siding. Add the knob and latch hardware associated with the new door.
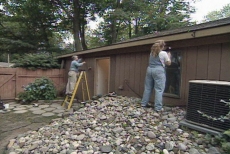
Prevent Future Wood Rot around the Exterior Door Installation
Fix the source of the exterior door's wood rot. Add/fix gutters to catch water running off the roof. Add plastic sheeting beneath rocks and other landscaping materials immediately adjacent to the house to make water run away from its foundation.
Related Tips

Blog Articles

Maximize Your Yield with DIY Netting for Strawberry Beds
Keep your strawberries safe from pests with our DIY strawberry cage netting solution. Learn how to create sturdy frames and find the best netting for your strawberry plants.

Change It Up: Swapping Out Your Light Switch Plates
Tired of boring light switch covers? Upgrade your home decor with this simple guide on replacing light switch plates and make a statement in every room.

Revamp Your Outdoor Space: How To Stencil A Concrete Patio
Learn how to create a stunning patterned concrete patio with our easy-to-follow instructions for stenciling. Upgrade your outdoor space in no time.


