How to Put up a Wood Ceiling Using Tongue and Groove Planks
Learn how to install solid wood ceiling paneling; watch a video containing installation tips; printable instructions include materials and tool lists.
Ron traveled down Florida's southern gulf coast to Cape Coral, one of the state's youngest cities. With more than 400 miles of canals, most of the homes here sit right on the water. Steve and Barb Hirsch invited Ron to their Spanish-style home to help them give their den ceiling a dramatic new look. They had fallen in love with a ceiling done in pecky cypress that they had seen in a restaurant in Ft. Meyers.
Prepare for the Installation of the Wooden Ceiling Panels
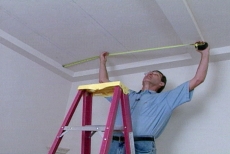
Begin by using a stud finder to locate the ceiling joists. Once you've determined their location, mark them with a chalk line. Next, you'll need to take measurements to determine how long the planks should be. Be sure to take a measurement every 12 inches or so, as the size of the panels can vary greatly from one end to the other.

Cut the Pieces to Length
A miter saw work station will allow you to set your length and make a number of cuts without having to measure and mark each plank. Once you've got the measurement set, cut each board and set it aside for installation.
Cut Custom Pieces for Angles
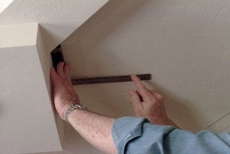
If you have an angle in your recessed panel, then one or more planks will need to have an angle cut in it in order to fit into place. Begin this process by measuring the panel to see where the angle starts. Next, use a bevel gauge to determine what the angle actually is. You can then use the bevel gauge to rotate the table of your miter saw to match the angle that is on the ceiling panel. Make sure that you use the left edge of the blade to align the correct angle with the gauge.
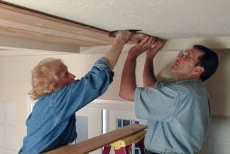
Begin Installing Planks
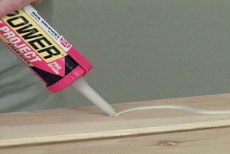
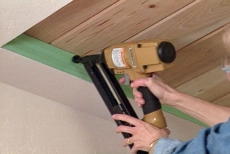
The planks will be secured to the ceiling using construction panel adhesive, with just a few nails from a nail gun. Apply the adhesive using a caulking gun in a serpentine pattern on the back of the plank. Set it into place and then pull it slightly away from the ceiling. Then push it back into place. This ensures that the adhesive is evenly distributed. After the plank is pushed back into place, secure it with a few nails into the joist that you marked earlier with the chalk line.
Continue Installing the Field of Tongue and Groove Planks
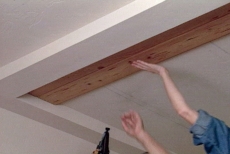
As you install the rest of the field, keep in mind that the groove on each panel has to fully engage the tongue on the previous one for them to fit properly. Continue setting each plank in place, and then pulling it slightly away before pushing it into its final position and nailing it.
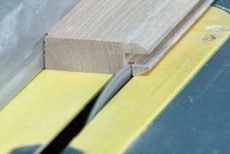
Measure and Cut the Final Piece for the Panel
It is unlikely that the final piece in the field will fit exactly. Measure the gap to determine the correct size for the final piece and then rip it to the proper width on a table saw. In order for you to be able to correctly install the piece, you will next need to lower the blade on the table saw and rip away the top lip of the groove. This will allow you to set the final piece in place and nail it into position.
Cutting Around Obstructions
You will most likely have to cut around some sort of obstruction as you install your panels. Whether it is lights, speakers, or anything else, the process is pretty much the same. Set the first plank into place and the reach your hand up into the hole with a pencil. Trace the outline of the opening and cut away the excess with a jig saw. Repeat this process for each plank. If any plank is completely divided by the opening, cut it in half and repeat this step for both ends.
Finish and Trim Each Panel
The final step is to install the trim of your choice around the outside of each panel. This will help cover any small gaps that you may have left at the ends of each plank. Remember, when cutting trim, it is always better to cut it a little bit long, as it's easy to back and cut more off if you need to. Continue working around each panel measuring, cutting, and installing the trim.
Related Tips


Blog Articles

Maximize Your Yield with DIY Netting for Strawberry Beds
Keep your strawberries safe from pests with our DIY strawberry cage netting solution. Learn how to create sturdy frames and find the best netting for your strawberry plants.

Change It Up: Swapping Out Your Light Switch Plates
Tired of boring light switch covers? Upgrade your home decor with this simple guide on replacing light switch plates and make a statement in every room.

Revamp Your Outdoor Space: How To Stencil A Concrete Patio
Learn how to create a stunning patterned concrete patio with our easy-to-follow instructions for stenciling. Upgrade your outdoor space in no time.


