Picture Hanging Kit for Sawtooth, Keyhole and D-Ring Hangers
Four Innovative Wall Hanging Devices You'll Want to Know About
With this hanging system from Hangman Products, you can hang just about anything on the wall - heavy, light, large or small.
This double-headed screw called a bear claw hanger is the heart of the system. The screw has a self-tapping tip and specially designed threads. No pilot hole is required. Just press the sharp tip into the wall...and start turning using a hand-held Phillips screwdriver. The coarse, deeply cut threads hold up to 30 pounds in drywall. The first head contacts the wall, stopping the screw at just the right spot. The second head serves as a protruding hanger that captures and holds the picture wire.
The hanging system comes with this small bubble level that sits on top of the frame....and these special adhesive pads to keep the picture from tipping. Peel off the protective backing......stick the pad to the wall behind the picture......pull off the front protective strip and gently press the frame into contact with the pad.
This is a new and improved version of the popular saw tooth hanger. It’s simple one-piece design eliminates the need for nails. Instead, these barbs (or prongs), which are part of the hanger itself, are simply driven into the back of the picture frame. These locators make it simple to hang something with saw tooth hangers exactly where you want it. Just slip a locator into a saw tooth hanger......and hold it in place temporarily with a piece of masking tape. Position the picture where you want it and press the tip of the locator into the wall. The locator will leave a mark showing exactly where to put the first double-headed hanger. Then, insert a second locator on the opposite side, hang the picture on the first hanger, level it, press the second hanger into the wall, remove the picture, screw in the second hanger and hang the picture.
This locator is designed to be used with D-rings. Place the locator inside the ring. Secure it temporarily with tape, put the picture where you want it, press......and drive in the hanger. To install the second locator, hang the picture, get it level......press......and screw in the second hanger.
Now, as useful as this hanging system is with D-rings......it really shines when it comes to hanging objects with keyhole hangers. Insert the locator into the keyhole....tape it temporarily in place......and press the object against the wall. Now a keyhole hanger can be used with double-headed screws......however, I prefer to install a threaded drywall anchor......then drive the pan head screw into the anchor... The advantage to this method is that I can adjust the screw in or out to pull the object tightly against the wall for a secure fit.
So, whether you're working with wire, saw tooth hangers, D-rings, or keyholes, this is a system that can handle it all.
Blog Articles
Maximize Your Yield with DIY Netting for Strawberry Beds
Keep your strawberries safe from pests with our DIY strawberry cage netting solution. Learn how to create sturdy frames and find the best netting for your strawberry plants.
Change It Up: Swapping Out Your Light Switch Plates
Tired of boring light switch covers? Upgrade your home decor with this simple guide on replacing light switch plates and make a statement in every room.
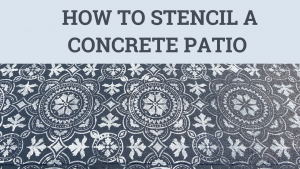
Revamp Your Outdoor Space: How To Stencil A Concrete Patio
Learn how to create a stunning patterned concrete patio with our easy-to-follow instructions for stenciling. Upgrade your outdoor space in no time.


