How Do You Choose the Right Sandpaper?
When it comes to tackling DIY home improvement projects, having the right tools is essential. And when it comes to sanding, choosing the correct sandpaper can make all the difference in achieving a smooth and professional finish.
The type of sandpaper you select can make a significant difference in the quality of your finish and the efficiency of your work. This article and video explain what you need to know about choosing the right sandpaper, considering which grit size is appropriate for which types of projects.
With so many options to choose from, how do you go about picking the right sandpaper for your project?
Understanding Sandpaper Abrasiveness
Sandpaper comes in a variety of grits, which refers to the size and concentration of the abrasive particles embedded within the sandpaper.
The lower the grit number, the coarser the sandpaper and the more material it will remove. Conversely, higher-grit sandpaper is finer and creates a smoother finish.
Lower grit numbers, typically ranging from 40 to 80, translate to coarser sandpaper. This coarse grit is ideal for heavy-duty tasks such as stripping off old paint or shaping raw wood from its natural, unrefined state.
The higher grit numbers like 120,220, and beyond help refine your project. This finer grit tackles material removal with a more measured approach, leaving behind a progressively smoother surface. It excels at tasks like scuffing up a surface to enhance paint adhesion or meticulously sanding between coats of varnish or polyurethane to achieve a flawless, mirror-like finish.
Using Coarse Sandpaper
Let's say you're tackling a project that requires removing all the paint from a piece of wood. You want to strip it down to its natural beauty, perhaps to stain it later. In this case, you'll need a real workhorse: a low-grit sandpaper-like 60 grit. This coarse sandpaper will make quick work of that old paint.
Using Mid-Grit Sandpaper
Maybe you don't need to remove all the paint but simply want to scuff up the surface to improve paint adhesion. Here's where a mid-grit sandpaper, like 120 grit, comes in handy. It provides the perfect amount of "bite" to create a good bond for new paint without being overly aggressive. You can use this grit with an orbital sander, but be cautious – it can remove more material than intended with excessive pressure.
Using Fine Grit Sandpaper
High-grit sandpaper, like 220 and above, takes center stage for those in-between stages of your project. Imagine you're applying multiple coats of polyurethane. Between each coat, you want to lightly sand to eliminate minor imperfections like dust nibs or bubbles. Sand with a gentle touch, and you'll see a fine white powder form, especially when working with polyurethane or varnish. This is exactly what you want – a smooth surface prepped for the next coat.
The Right Grit for the Right Result
The key to successful sanding is using the appropriate grit for the task at hand. With a little knowledge about these grading variations, you'll be well on your way to achieving a flawless finish on your next project!
Using Sandpaper with Power Tools
When tackling larger projects that require sanding, using power tools like orbital sanders can significantly expedite the process. Orbital sanders are efficient tools that move the sandpaper in a circular motion, allowing for quick and consistent sanding of surfaces. These power tools are particularly useful for smoothing out rough surfaces or removing old finishes quickly and effectively. When using orbital sanders, it's essential to start with a lower grit sandpaper to remove imperfections gradually and then progress to a higher grit for a smoother finish. Remember to always follow safety precautions when using power tools and wear appropriate protective gear to ensure a safe and successful sanding experience.
When it comes to choosing the right sandpaper for your project, understanding the abrasiveness levels and knowing which grits to use for specific applications is key. Whether you're smoothing surfaces or preparing them for painting, selecting the appropriate sandpaper can make a significant difference in the outcome of your project. By using the correct grit and pairing it with the appropriate power tools, you can achieve professional results with ease. For more in-depth information and tips on using sandpaper effectively with power tools, be sure to watch the video. It will provide you with valuable insights that can help you tackle your next project with confidence. Read more about sandpaper tips and how to organize your sandpaper sheets in your workshop.
Recommended Articles
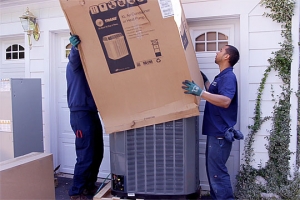
The How’s and Why’s of Upgrading a Central AC System
A step-by-step video demonstration showing removal and replacement of a central air conditioning system. Includes advantages of new, state-of the-art AC systems.
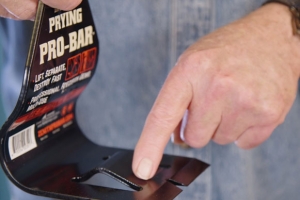
If You’ve Got a Project That Involves Demolition, You’ll Want to Know About This Tool.
I try out a new tool designed and engineered to do one task exceptionally well -- demolition.