How to Install an Outlet with USB Ports
A Guide on How to Install an Outlet with USB Ports
Nowadays, with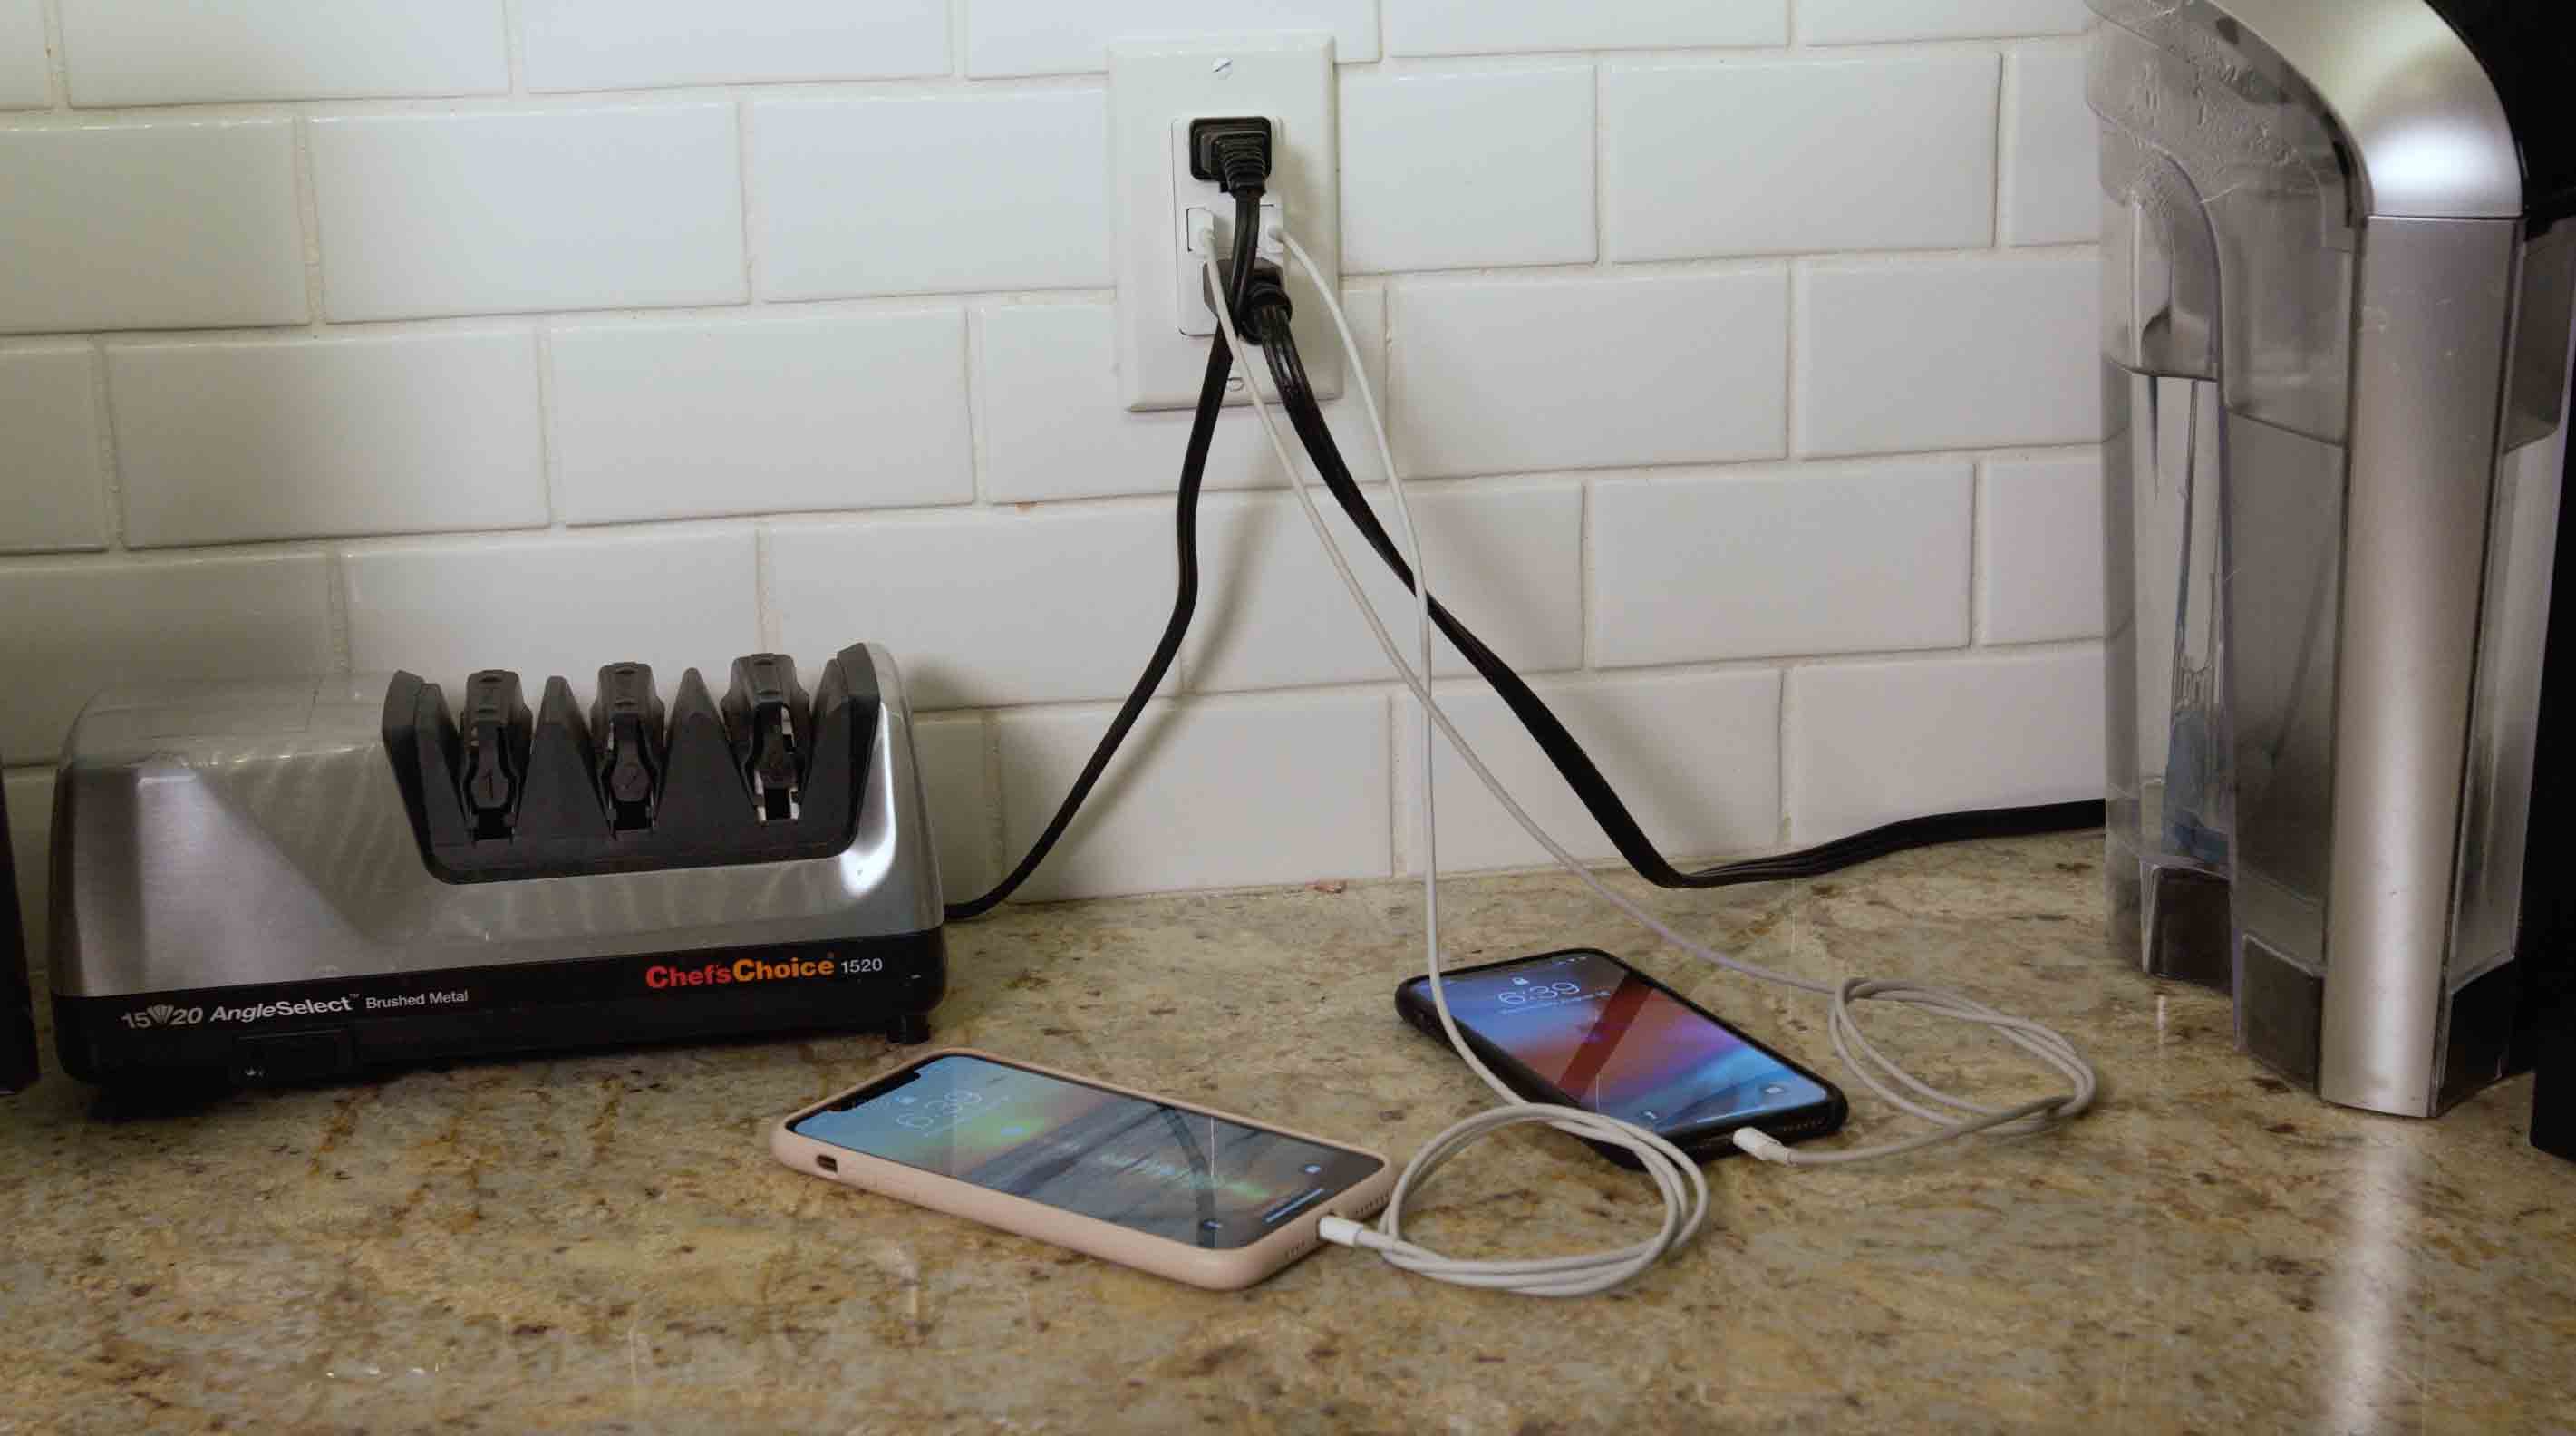 so many phones, tablets, and other electronic devices it can become crowded around your electrical outlets. Wouldn’t it be nice to stop moving your USB charger from outlet to outlet? With an electrical outlet with built-in USB ports, you won’t need to move your chargers around and decide which device gets priority in the outlet. You can charge your devices while freeing up space for your power outlet.
In our household, the kitchen is the heart of the home and our kitchen counter is often a parking lot for all our electronics. Between laptops, tablets, and cell phones, it can become overwhelming. You can imagine that when kids come home from school, it’s not just their backpack that they are tossing on the countertop. Now, it’s all their electronic devices - and yours! Plus, you still need room to plug in your kitchen appliances. Having an outlet with USB ports creates a centralized and organized space for our devices.
 Fortunately, installing an electrical outlet with built-in USB ports is an easy DIY upgrade that only takes a few minutes. In this post, I'll explain how you can install an outlet with USB Ports to free up counter space. I will also provide suggestions throughout the installation process.
BEFORE YOU BEGIN
Before you begin, you will want to think about what space in your house would be the most convenient. I mentioned that the kitchen is our most utilized space, but maybe yours is beside a table in your family room or even your bedroom - or all three! As you look around your home for available electrical outlets, now would also be a good time to check for loose electrical outlets throughout the home. My most recent post
How to Fix Loose Electrical Outlets covers multiple solutions that will fix loose outlets for good!
GETTING STARTED
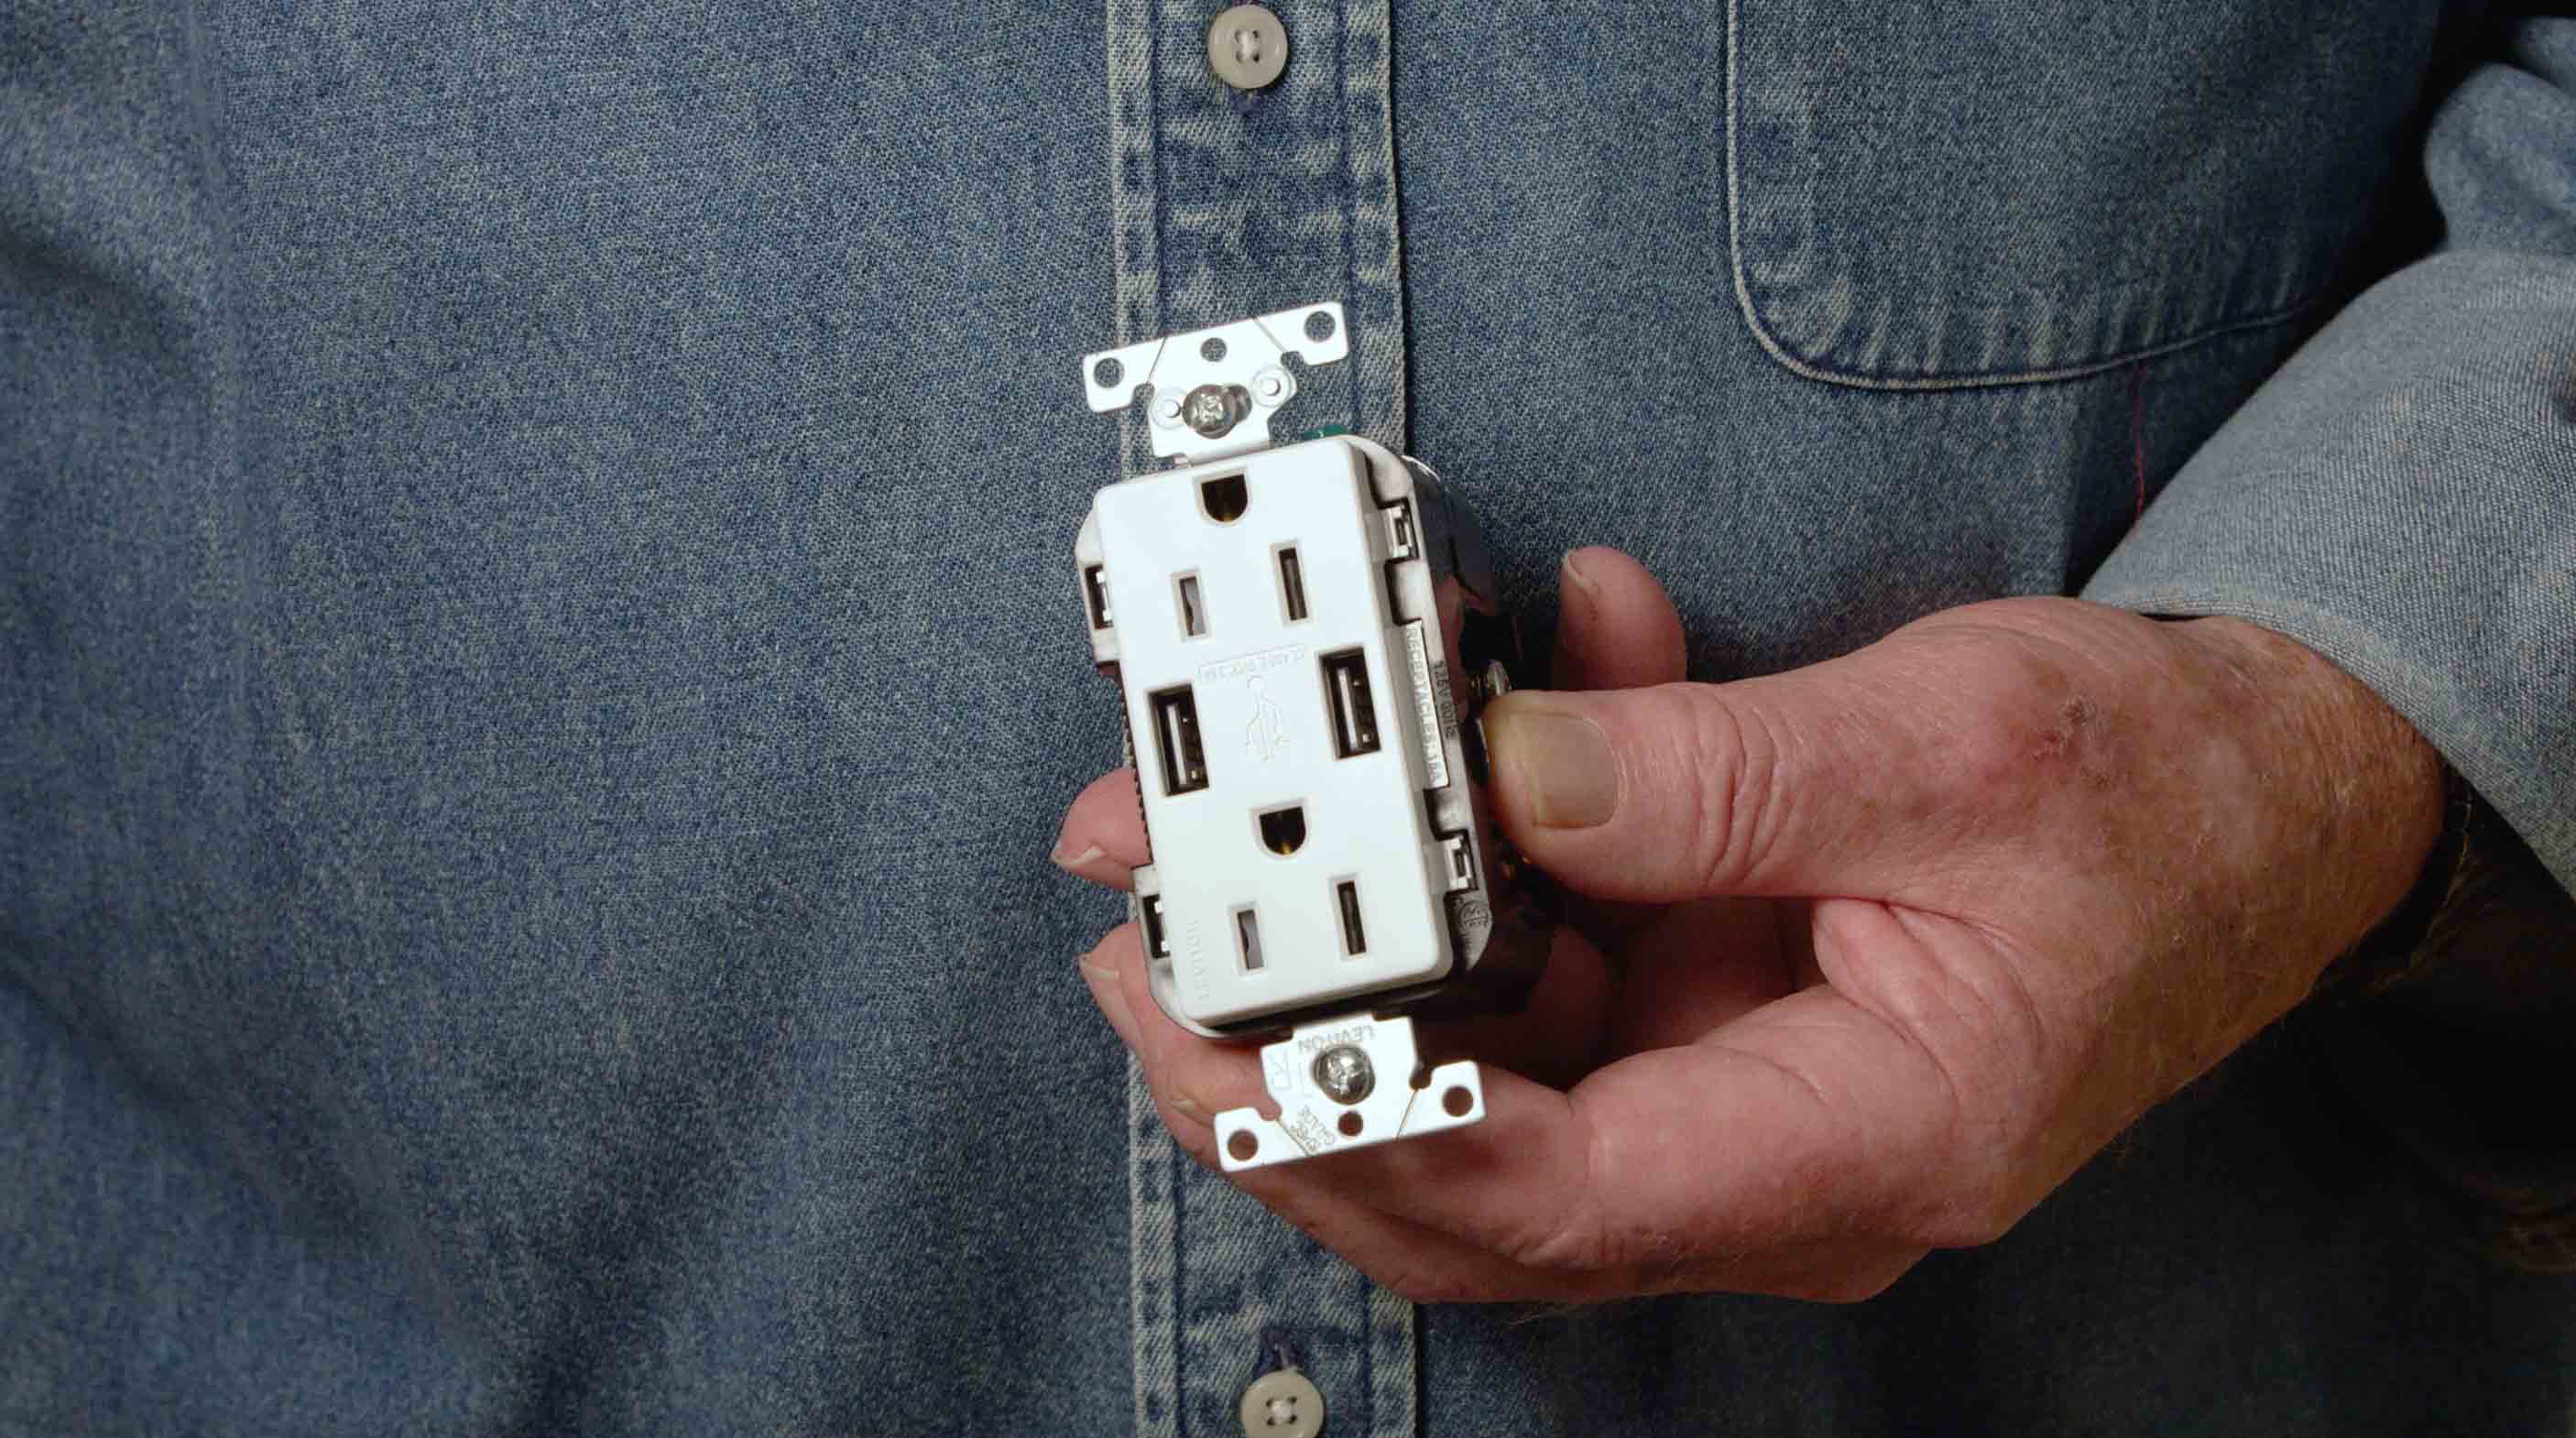
Once you’ve figured out which outlet(s) that you will be replacing, it’s time to purchase the electrical outlet. You’ll notice that it is a standard outlet with two USB ports on either side. You can find the one I demonstrated here, Electrical Outlet with USB Port.
STEP 1
The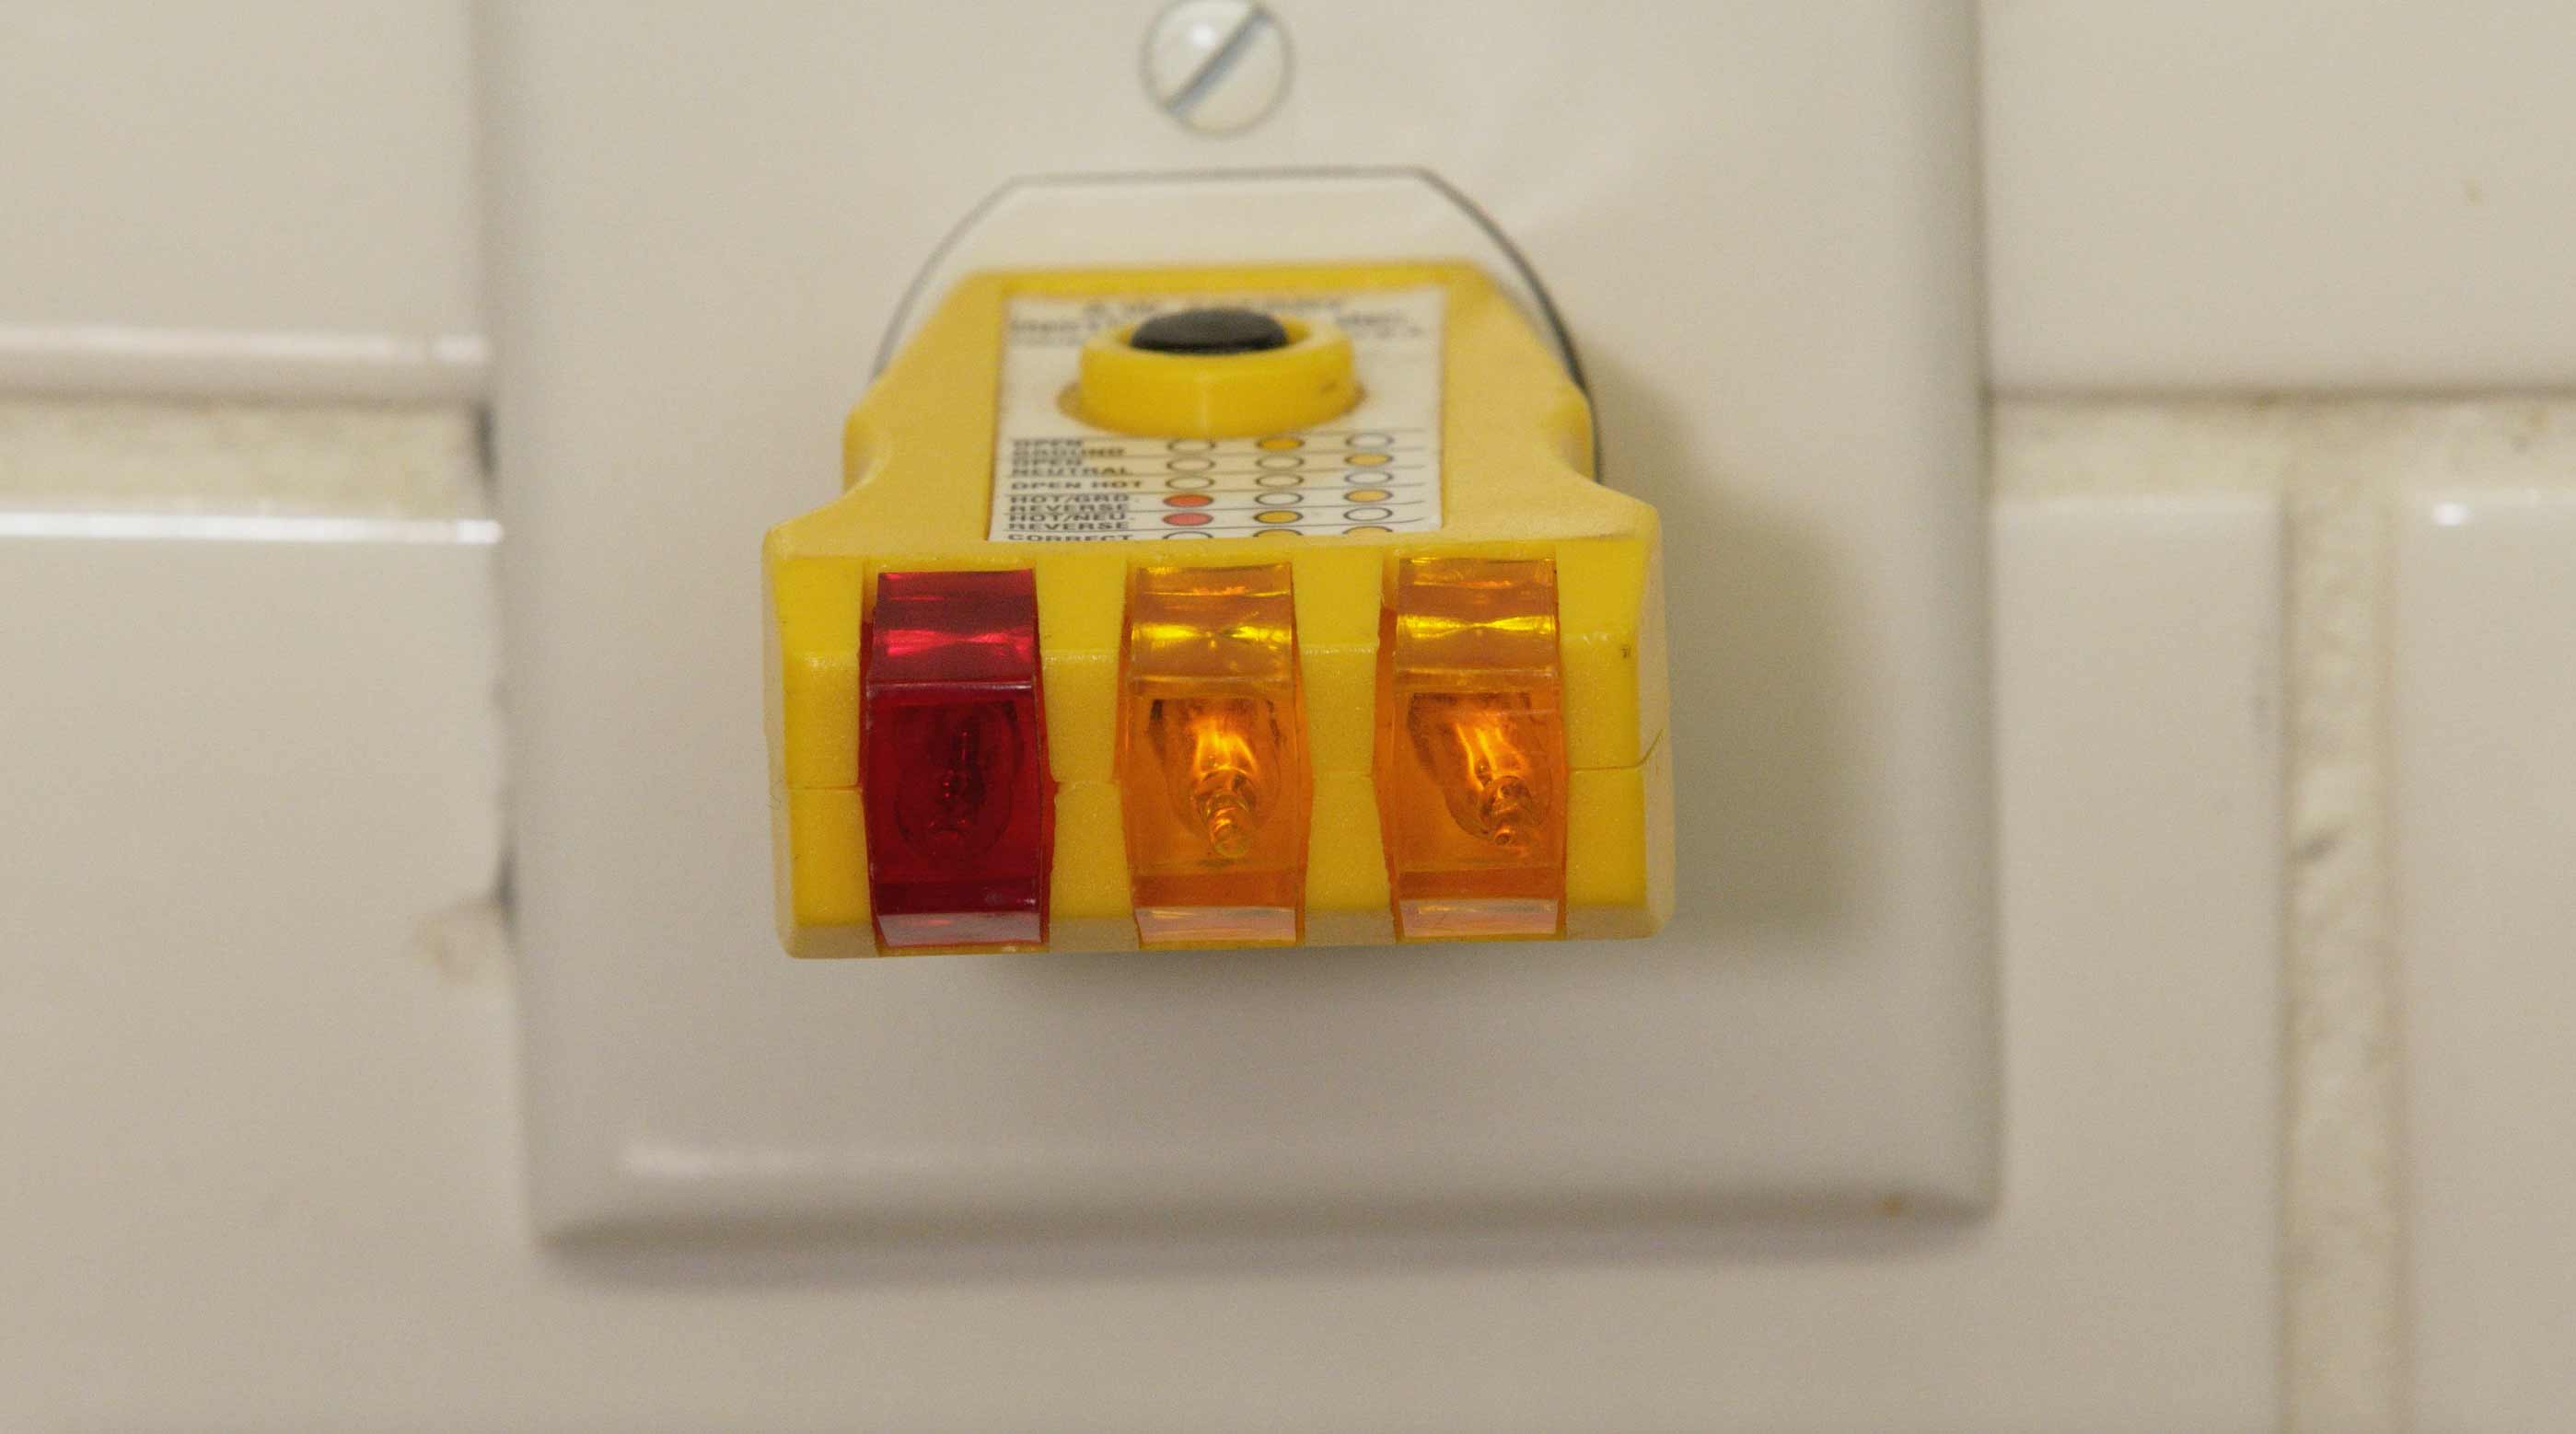 first step is to ensure that there is no power feeding into the electrical outlet. To do this, you’ll want to shut off the main power from your electrical breaker box. Then, I recommend using an outlet voltage tester like this one, Electrical Circut Tester. This is a relatively inexpensive and essential tool that will ensure the circuit is not live. Whenever working with electricity it is important to use caution and heed safety tips.
STEP 2
Now that you’ve used your voltage tester to double-check that the power is cut, you will want to carefully unscrew and remove the cover plate and outlet, pulling out the receptacle. The goal is to reattach the electrical wires from the current outlet to the new outlet. A great tip is to take a picture of the existing wiring so you can double-check when you rewire the new outlet.
STE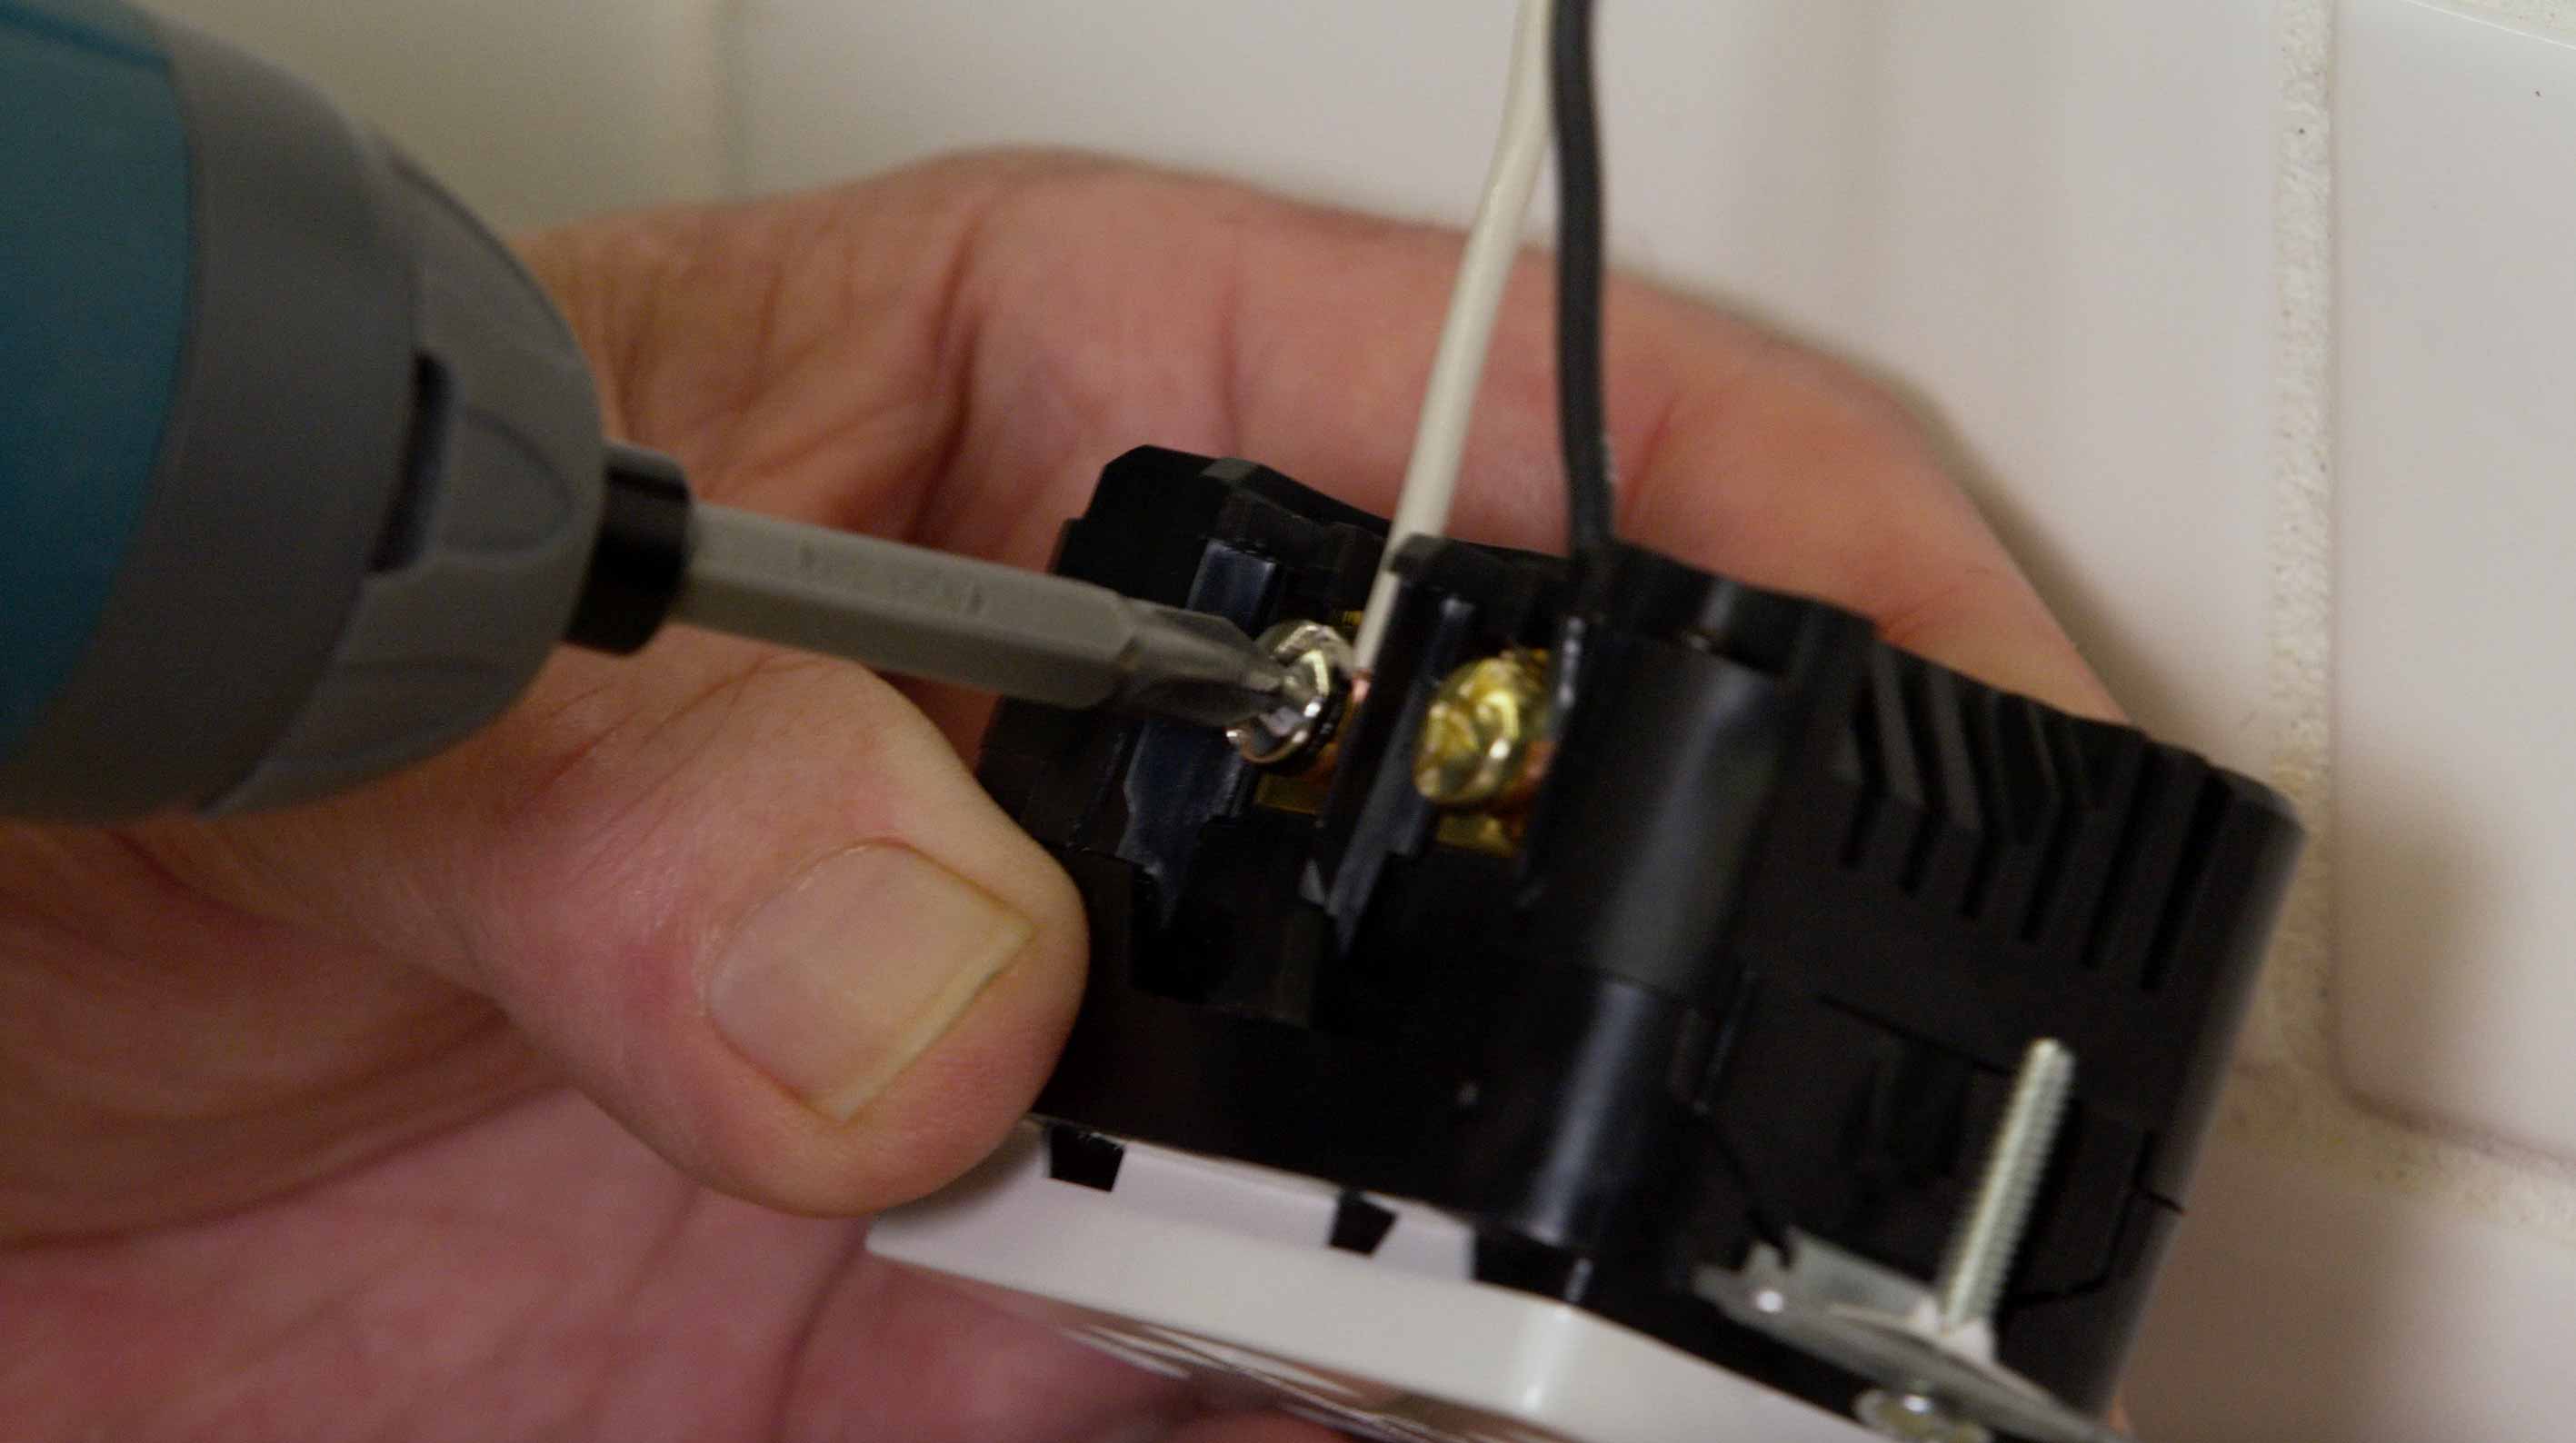 P 3
P 3
Then, remove wires from side terminals and detach the ground wire. Holding your new outlet, reconnect the wires to the correct terminals and reattach the ground wire. You can refer to your picture to be sure you’ve reattached the wires in the correct terminals! Gently position your new outlet into place and secure using a screwdriver.
STEP 4
The last step is to plug in the circuit tester, turn on the breaker and you will be good to go!
Now you’ll be able to plug in your USB devices and have use of the outlet at the same time. Not only will this help with organization of space, but the convenience will be something to be enjoyed!
Once you see how easy it is to do this project yourself, you can replace more outlets around your home to have USB ports for the ultimate organization.
Organizing a home can make for better productivity and better use of your spaces. Whenever your things are put in order, it not only makes your home look better, but it becomes more useful in your day-to-day life. For example, we often think about closets as a necessity for organization. This DIY home project about How to Install a Closet Organizing System will walk you through installing this system to give your closet the opportunity to be organized - and stay that way. Kitchens are another haven that craves organization. If you’re looking to maximize space, check out How to Convert a Closet into A Pantry with Pull Out Storage. Installing shelving and cabinets made a big difference in my project on How To Make a Laundry Room That’s Efficient. An organized garage can help everybody in the family reduce the clutter. Here is everything you need to know about organizing a garage and building a wall storage system. For more organizational projects and tips for your home, visit ronhazelton.com. Whether it’s your closet, laundry room, kitchen storage, garage, or basement, my projects and tips will make your home more organized.
Recommended Articles
The How’s and Why’s of Upgrading a Central AC System
A step-by-step video demonstration showing removal and replacement of a central air conditioning system. Includes advantages of new, state-of the-art AC systems.
If You’ve Got a Project That Involves Demolition, You’ll Want to Know About This Tool.
I try out a new tool designed and engineered to do one task exceptionally well -- demolition.