The Secret to Finishing Plywood Edges
The Secret to Finishing Plywood Edges
Plywood projects are fantastic, but exposed edges can be an eyesore. This blog post unveils the magic of edge banding - a simple technique to create flawless, finished edges on your plywood projects, making them look professional and ready for paint or stain. Watch the video to learn how to apply edge banding like a pro!
Why would you choose plywood for a project?
In the world of construction and woodworking, plywood stands out as a preferred material for its exceptional blend of properties. Its layered construction offers superior dimensional stability compared to solid wood, keeping your project flat and prevents warping over time. It is similar to particle board, but is made differently. This stability makes it ideal for load-bearing applications and ensures project longevity. Unlike solid wood, which can move and warp with moisture changes, plywood's layered construction makes it highly stable.
Plywood is relatively easy to cut, drill, and fasten with common tools like screws and nails. This user-friendly nature makes it a favorite among both beginners and seasoned DIYers.
A true chameleon, plywood comes in a wide range of thicknesses, wood types, and grades. This allows you to tackle nearly any project, from furniture building to wall paneling. Plus, it often has smooth surfaces that take paint or stain beautifully. Because of its strength, it makes a cost-effective solution for shelves, furniture, and more!
Get a Professional Look: DIY Plywood Edge Banding Techniques
Plywood – a crafter's dream material! It's stable, predictable, and takes paint and stain beautifully. But let's face it, those exposed edges with all the visible plies can be a bit unsightly. What is the solution to raw plywood edges? Edge banding.
What is edge banding for plywood?
Veneer edge banding is a thin layer of real wood veneer with an adhesive back that is applied to the edge of plywood to give it a finished look. The glue is activated by heat and can be easily applied using a household iron for a strong and permanent bond. Veneer edge banding comes in rolls with pre-glued options available, making it convenient for woodworkers to create a professional finish on their plywood projects.
Using a veneer edge banding can elevate your plywood projects to a professional level. By applying a thin strip of veneer to conceal the exposed edges, you can achieve a clean and polished look. Veneer is available in various materials like wood, PVC, and melamine, offering flexibility in matching your project's aesthetic.
When done correctly, edge banding not only enhances the appearance of plywood but also provides additional protection against moisture and impacts. It creates seamless joints and ensures a cohesive finish throughout your project. Whether you're crafting furniture or cabinets, mastering edge banding techniques will take your woodworking edge banding is a thin layer of real wood veneer that is applied to the edge of plywood to give it a finished look.
Let’s Get Started!
Cut to Size: First things first, grab your edge banding and cut a piece slightly longer than the plywood edge you want to cover.
Heat it Up: Time to activate the glue! Set your iron to medium heat and carefully press it onto the back of the edge banding. Move the iron slowly, just like ironing a shirt, to avoid burning the wood.
Adjust: You'll have a little wiggle room to adjust its placement before the glue sets fully.
Give it Time to Set: Let the edge banding cool and cure for about five minutes.
Trim & Perfect: Trim any excess banding. Use an edge band trimmer, a tool with built-in blades will do the magic of trimming the excess flush with the plywood surface. To use it, place it on top of the plywood, aligning it with the edge banding. Squeeze the handles together and glide over the edge. Use sandpaper to smooth out any rough edges for a perfect finish.
Enhancing the look of your plywood projects with edge banding is a smart and effective way to achieve a polished finish. By concealing those unsightly edges, you can elevate the overall appearance of your creations. Edge banding not only adds a professional touch but also provides durability to the edges, making your projects last longer. If you want to master the art of edge banding and learn more about how it can transform your woodworking projects, make sure to watch the video for detailed instructions and expert tips. Elevate your craftsmanship with this simple yet impactful technique!
Recommended Articles
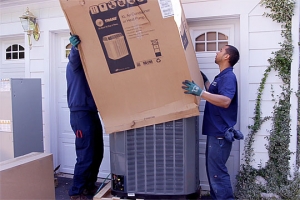
The How’s and Why’s of Upgrading a Central AC System
A step-by-step video demonstration showing removal and replacement of a central air conditioning system. Includes advantages of new, state-of the-art AC systems.
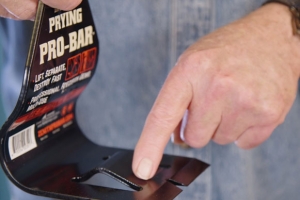
If You’ve Got a Project That Involves Demolition, You’ll Want to Know About This Tool.
I try out a new tool designed and engineered to do one task exceptionally well -- demolition.