RON HAZELTON:
Mark and Suzy Geller, down the road here in Reading, Connecticut, love natural light but they haven't been able to get any in their hallway. Well, that is until now. I'm gonna head over there and give them a hand with something called a tubular skylight. Hey Mark.
MARK GELLER:
Hey, Ron, how you doing?
RON HAZELTON:
Nice brisk fall morning, huh?
MARK GELLER:
Oh, it's a bit hippy out here. Why don't you come on in and warm up by the fire.
RON HAZELTON:
Well, that sounds -- wow, a fireplace in the kitchen. I love that.
MARK GELLER:
My wife, Suzy.
SUZY GELLER:
Hi, Ron, nice to meet you.
RON HAZELTON:
Pleasure to meet you.
SUZY GELLER:
Can I get you some coffee?
RON HAZELTON:
Sure, thanks. You know, I couldn't help but notice when I drove up that you guys already have four or five skylights in the house.
SUZY GELLER:
Well, we really love natural light.
RON HAZELTON:
Well, the hallway, you know, is one place where it's almost impossible to get it from windows so --
Well, I think there might be a bright solution for Suzy and Mark. It's called a tubular skylight, a cylinder that passes through the roof and attic, ending in the hallway ceiling. Sunlight is collected at the top of the tube and directed downward. They seemed to like the idea.
So you want to take a look and show me where it's gonna go.
MARK GELLER:
Terrific.
SUZY GELLER:
So Ron, this is the hallway.
RON HAZELTON:
Right up here, huh?
SUZY GELLER:
Yeah.
RON HAZELTON:
You know, this is very typical, you know, in the hallway -- you just can't get natural light into these places.
SUZY GELLER:
So dark.
RON HAZELTON:
Yeah, right. Well, this is my favorite part.
SUZY GELLER:
Why is that?
RON HAZELTON:
You can start punching holes in the ceiling.
SUZY GELLER:
Ahah.
MARK GELLER:
I'm with you.
SUZY GELLER:
Sounds great. Okay, well, I'm out of here. [LAUGHS]
RON HAZELTON:
Oh, really, you've got to go?
SUZY GELLER:
Let you guys do the work yourselves, okay. I got some stuff to --
RON HAZELTON:
All right, well keep an eye on us. Don't let us get in trouble.
Our first installation step is to decide where in the ceiling to put the skylight. Using a stud finder, Mark first locates the ceiling joists, then we explore the options.
It has to be between the -- this joist here, the ceiling joist, but I can move it back and forth this way. So what do you think, you like it here?
SUZY GELLER:
It's not bad, yeah, that looks pretty good.
MARK GELLER:
Yeah, I like that.
RON HAZELTON:
Just gonna draw a little reference line out here.
Mark drills a hole in the approximate center of the circle and inserts a screwdriver.
Push it through a little bit, just twist it back and forth.
Then we go up in the attic, locate the screwdriver and verify that the opening will in fact fall between the joists and that there are no obstructions.
I want to create a hole that's exactly in the center between these two joists right here.
Next, I hold a plumb bob over the screwdriver hole, wait for the swinging to stop, then mark the point on the roof that's directly above the hole in the ceiling.
RON HAZELTON:
But now once again, we want this to be between these two rafters because we're putting in a 14-inch unit, so we've got to be right in the center.
Once we've located the center point, we drill through. Then we take an ordinary coat hanger, cut out a section and insert the length of wire through the roof, so we can locate the hole from the outside.
Do you have a large compass, one that could draw a circle 14 inches in diameter?
MARK GELLER:
No, I don't think so.
[BOTH SPEAK AT ONCE]
RON HAZELTON:
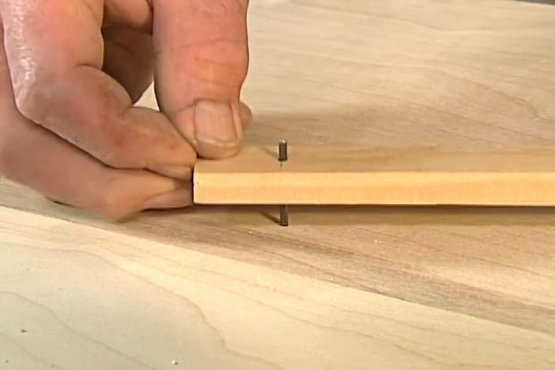
No, most people don't. So we're gonna make something up to draw a circle, okay.
MARK GELLER:
Okay.
RON HAZELTON:
So I'm just gonna push this screw starter. There we go, all right.
After we use our makeshift compass to draw a circle on the ceiling, we cut it out with a dry wall saw.
[MUSIC]
[SAWING SOUNDS]
There. Talk about destruction, isn't that great?
MARK GELLER:
That's wonderful.
RON HAZELTON:
Now, Mark, this is called a bottom tube assembly.
MARK GELLER:
Okay.
RON HAZELTON:
So just slip that right up in the hole we cut there.
MARK GELLER:
All right. You're feeling better already, aren't you.
RON HAZELTON:
Oh. I'm gonna screw this in just temporarily. Now you see the coat hanger up there that's going through the roof?
MARK GELLER:
Yes.
RON HAZELTON:
That's pretty close to being in the center of this.
MARK GELLER:
Okay.
RON HAZELTON:
Now, let's have some real fun.
[MUSIC]
You ready?
MARK GELLER:
Yes. Sure. I think so.
RON HAZELTON:
Okay. I'll follow you. Well, let me know if the lighter feels stable, okay.
MARK GELLER:
Feels good to me.
RON HAZELTON:
Now this is -- this is the flashing that's gonna make the seal actually around the piece of the upper dome that we're gonna put in here called the turret dome. What we need to do now though is to turn this bottom side up and center this right over that coat hanger.
Using a lumber crayon, we outline the opening.
Now this is a reciprocal saw, cordless, batter-operated. We're gonna use this to cut that circle out and you probably want to stay a little bit on the outside of the line because that crayon was pretty thick.
MARK GELLER:
Okay.
RON HAZELTON:
I want to try to start this using a plunge cut.
[SAWING SOUND]
So how's it feel to cut a hole in your roof?
MARK GELLER:
Scary.
RON HAZELTON:
Yeah?
MARK GELLER:
Yeah.
RON HAZELTON:
Easy though, isn't it?
MARK GELLER:
Mm-hmm [AFFIRMATIVE]. Too easy. [LAUGHS]
[LAUGHTER]
RON HAZELTON:
I screw a piece of scrap lumber to the circle to prevent the cut out from falling through and damaging the ceiling.
Okay.
MARK GELLER:
Really.
RON HAZELTON:
Finish it up.
[BOTH SPEAK AT ONCE]
MARK GELLER:
I know, I'm getting a little sloppy here.
RON HAZELTON:
It's all right. Just take your time, don't rush it.
MARK GELLER:
Okay.
RON HAZELTON:
Not bad, huh,
MARK GELLER:
Wow.
RON HAZELTON:
[LAUGHS] Looking right down into your house.
Before we set the flashing in place, we apply a bead of sealant around the base. Then use a shingle ripper to separate and loosen the shingles above the opening. Now, we slip the flashing up and under the loosened shingles.
I'm gonna slip this in here. Well, the flashing's in good shape. Want to move on now, Mark, to putting in what's called the top tube. This is the same as the bottom tube but one up in the ceiling except it goes from the top.
And we'll drop this down inside the flashing and through that hole we cut in the roof. What we need to look for now is to see whether this is aligned with that bottom tube.
MARK GELLER:
Okay.
RON HAZELTON:
Take a look, it looks to me like it's sort of skewing off in this direction over here. So they've made this so that it's adjustable. So if we just rotate this -- there we are, and then we can drop this back in here. That's pretty good.
Okay, Mark, you want to grab that roll of foil tape right there.
MARK GELLER:
Sure.
RON HAZELTON:
We're gonna tape these seams here.
MARK GELLER:
Okay.
RON HAZELTON:
Just go ahead, go ahead and follow me right on and around. Last thing before we install this, there's a protective liner right here. You see that? It's almost -- it's literally a mirror in here.
This tubular skylight uses a solar collector to concentrate sunlight and direct it down the reflective shaft. It attaches to the top rim. Finally, I place the acrylic dome on the top of the skylight and Mark screws it in place. The flashing assembly is secured with screws and the head's weatherproofed with a dollop of caulk.
Okay, well done, sir. I say let's go down and warm up, huh?
MARK GELLER:
That sounds great to me.
RON HAZELTON:
Now these strips of sheet metal, we're gonna form into what's called the extension tube. That's the tube that connects that top tube and bottom tube. You know, it will kind of roll up into a cylinder, just like this. It will look like this when we're finished with it.
And what holds this together, are these tabs right here and here.
Aluminum tape seals the seams and prevents light leakage. Finally, we peel off the protective film inside the tube, revealing the mirror-like reflective surface.
Now this is the top tube that comes through the roof, this is the bottom tube that we put up through the ceiling, and this is the extension tube that we assembled down in the bedroom and it will connect the top and bottom tube.
Before I put that in, I want to install this. This is called an iris and it allows you to control the amount of light that comes through here in much the same way a dimmer switch would --
[BOTH SPEAK AT ONCE]
On an overhead light fixture.
MARK GELLER:
That's great, that's great.
RON HAZELTON:
Now this just sets in place, right on top of the bottom tube like that, and we'll secure it with a couple of screws.
With the iris attached, Mark unscrews and then lowers the bottom tube. I insert the centerpiece --
Okay, Mark, push it back up.
-- and we connect the sections together. Again, we seal the seams with aluminum tape. As a finishing touch, we slip on a defuser to soften the light coming into the hallway. All that's left now is to wire up the switch for the iris. The wires are twisted on the end of a fish tape and pulled through the wall.
The box is installed, the switch wired and the cover plate assembly screwed in place. When the switch is rocked, the iris opens and closes, controlling the amount of sunlight that comes into the room.
You know, it's not too often I get to bring some sunshine into somebody's life.
SUZY GELLER:
Well, I'm pretty impressed.
RON HAZELTON:
Got your own sun spot up there now.
SUZY GELLER:
That is great. Oh, my God, what a difference. This was so dark before. Totally natural.
RON HAZELTON:
Yeah and it brings light -- I think you're gonna find it will bring you light all the way down the stairs here. Just be sure to put your sunglasses on before you head upstairs.
SUZY GELLER:
I will think of you every time I walk up there. Thank you.
RON HAZELTON:
All right, I'm gonna take off, okay.
MARK GELLER:
Okay, Ron. Thank you again.
SUZY GELLER:
You can see yourself out all right?
RON HAZELTON:
I will. Yeah.
SUZY GELLER:
Okay, thank you. Oh, my God, hon, you really did this?
MARK GELLER:
Just me by myself.
SUZY GELLER:
No kidding. He just watched, huh?
MARK GELLER:
I borrowed his tools.


