How to Make Moveable Drawer Dividers
How To Make Drawer Dividers That Are Endlessly Customizable
Drawers can get messy and to make them more organized, drawer dividers are your solution. A well-organized drawer not only tends to use space more efficiently, but it lets you find what you need when you need it. But what happens when things change? Maybe you bought a few new tools and now they won’t fit into your organizer. Maybe you reorganized your workspace and are needing a different arrangement. Or over time, your drawers simply become cluttered - it happens to everybody!
In my video and post, I’ll show you the fastest and easiest way how to make drawer dividers that are endlessly customizable. This technique can be applied to any drawer - wood, metal, or plastic. And, the best part is that it is completely moveable, rearrangeable, and endlessly customizable.
This could be useful for your at-home tool workshop, laundry room, kitchen, garage, mudroom, office - or really any drawer in the house. My method is quick, easy, and inexpensive to build. Soon enough, you might be considering adding these drawer dividers throughout your whole house.
 MAKING THE DIVIDERS
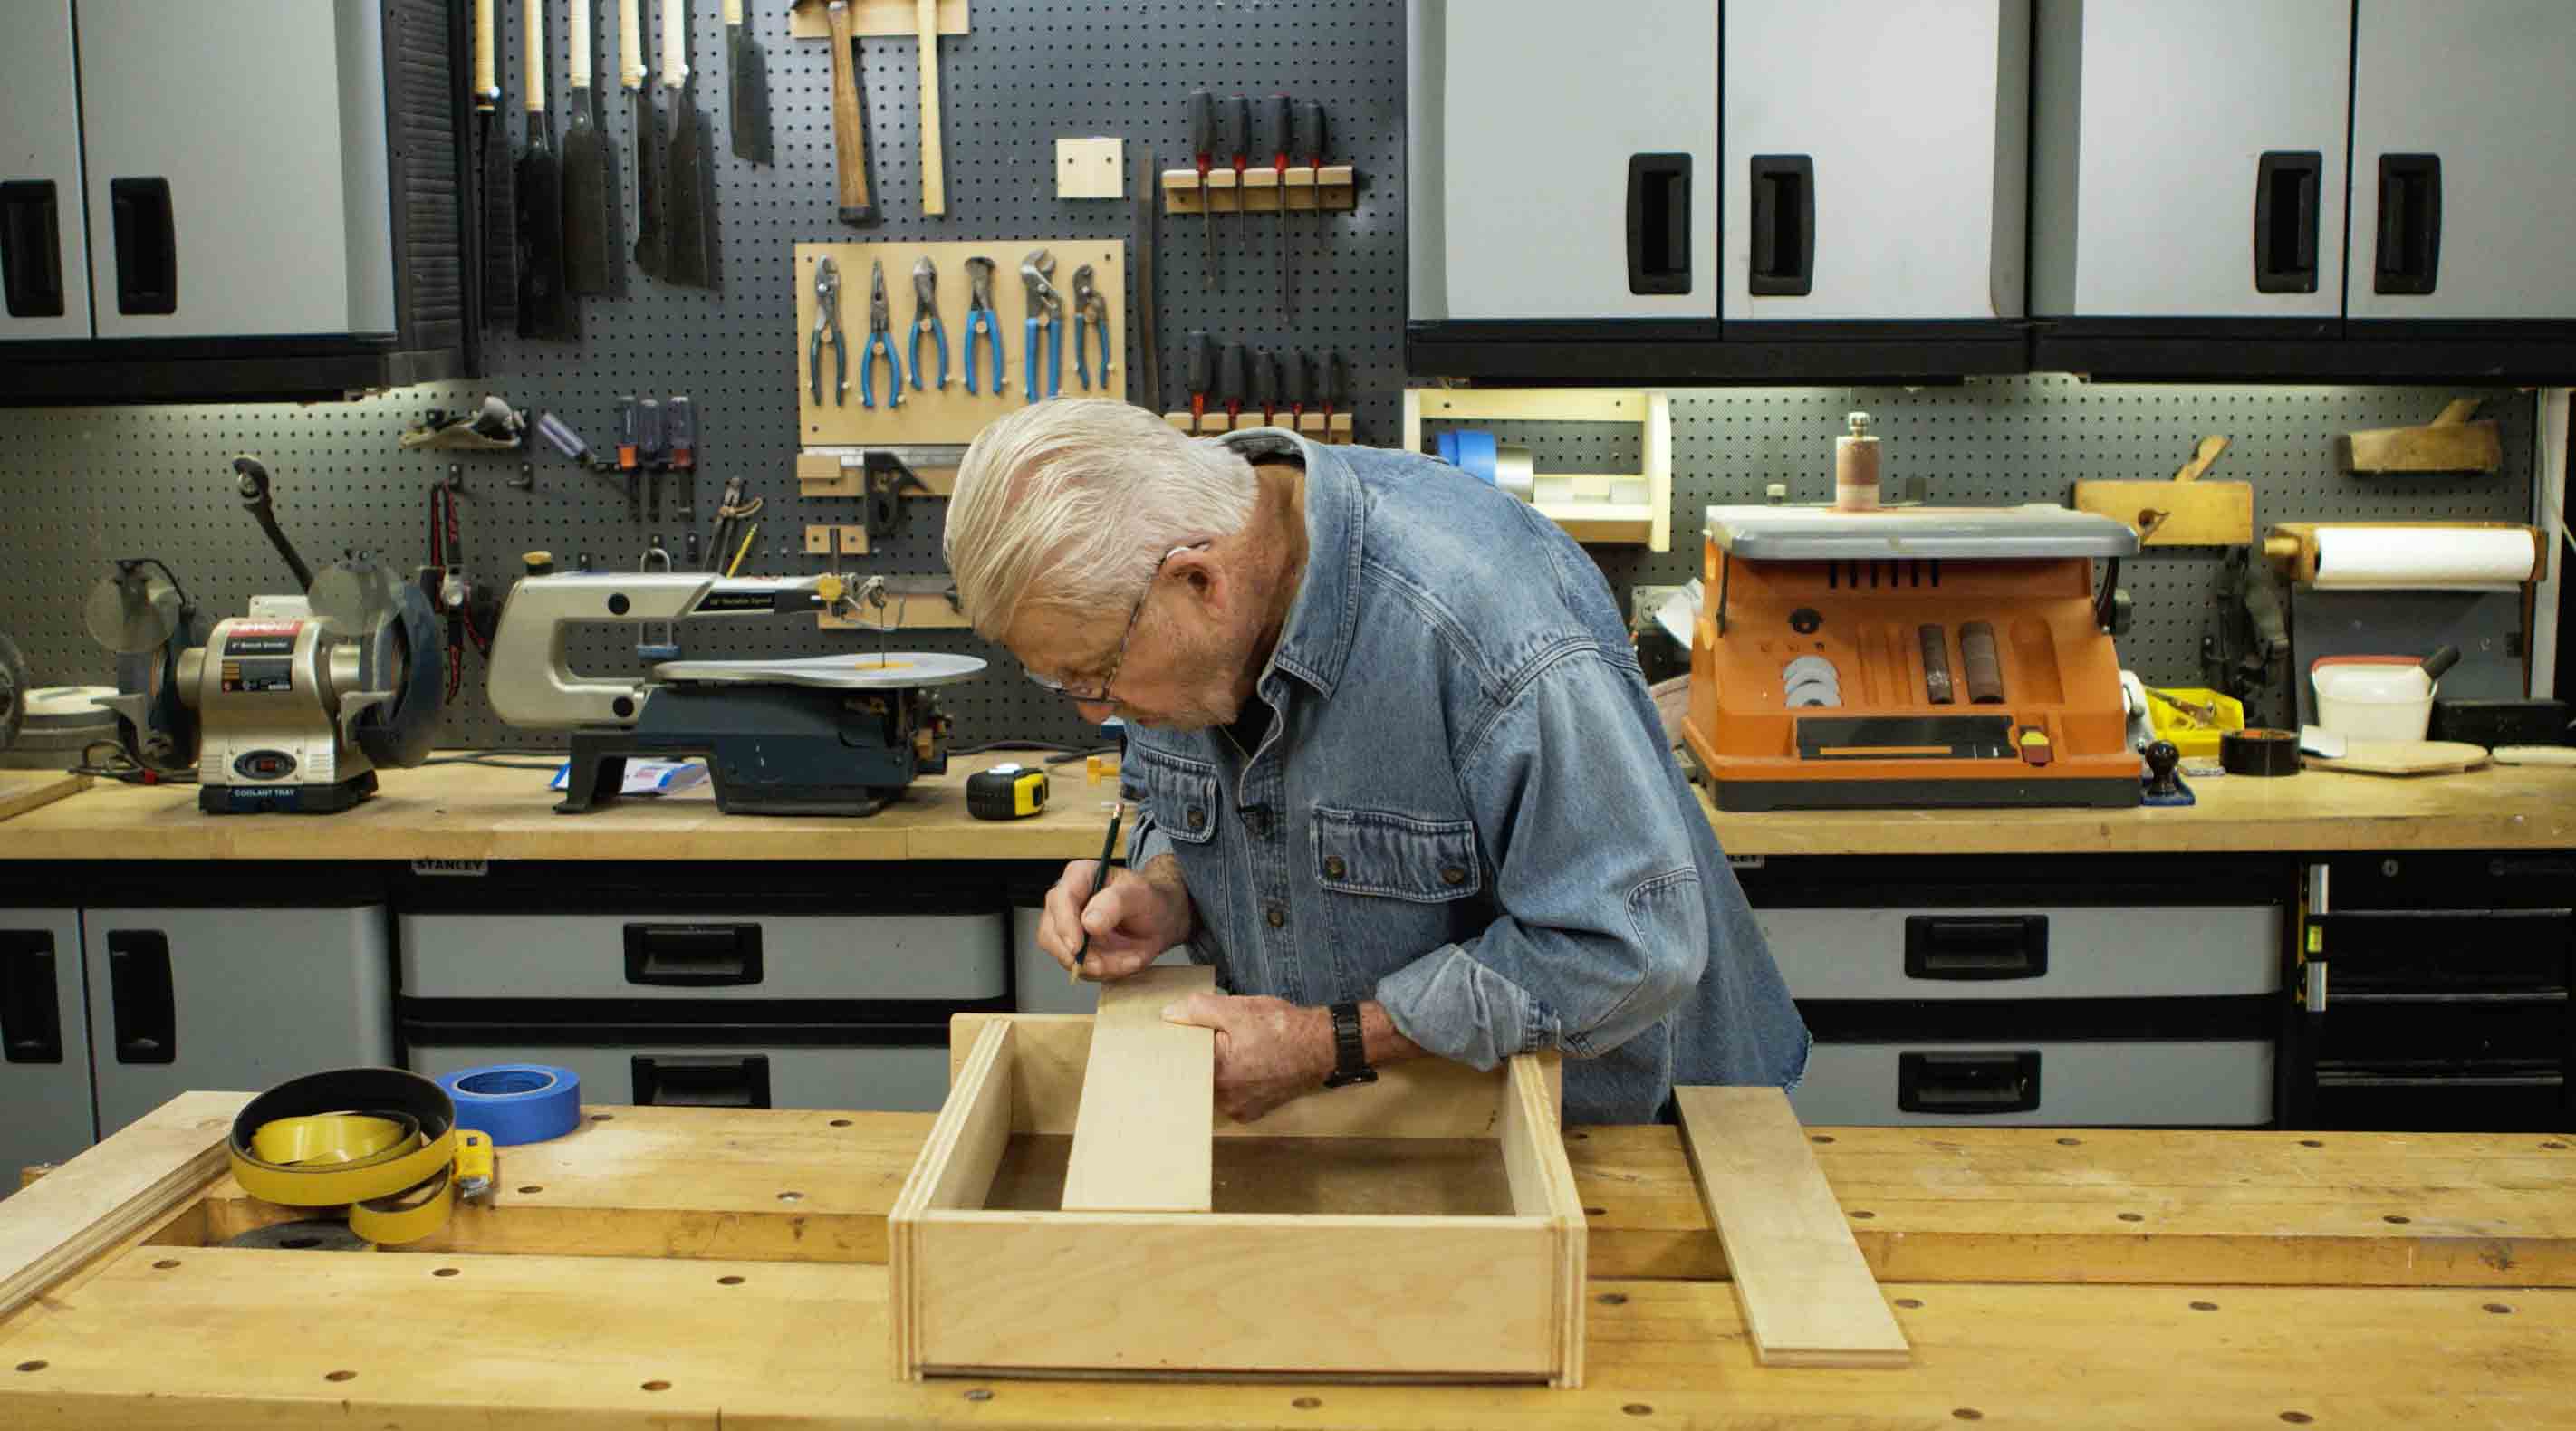
The first step is to cut the divider material. I am using a half-inch thick plywood, which I will cut into 3.5 inch wide strips. I prefer using my table saw, but you could also do this with a circular saw, jigsaw or band saw.
Next, I will cut these to length. You will want to cut these a little bit shorter than the depth of the drawer. You should leave it shorter by about a sixteenth of an inch, leaving a gap on the ends. The reason for this is that this technique relies on compression. You’ll see more about how that works in the next step, once the dividers are cut and placed. For cutting these to length, I prefer using my miter saw, but, again, any saw will do just fine.
THE SECRET
The trick to making these drawer organizers endlessly moveable relies on compression. You may be wondering how these drawer dividers will be held together by compression? The answer is high-density closed-cell foam weather stripping.
PUTTING IT TOGETHER
The weatherstripping is an eighth of an inch thick and like most, has a self-adhesive back. Because of this, you’ll want to make sure all surfaces are perfectly clean before you apply the weatherstripping. I like to use denatured alcohol to remove all of the oils and dirt which could prevent the adhesive from sticking. 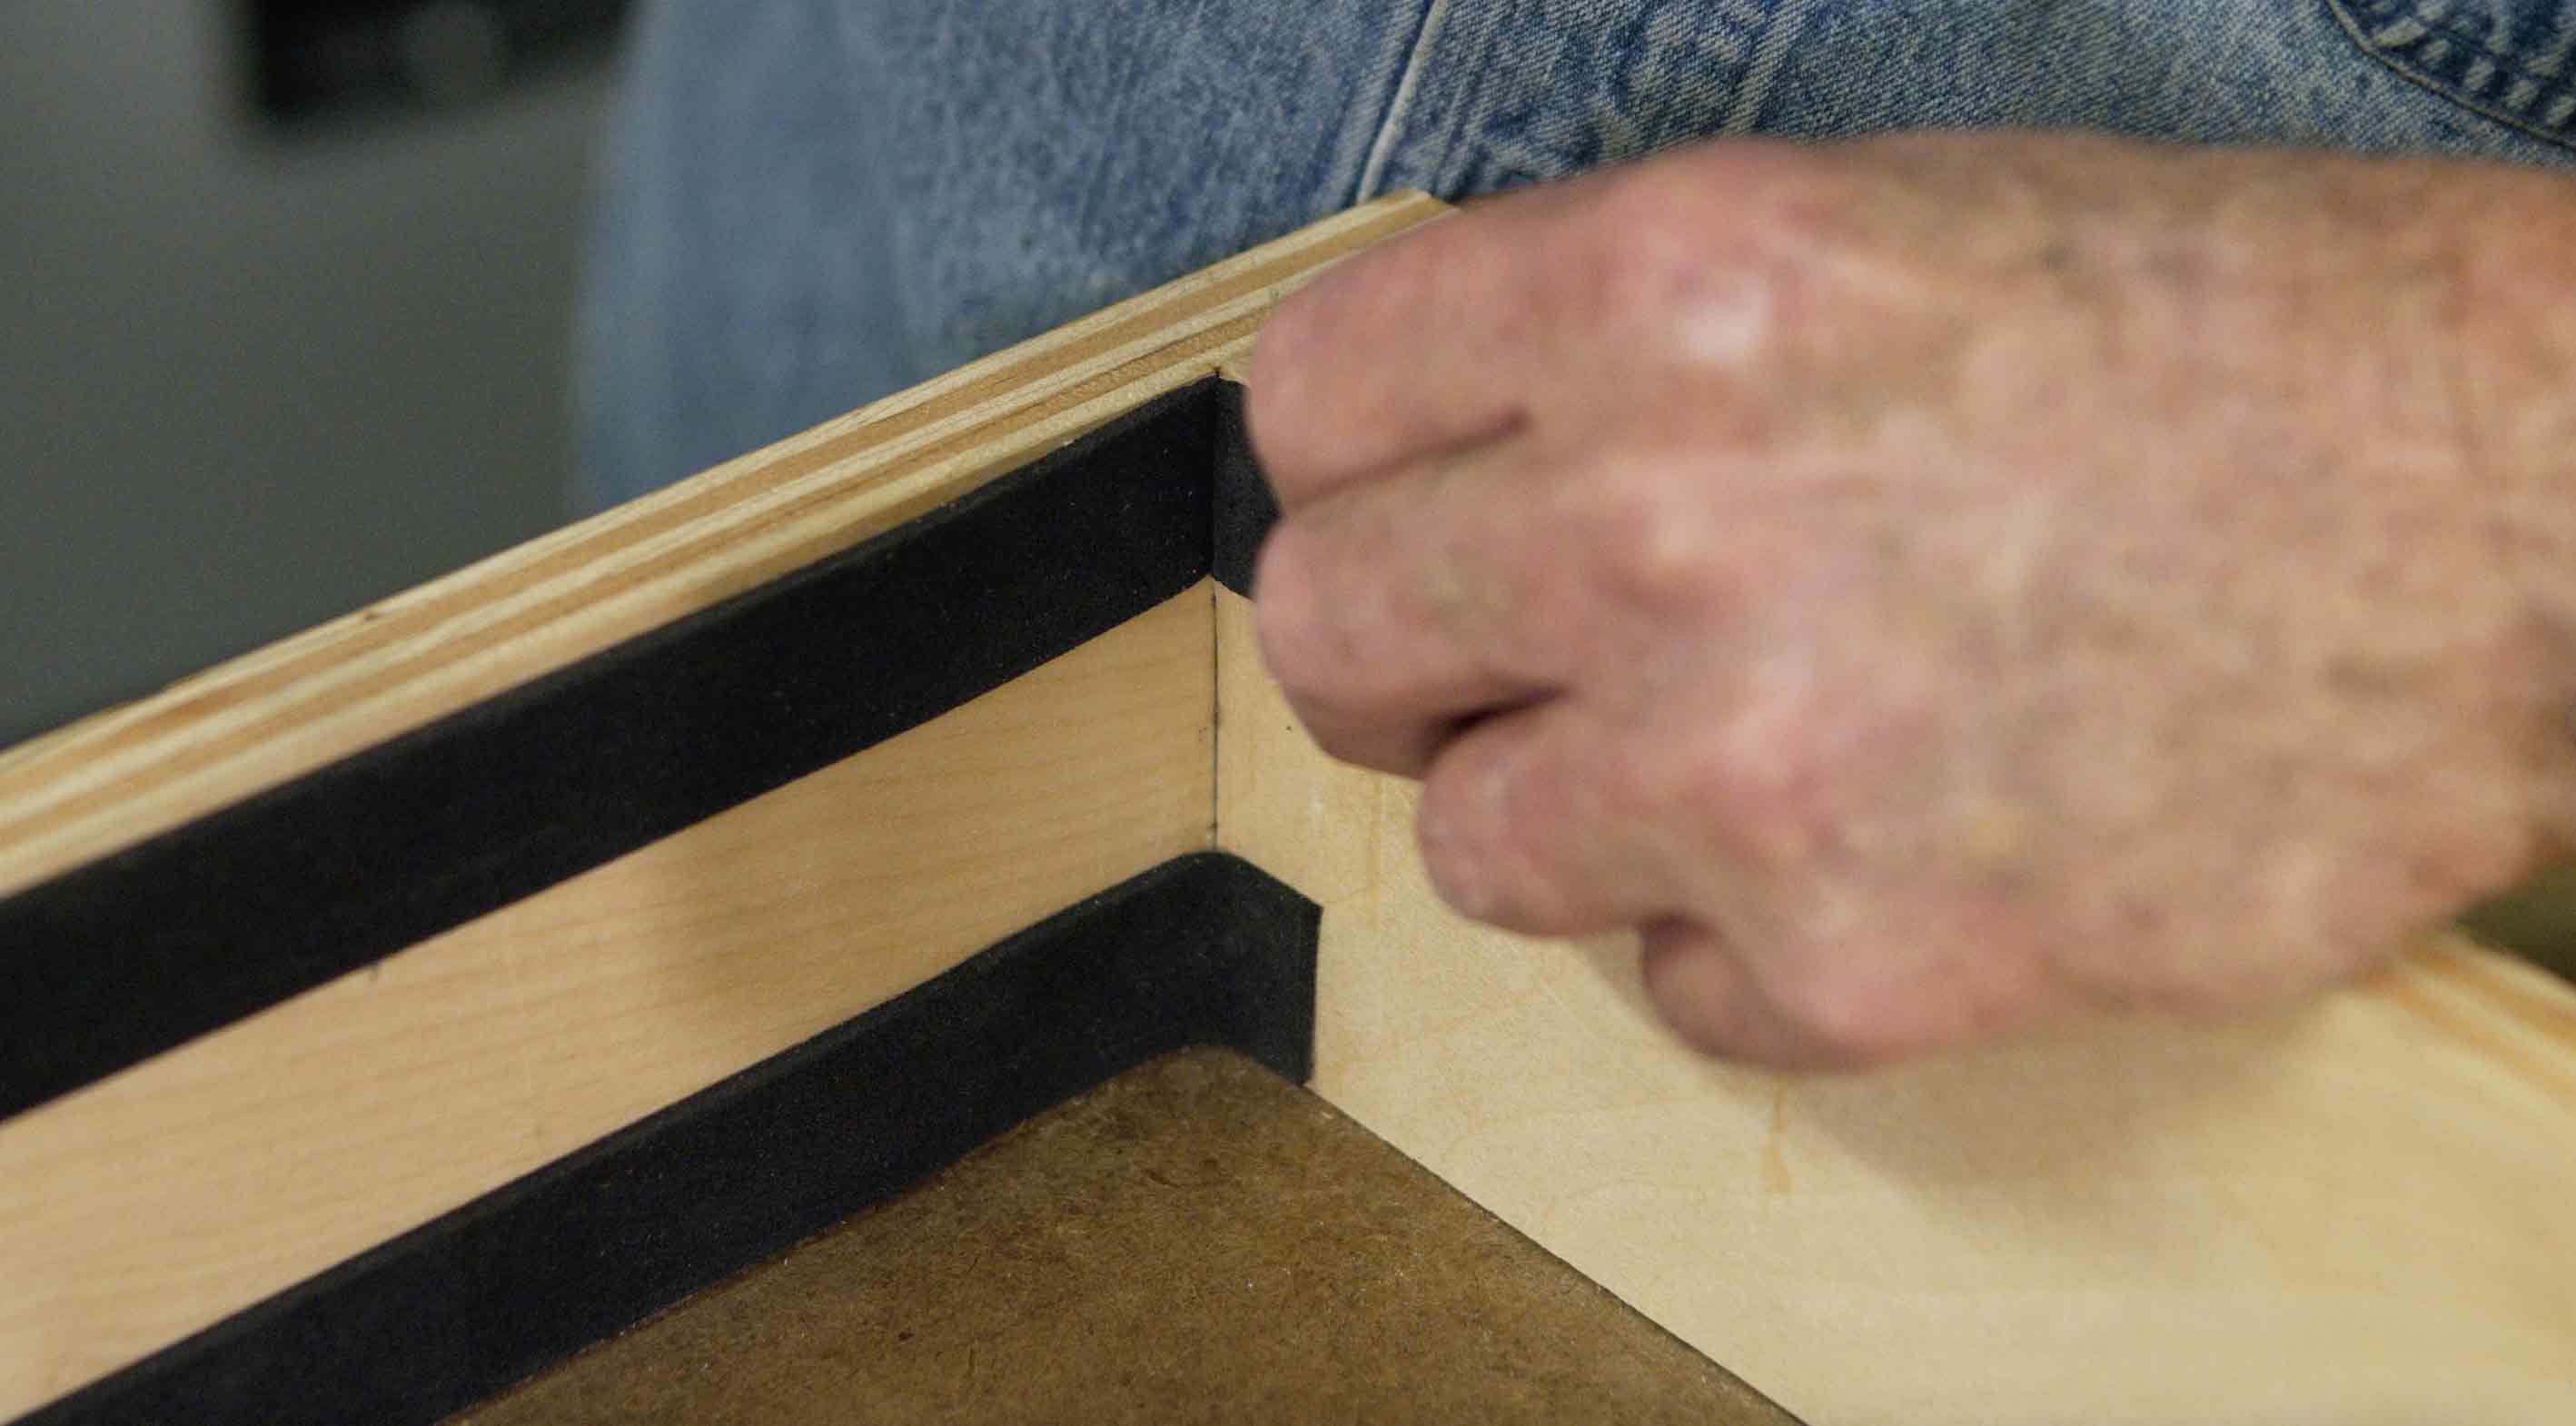
I know it’s easy to think “Do I really need to clean this?” But, don’t skip this important step because taking a little extra time now will actually end up saving you time later. If you do not clean the surface properly, the adhesive may come apart, and you’ll end up having to re-do the entire project later.
Unroll the weather stripping and cut it roughly to length using scissors. Once you remove the protective backing, put one strip at the bottom and press it firmly into place. Then, place another strip along the top edge, and again, press firmly into place. Trim any excess neatly with a utility knife.
Repeat this process on the opposite drawer side.
MAKING IT EVEN MORE REMOVABLE
If you think that in the future you might want to remove the weather stripping from the drawer, you can use masking tape which has much less adhesive. You can place the masking tape down underneath the weather stripping. This way, you can peel the masking tape and the weatherstripping will come off with it. (And with little to no damage to your drawers)
INSTALL THE DIVIDERS
To install the dividers, set one end in place and pull the opposite end into position. This will cause the divider to compress the weather stripping, creating the pressure and friction that you need in order to keep the divider securely in place.
REARRANGE THE DIVIDERS 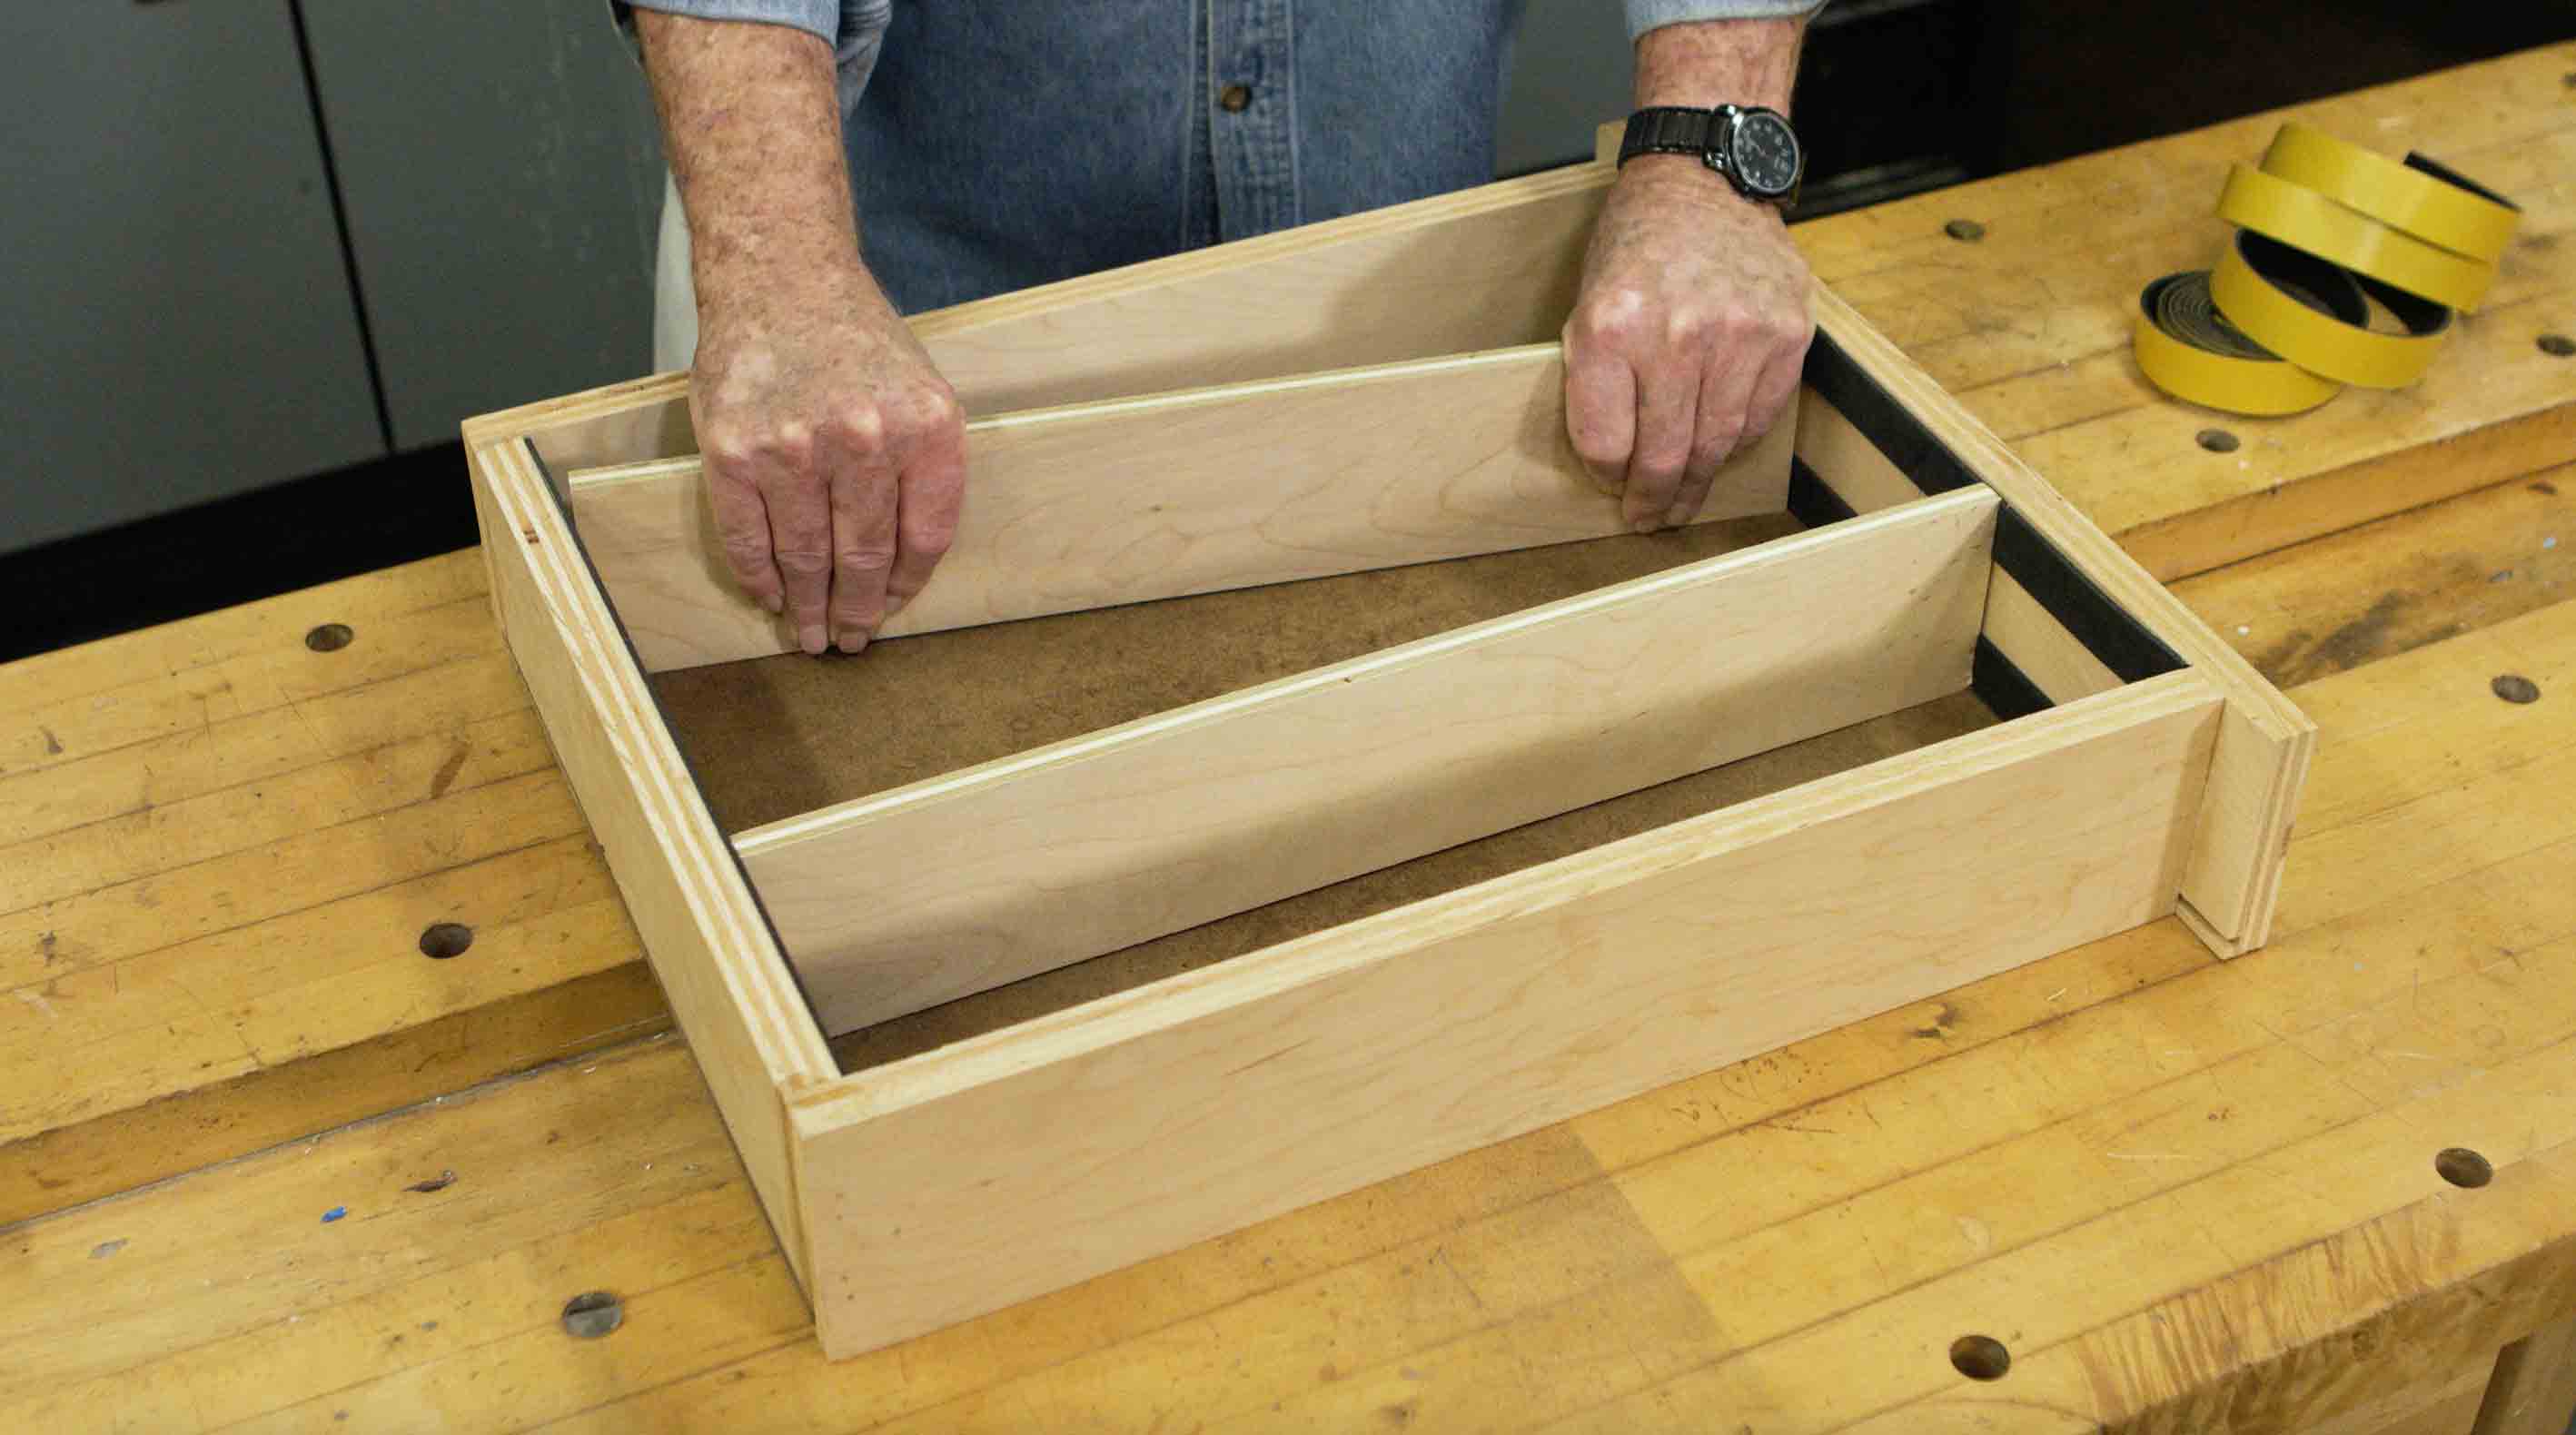
To remove the dividers, push one end to the side, releasing the pressure, then relocate the divider to wherever you want it.
Not only can you customize your drawer size with this approach, but the best part is that you can remove, re-arrange endlessly!
Using high-density closed-cell foam weather stripping and compression will allow your drawer dividers to be endlessly moveable. You can use this method in any drawer in your home. And, with masking tape underneath, it becomes even less of a commitment.
Many drawer dividers that you buy at the store are made from materials like plastic and have fixed, molded plastic compartments. My method not only allows you to change the configuration of your drawer and to do it yourself, but it’s eco-friendly in that it potentially saves you from having to throw away those fixed plastic drawers.
For more DIY organizational projects and tips for your home, you’ll enjoy How to Make Pull Out Shelves and How To Free A Stuck Drawer.
Recommended Articles
The How’s and Why’s of Upgrading a Central AC System
A step-by-step video demonstration showing removal and replacement of a central air conditioning system. Includes advantages of new, state-of the-art AC systems.
If You’ve Got a Project That Involves Demolition, You’ll Want to Know About This Tool.
I try out a new tool designed and engineered to do one task exceptionally well -- demolition.