How to Make Pull-Out Shelves for Kitchen Cabinets
Purchase a Kit and Use Your Know-how to Install Roll-out Shelves in Your Kitchen Cabinets
Widen your narrow cabinet openings to accommodate larger objects without damaging the cabinet doors or changing their appearance. Install sliding-shelf kits that you purchase, cut to size, and install in your kitchen cabinets for extra storage and easy access to items at the back. The kits join with dove-tailed sides and a tray bottom that is secured with screws.
The QuikTray rollout system is available online from quickdrawers.com.
The do-it-yourself rolling shelf kit can be found online at RollingShelves.com.
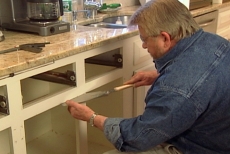
Remove Doors and Fixed Shelves from Cabinets
Remove doors, hardware, and any fixed shelves from the cabinets where you will install roll-out shelves. Temporarily take out drawers above the cabinets because they will obstruct your access.
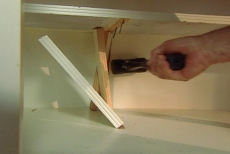
Reinforce Supports Before Cutting out Vertical Supports
Attach a strip of oak to the back of the horizontal support before cutting out the vertical supports to widen the cabinet openings. Use a Japanese handsaw to carefully cut the supports without damaging them, because they will be reused.

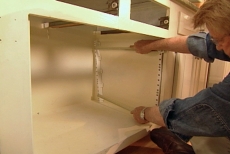
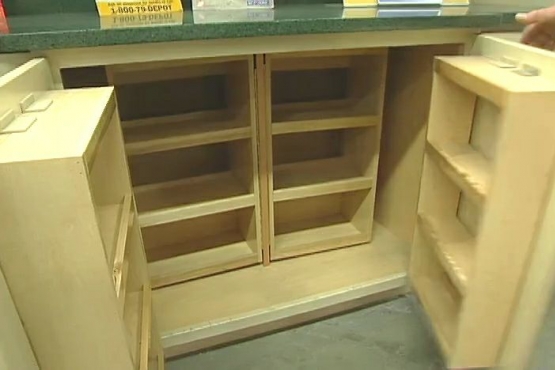
Install Rails and Partitions for Each Pair of Sliding Shelves
Position and secure four support rails/pilasters and two partitions for each pair of sliding shelves. The front and rear partitions serve as stubs to hold the rails/posts on the side where there is no wall.
Snap Drawer Glides into the Front and Rear Support Rails/Posts
Snap two drawer glides into the rear support rails. Position the post and snap the other end of the glides into the corresponding slot on the front post. Secure with screws.
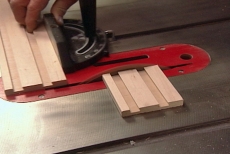
Cut the Dove-tailed Side Components to the Correct Length
Make square cuts as necessary to shorten each pair of side components for a pull-out shelf. Do not cut the front and back components because that will remove the dove-tails that join them to the sides.
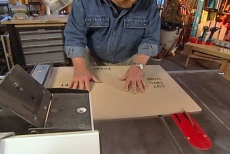
Trim the Bottom of the Shelf to the Same Dimension
Cut the panel that forms the bottom of the shelf to the same dimension as the side components. You will be trimming only the length of the panel from front to back--do not change its width.
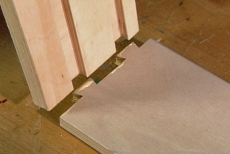
Assemble the Front, Back and Sides of the Shelf Frames
Brush carpenter's glue on the dove-tails and insert them carefully into the notches of the back component. Repeat for the front component and the other side to form a rectangular frame. Tap the joints gently into place with a mallet.
Glue, Position, and Screw the Bottom in Place
Brush glue on the bottom edge of the frame and set the bottom in place. Drive screws through the pre-drilled holes to secure it and provide structural rigidity to the shelf.
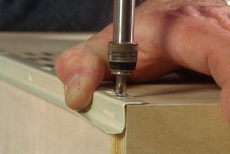
Attach Drawer Glides to the Sides of the Shelf
Secure the mating half of the drawer glides on the left and right sides of each shelf with screws and slide the shelves into the cabinets on top of the glide rails already installed. Line the drawers to prevent slipping.
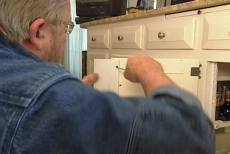
Attach the Severed Support to One Cabinet Door and Reinstall
Position and secure the severed support to the cabinet door to fill the gap where the support was removed. When reattached, the pairs of doors will open and close properly and disguise the cut.
Related Tips


Blog Articles

Expert Tips: How to Mount a TV on the Wall
Get step-by-step instructions on how to mount a TV on the wall, especially for big screen TVs. Master the art of wall mounting with our tips.

Frustrated by Stripped Screws? Here’s How to Get Them Out Fast
We've all been there. You're in the middle of a project, and suddenly your screwdriver spins uselessly in the screw head. The screw is stripped, and frustration sets in. With a little know-how and this simple trick, you can tackle a stripped screw and get your project back on track.

The Secret to Finishing Plywood Edges
Plywood projects are fantastic, but exposed edges can be an eyesore. This blog post unveils the magic of edge banding - a simple technique to create flawless, finished edges on your plywood projects, making them look professional and ready for paint or stain. Watch the video to learn how to apply edge banding like a pro!


