RON-VO:
HERE IN ORLANDO, FLORIDA, FANTASY AND COLOR CAN BE FOUND NOT ONLY IN ITS FAMOUS PARKS, BUT ALL THROUGHOUT THE CITY. THERE ARE CLOSE TO A HUNDRED THEMED TOURIST ATTRACTIONS HERE. AND ON ONE QUIET RESIDENTIAL STREET, THE HOME OF BARBARA AND NATHAN MCMAHAN REFLECTS NOT ONLY THE BRIGHT COLORS, BUT EVEN SOME OF THE FANTASY THAT MAKES ORLANDO SUCH A FUN PLACE.
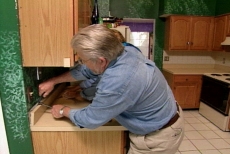
THE COUPLE’S KITCHEN COUNTERTOP HOWEVER DOESN’T QUITE KEEP UP… IT’S DRAB AND OUTDATED, SO THE MCMAHANS HAVE ASKED ME TO HELP THEM REPLACE IT WITH A LAMINATE COUNTERTOP THAT’S MUCH MORE IN KEEPING WITH THEIR ADVENTUROUS TASTE.
Ron:
Uh, do you have a sample of the laminate?
Barb:
Uh-huh. We have this one.
Nate:
It’s, um, we wanted to go with a slate color, it’s lichen I think is what they’re calling it.
Ron:
Wow, okay. Well that will work really nice with the, with the walls.
Nate:
Yeah we wanted something to kind of contrast it between the cabinets and, and the green.
Barb:
Uh-huh. Yeah.
Ron:
Right, right, right. Now we could put this on top of what you’ve got here—
Nate:
Right.
Ron:
--but it’s generally not the best idea so we’re going to just take everything out—
Barb:
Okay.
Ron:
--and make new blanks they call them and then put this on top.
Barb:
Okay.
Nate:
Okay.
Ron:
We should be able to do it in a day, maybe a little bit more.
Nate:
All right.
Barb:
Excellent. Good.
Ron:
Let’s get some pry bars and pull this off.
Barb:
Okay. Sounds good.
MUSIC
RON HAZELTON: [16:10:56]
All righty. Uh, first thing, let’s take off that backsplash in the back there.
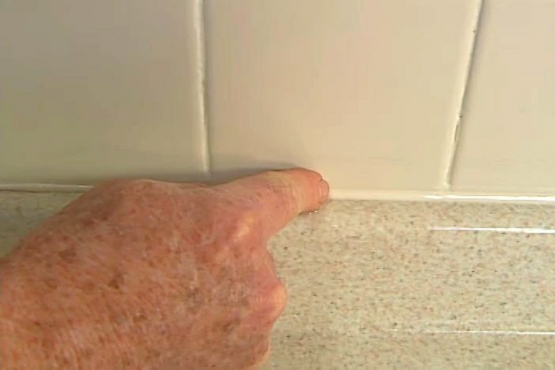
RON-VO:
WE START BY CUTTING THROUGH THE CAULK AROUND THE BACKSPLASH TO AVOID DAMAGING THE WALL PAINT WHEN WE PRY THE BACKSPLASH AWAY.
WE ALSO DRIVE PUTTY KNIVES BEHIND THE BACK SPLASH TO PROTECT THE WALL FROM OUR PRY BARS.
Ron:
We got our hands behind here, here we go.
Nate:
Like that?
Ron:
There we go. Excellent.
[SOT: electric screw driver]
RON-VO:
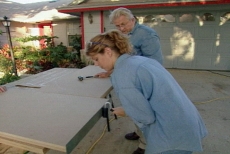
NEXT, BARB AND NATHAN TEAM UP TO REMOVE THE SCREWS HOLDING THE COUNTERTOP IN PLACE.
[SOT: electric screw driver]
MUSIC
Nate:
Whoo-hoo.
Ron:
All right, is it loose?
Nate:
Yup.
Ron:
All right. First one out.
Nate:
This thing has probably never been out since the house was built.
Nate:
You are free and clear to navigate.
Ron:
OK, it’s loose, guys, so let’s take it right out. Very nice. We got to go up a little higher.
Nate:
Little higher.
Barb:
Whoops!
Ron:
Way higher, way higher.
Nate:
All right.
Ron:
Okay now tip it up this way. All right. I’m going to hand this off to you Nate.
Nate:
Got it.
Ron:
You got it?
Nate:
Hey, Ron, look what I found in the neighbor’s trash.
Ron:
Yeah looks a lot like your countertop.
Nate:
Yeah, well I threw it in the neighbor’s trash and--
Ron:
Oh okay, well I’m glad you got it back ‘cause we’re going to need this all right?
Nate:
Apparently we need it.
Ron:
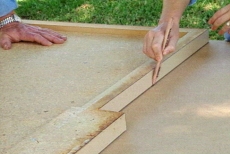
Uh, we’re going to, I’ll show you why in just a second. But this is the material that we’re going to use to make your new countertops—
Nate:
Okay.
Ron:
--or the, or the base or the substrate for them. It’s called, uh, MDF, medium density fiber board and eventually we’re going to glue the laminate right on top of that. The reason I’m glad you retrieved this from the trash can is that we’re going to use this as a template, uh, to trace…
Nate:
Okay.
Ron:
--and we’ll trace around this. That will give us a, a blank that’s exactly the same size as the old one.
MUSIC
Ron:
Okay, Nate. Go up--
Nate:
So I can throw this in the street or throw back in the neighbor's trash?
Ron:
Now you, now you can throw it back in their trashcan.
Nate:
Make it into a desk or something?
Ron:
There's our outline right there.
RON-VO:
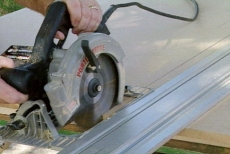
USING A STRAIGHT EDGE AS A GUIDE, BARB AND NATHAN CUT OUT THE FIRST BLANK WITH A CIRCULAR SAW.
Ron:
Now you notice that nothing moved when we finished that cut? That's because we've laid out 2X4's under here.
Nate:
You're such--
Ron:
And we're cutting through them, or just barely we're, just barely cutting into them. But it means we don't have to be hanging on to this, something's gonna drop as we cut through it. So that's great, guys. Now we just have to make one cut right down through here, and then kind of finish this one off. We'll do that with a jigsaw.
[SOT: JIGSAW]
Ron:
Very nice, guys.
RON:
NEXT, WE MOVE ONTO THE LARGER, L-SHAPED COUNTERTOP.
Ron:
Whoa!
Nate:
I saved my piece.
Ron:
Okay. That's all right.
RON-VO:
WELL THE BREAK REALLY ISN’T A PROBLEM. SINCE WE’RE GOING TO MAKE THIS PORTION OF THE COUNTERTOP IN TWO SECTIONS WHICH WE’LL JOIN LATER.
MUSIC
[SOT: JIGSAW]
RON – VO:
AFTER CUTTING OUT BOTH SECTIONS, WE LAY THEM BOTTOM-SIDE UP …BRUSH GLUE ON THE ADJOINING EDGES…THEN CLAMP THEM TOGETHER UNTIL THE GLUE DRIES.
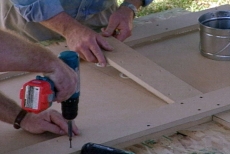
Ron:
We're gonna put this strip along here. This is gonna do two things. It's going to act as a cleat across this joint right here, giving it some strength.
Nate:
Right.
Ron:
But also it's gonna double up the thickness for the edge, because we want an edge that's not three-quarters of an inch thick, but an inch and a half, inch and a half.
Nate:
Okay.
Ron:
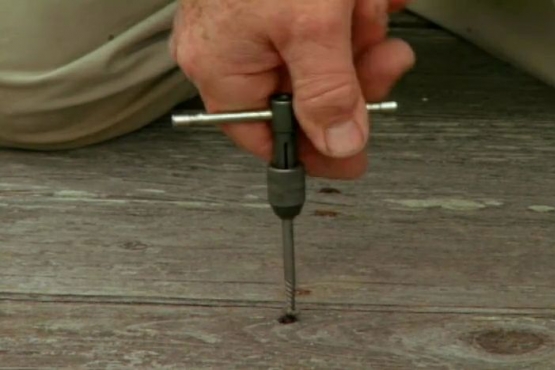
Right? It's gonna look a lot better. So let's, uh, drill some clearance holes in this first, guys.
[SOT: DRILL]
RON:
WHILE NATHAN BORES CLEARANCE HOLES THROUGH THE CLEAT, BARB FOLLOWS BEHIND DRILLING COUNTERSINK HOLES WHICH WILL ALLOW THE SCREW HEADS TO SIT SLIGHTLY BELOW THE SURFACE.
NEXT, WE APPLY GLUE TO THE FACE OF THE CLEAT… PRESS IT INTO PLACE… THEN DRIVE IN OUR SCREWS.
[SOT: DRILL]
MUSIC
RON-VO:
WE REPEAT THE PROCESS ON A SECOND CLEAT…THEN ATTACH A THIRD CLEAT DIRECTLY OVER THE JOINT WHERE THE TWO SECTIONS MEET.
Ron:
Well done.
RON – VO:
WE CONTINUE BUILDING UP THE BLANKS BY INSTALLING CLEATS ALONG EACH EDGE.
[SOT: drilling]
RON-VO:
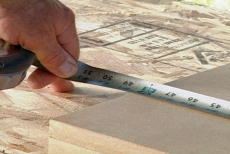
NOW WE’RE READY TO CUT THE LAMINATE. WE START BY MEASURING THE DIMENSIONS OF THE BLANKS.
Ron:
So the first one is forty-three and a half.
RON – VO:
I ADD AN EXTRA INCH TO EACH MEASUREMENT, SO THAT THE LAMINATE WILL OVERHANG THE BLANK ON ALL SIDES.
WE’LL TRIM OFF THE EXCESS LAMINATE AFTER IT’S ATTACHED TO THE BLANK.
Ron:
Now this comes in a whole different size, a range of, uh, sheet sizes from three feet wide and six feet long to five feet wide and twelve feet long. Um, I’ve selected four by eight sheets today ‘cause I think we’ll get the most efficient use of those.
RON-VO:
AFTER TRANSFERRING OUR MEASUREMENTS TO THE LAMINATE, WE CUT IT TO SIZE WITH A CARBIDE-TIPPED SCORING TOOL. WE RUN THE TOOL OVER THE SURFACE SEVERAL TIMES TO MAKE A DEEP SCORE. THEN BREAK THE LAMINATE.
MUSIC
RON-VO:
NATHAN AND BARB CUT THE REST OF THE LAMINATE TO SIZE.
WE’RE GOING TO START ATTACHING IT ON THE SIDES OF OUR BLANKS.
Ron:
So we’re going to do that by applying first of all some contact adhesive. Now I’ve already put one coat on these three surfaces here but Barb if you want to take a brush and put some more on.
RON-VO:
THIS SECOND COAT IS NECESSARY BECAUSE THE FIBER BOARD IS VERY POROUS. AS BARB BRUSHES IT ON, NATHAN APPLIES CONTACT ADHESIVE TO THE SIDE STRIPS OF LAMINATE. ONLY ONE COAT IS NEEDED HERE.
Ron:
And, interesting thing about contact cement is, you put it on two mating surfaces and you want it to be dry to the touch.
Nate:
Oh.
Ron:
And it, so it’s not sticky if you touch it with your finger.
Nate:
But when you put the two together…
Ron:
Boom.
Nate:
Gotcha.
Ron:
They bond.
Ron:
Now this is called a J roller. We’re going to use this to apply pressure to this laminate and the adhesive by the way is dry ‘cause you see it went from that milky color—
Nate:
Uh-huh.
Barb:
Uh-huh.
Ron:
--to clear.
Barb:
Right.
Ron:
So all you have to do right now, remember these are cut oversize so as long as you’re overhanging on all edges, position is not that critical.
RON-VO:
THESE STRIPS OF LAMINATE ARE GOING ON THE SIDES OF THE COUNTERTOP THAT WILL BE NEXT TO THE APPLIANCES. LATER, WE’LL USE A MORE DECORATIVE TREATMENT FOR THE FRONTS AND EXPOSED ENDS OF THE COUNTERTOPS.
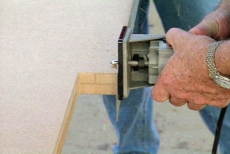
Ron:
Now it’s time to trim off all that excess laminate. It’s going to be easier than you think. This is called a laminate trimmer. It’s actually sort of a small router and the bit that we have in here has a ball bearing and that’s going to actually roll along this surface right here and the cutter right back here is going to cut this off—
Nate:
Oh, cool.
Ron:
--perfectly flush.
[SOT: laminate trimmer]
RON-VO:
WE RUN THE TRIMMER ALONG THE SIDES IN A CLOCKWISE MOTION. WHAT’S IMPORTANT HERE IS TO KEEP THE BASE PERFECTLY FLAT AS IT MOVES ALONG THE SURFACE.
AFTER COMPLETING THE TRIM WORK ON THE SIDES OF THE COUNTERTOPS, WE MOVE ON TO THE TOP. THIS TIME WE APPLY THE CONTACT ADHESIVE WITH ROLLERS, AND AGAIN, WE USE A DOUBLE COAT ON THE MDF.
Ron:
All right, it’s dry.
Nate:
Cool.
Ron:
Now, remember, when we put these in contact with each other, they’ll stick immediately. So what we’re gonna do is put these pie--, these strips of wood down here; just let the end kind of stick out a little bit there, Nate, on that one.
RON-VO:
SINCE THESE STRIPS WON’T STICK TO EITHER SURFACE, THEY ALLOW US TO SLIDE THE LAMINATE INTO POSITION AND MAKE SURE WE HAVE AN OVERHANG ON ALL SIDES. THEN WE REMOVE THE STRIPS AS WE PRESS THE LAMINATE INTO CONTACT WITH THE MDF.
Ron:
Once you’ve gotten this all rolled out, take the laminate trimmer, and the same way we did the sides, trim the overhang right here, okay?
Barb:
Okay. You can do that. I’m gonna go to bed.
MUSIC
Ron:
All right? And I’ll, uh, leave you guys to this, and I’ll see you in the morning.
Nate:
Cool.
Barb:
Good.
Nate:
Thanks, Ron.
Barb:
Thank you.
Ron:
Like it. I like it a lichen, huh?
Nate:
I likin’ the lichen.
BUMPER Ron:
For more great home improvement ideas, visit me at lowes.com/housecalls.
COMMERCIAL BREAK
COMMERCIAL BREAK
ACT 2 Ron:
Well, good morning.
Barb:
Good morning.
Nate:
Good morning, Ron.
Ron:
Boy, you guys made some progress. How’d this go?
Barb:
Really good.
Nate:
Ah, we just finished it up.
RON-VO:
IT’S DAY TWO OF MY HOUSECALL AT THE ORLANDO, FLORIDA HOME OF BARB AND NATHAN MCMAHAN WHO, LAST NIGHT, APPLIED THE REST OF THE LAMINATE TO THEIR NEW KITCHEN COUNTERTOPS.
WE ALSO APPLIED STRIPS OF LAMINATE TO THE COUNTERTOP EDGES THAT WILL BE ALONGSIDE THE APPLIANCES. THESE, WE SMOOTH WITH A FILE.
MUSIC
Ron:
The other edges, this edge and this edge, all the exposed edges, the ones you guys are gonna see from the front…
Nate:
Right.
Ron:
...or the end of the countertop, we’re gonna treat differently. We’re gonna put this decorative edge, uh, on the blank that we’ve made up right here. And in order to do that, you notice that there’s a tongue right here on the inside?
Nate:
Right.
Ron:
We’re gonna have to cut a dado or a slot right on the edge right here.
Nate:
Okay.
Ron:
Uh, to receive that, and we’re gonna do that--
Nate:
With a big router.
Ron:
With this tool. With a, with a router fitted out with a, a dado bit in here.
[SOT: electric router]
Ron:
I’m gonna let go now. Just keep goin’. You’re doin’ great. Just slide it along.
[SOT: electric router]
Ron:
Okay, good. Pull it away. There you go.
RON – VO:
AS WE CUT EACH PIECE TO LENGTH, WE PUT 45 DEGREE MITERS ON THE ENDS, TO CREATE CLEAN CORNER JOINTS.
NEXT, NATHAN AND BARB BRUSH GLUE, ON THE INSIDE OF THE DADO, ON THE EDGE OF THE COUNTERTOP AND ON THE BACK OF THE DECORATIVE TRIM.
MUSIC
Ron:
Okay. I'm gonna just push this in now.
Nate:
Wow. Now would you use a rubber mallet or anything to pound this in? Or just…
Ron:
Yeah.
Nate:
Or just--
Ron:
I think we may have to.
Ron:
All right? Now let's take this piece right here, and we want to pull these together, Nate. Nice and tight, okay?
[SOT – HAMMER]
RON-VO:
ONCE ALL THE EDGING IS ON, WE MOVE BACK INTO THE KITCHEN TO INSTALL OUR NEW COUNTERTOPS.
Ron:
Very pretty. You've got to like this, huh?
Nate:
Well, I'm still kind of partial to the screaming neon pink. But--
Ron:
Like it. I like a the lichen, huh?
Nate:
I likin’ lichen.
Ron:
All right. You want to attach these down?
Nate:
‘Scuse me. Yeah.
Barb:
Go for it.
Ron:
Here's some screws. Now look, before you go under there, Nate, there's a bracket right here. You see it right here?
Nate:
Same bracket as when we took it off?
Ron:
So you've got to come up through this bracket right here and into the bottom of the shelf.
Nate:
Got it.
[SOT: DRILL]
RON-VO:
WHILE NATHAN ATTACHES COUNTERTOPS, BARB AND I INSTALL THE BACK SPLASHES. WE START BY RUNNING A BEAD OF CONSTRUCTION ADHESIVE ACROSS THE BACK OF EACH ONE… THEN PRESS IT INTO PLACE.
WE RUN A BEAD OF WHITE SILICONE BETWEEN THE BACKSPLASH AND TILE TO SEAL THE GAP BETWEEN THEM…. FOLLOWED BY A BEAD OF CLEAR SILICONE BETWEEN THE BACKSPLASH AND THE COUNTERTOP. AFTER DIPPING HER FINGER IN RUBBING ALCOHOL BARB SMOOTHES OUT THE SILICONE IN A PROCESS CALLED, “TOOLING THE BEAD.”
MUSIC
Ron:
We’ll put this in first, and then put that L-shaped counter on, so that we can bring the counter up to the stove.
Ron:
A little higher. There we go, that’s it. Place it here.
RON VO:
WITH THE COUNTERTOP INSTALLED, WE PLACE THE NEW SINK UPSIDE DOWN AND TRACE THE OUTLINE.
MUSIC
RON-VO:
WE DRAW A SECOND LINE ONE QUARTER INCH INSIDE THE FIRST. THIS WILL BE OUR CUT LINE.
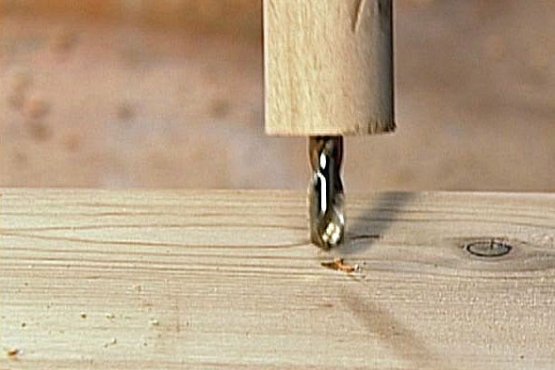
[SOT: DRILL]
RON-VO:
NEXT, WE DRILL STARTER HOLES AT ALL FOUR CORNERS… THEN USE A JIGSAW TO CUT THE OPENING.
[SOT: JIGSAW]
RON-VO:
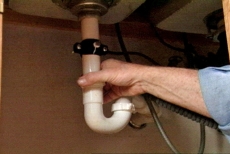
ALL THE FIXTURES ARE ATTACHED TO THE SINK BEFORE IT’S INSTALLED. THEN A BEAD OF SILICONE SEALANT IS APPLIED AROUND THE EDGE OF THE COUNTERTOP OPENING AND THE SINK IS SET IN PLACE AND SECURED FROM BELOW WITH CLIPS. FINALLY, THE PLUMBING IS RECONNECTED.
THE SINK AND COUNTERTOP REALLY HAVE TRANSFORMED THE KITCHEN.
Barb:
I love this.
Ron:
What a difference, huh?
Nate:
It looks so rich and, and, and elegant.
Ron:
And Lichen. Who would've thought Lichen, huh?
Nate:
Lichen. Lichen.
Ron:
It's perfect for you guys though.
Barb:
I know.
Ron:
I mean, you've got, you know, so many plants in the house.
Nate:
Yeah.
Ron:
And this color here, it just, it just, it's you and it picks up a lot of the elements in this room.
Nate:
Well, it used to be so bland. And now it brings out the color in the cabinets and, uh, breaks the room up, gives it three dimensions.
Barb:
Mm-hm.
Ron:
Brings out a lot of color in the cabinets, really.
Nate:
Yeah. Yeah. And it makes the room look wealthy.
Barb:
Right. And this edging's really nice, too.
Nate:
Yeah. Yeah.
Barb:
Rather than just straight down.
Ron:
This is what makes laminate look like such an elegant material.
Nate:
Mm-hm.
Ron:
One of the things. The richness of the pattern.
Barb:
Right.
Ron:
But for sure the detail on--
Barb:
Right.
Nate:
Yeah.
Ron:
--this edge right here.
Ron:
Well, it's been a long day.
Nate:
It has.
Barb:
Yes.
Ron:
Shall we, uh, say, uh,--
Nate:
Mm.
Ron:
--that's it for today?
Barb:
That's it. Sounds good.
RON-VO:
LAMINATE HAS COME A LONG WAY IN RECENT YEARS AND IF “LICHEN,” ISN’T YOUR COLOR, YOU’LL FIND COUNTLESS OTHER SHADES AND PATTERNS TO CHOOSE FROM AT YOUR HOME IMPROVEMENT CENTER.