How to Install Solar Powered Outdoor Lights and Lighting
Outdoor lighting is not only useful for illuminating your home, but also for adding security and beauty. The soft and sometimes colored exterior lights lend an enchantment to trees, plants, walkways and other man-made features of your home, lending them an aura quite different from their daytime appearances. Exterior lighting is available in low-voltage and solar models that are both attractive and easy to install. Here are some points on their installation.
- Choose from the many shapes and styles of solar-powered lights available at your home improvement store. These are environmentally friendly and nearly cost-free to operate, in addition to being easy to install. Solar-powered models absorb energy from sunlight, convert it into electrical energy, and store it in rechargeable solar batteries. At dusk, a small photo-cell fixture turns the lights on. The lights remain illuminated until the batteries run out of charge or the sensor detects sufficient daylight to turn them off. When the sun comes up, the batteries are recharged.
- Drive a foundation stake into the ground and slip on the post that comes with each solar fixture. Add the light component on top. They do not require wires, timers, or switches--although they do need to be activated once after you install them. The hardest part of the installation is ensuring that the posts are plumb, evenly spaced, and driven into the ground at the same elevation. Even a little carelessness in position can be very noticeable when the lights come on.
- Place the solar lighting devices in a position in which they get full sun exposure--or at least as much as possible during the day. Do not be fooled into thinking you have the ideal spot because the lights are in full sun at noon. Consider where shadows from trees and your house will fall as the day progresses. Solar lights require about 8 hours of direct exposure in order to provide the maximum 8 to 10 hours of illumination at night.
- Use a remote solar panel to absorb the sunlight's energy if the solar lights must be located in a shady or full-shadowed area. Install the remote panel in the sunlight where it will gather the light energy and send the electrical charge via wires to the lights positioned anywhere. The chief obstacles to avoid are not exceeding the length of the connecting wires and not making extra work by locating the two components on opposite sides of a path or other obstacle that requires digging underneath for wire placement.
- Gain the most efficiency from solar lights that use LEDs (Light Emitting Diodes) rather than bulbs--the more diodes in a fixture, the brighter the light. LED technology is ideal for marking and lighting dark areas, especially if there is a problem accessing electricity at these sites. These lights can illuminate house numbers and pathways and can even be floated in swimming pools or water features.
- Use conventional low-voltage lighting if you need a lot of illumination. They emit considerably more light, but are still economical and relatively easy to install. You will find models that light from above or below and can use colored lenses to cast even more enchanting plays of light.
Blog Articles
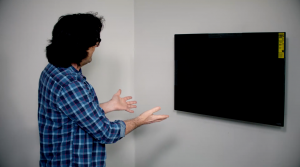
Expert Tips: How to Mount a TV on the Wall
Get step-by-step instructions on how to mount a TV on the wall, especially for big screen TVs. Master the art of wall mounting with our tips.
Frustrated by Stripped Screws? Here’s How to Get Them Out Fast
We've all been there. You're in the middle of a project, and suddenly your screwdriver spins uselessly in the screw head. The screw is stripped, and frustration sets in. With a little know-how and this simple trick, you can tackle a stripped screw and get your project back on track.
The Secret to Finishing Plywood Edges
Plywood projects are fantastic, but exposed edges can be an eyesore. This blog post unveils the magic of edge banding - a simple technique to create flawless, finished edges on your plywood projects, making them look professional and ready for paint or stain. Watch the video to learn how to apply edge banding like a pro!


