RON HAZELTON:
Well, I'm off to visit Mike Kerrigan and Lisa Holit. Now they live just up the road in Gloucester, Massachusetts. They're very proud of their town's history and they want their home to reflect that traditional New England style.
That's why they'd enclosed their deck with a classic lattice fence featuring an archway. But two-year-old daughter Cashlin is pushing farther and farther in her childhood explorations. So now Mike and Lisa need a gate under the archway and I've come to help them build it.
This is very nice. So is the gate just for appearance's sake or is there a security issue here with —
[BOTH SPEAK AT ONCE]
LISA HOLEN:
Security and looks too.
RON HAZELTON:
A little bit of both, a little bit of both.
LISA HOLEN:
Both, yeah.
RON HAZELTON:
Okay. What I'm thinking is something pretty simple but kind of an arched top that sort of mirrors the arch up here on — on the top of the entryway here. And then latticework, it picks up the latticework that's already there. So how does that look to you guys?
LISA HOLEN:
Looks great.
MIKE KERRIGAN:
Looks great.
RON HAZELTON:
After laying down Cashlin for a nap, Mike and Lisa join me on their driveway where I've laid out the lumber for their gate.
This big piece right here is going to be the top. It's out of this that we're going to cut this arch shape right here. The sides, here and here, I've laid out over here. And the bottom, this piece of 4 x 4 right here. Now all this is, guys, is a couple pieces of this 2 x 12 right here, that I've glued up with some waterproof glue and then clamped it.
To create the side pieces, we'll glue not just two but three boards together to form a sandwich.
And then if you can take the brush here, just kind of spread this out. This is sort of stiff.
LISA HOLEN:
Should I cover it all the way or?
RON HAZELTON:
Yeah, that's good. As much of an even coating as you can get with that, that's good.
This is polyester glue we're using today. It cures or dries by reacting to moisture. So I brush water on the face of the bottom board to promote a better bond when we join the two surfaces together. Lisa aligns the end of the middle board with a line I drew on the bottom board. Then repeats the process with the top section.
I will say one thing about this glue. I've ruined more than one set of clothing with this stuff. It is very, very strong and it will never let go of the wood, it will never let go of your clothing either.
When assembled, the shorter center board and the two longer outside ones, form notches at each end called mortises. Our next step will be to cut tongues or tenons in the ends of the top and bottom rails that will fit snuggly into the mortises, creating very strong joints.
And to do that, we're going to be cutting away every place here that I've got an X. And we're going to use the power miter box to do that. You'll notice what I've done is I've set the saw so that it only comes part of the way down.
And we'll place the wood in here, line the blade up with that first line right here. And then we're going to make a series of repetitive passes back and forth, and each time we'll pull this out a little bit until we've removed all of that wood and what we'll have left is the tenon.
Shaving the board one saw blade's width at a time, Mike and Lisa create the first half of the tenon. Then they flip the board over and finish the job.
Very nice, guys. After cutting a second tenon on the opposite end of the bottom rail, we repeat the process for the top rail.
All right, guys, here we go, there's our tenon.
On a wide plank like this, it's not unusual for the saw blade to leave a small ridge on one end. So I cut it away, using a chisel.
Let’s slip these together —
[BOTH SPEAK AT ONCE]
MIKE KERRIGAN:
Just temporarily here.
RON HAZELTON:
Should go right, the tenon should go right into the — the mortises there like that.
Next, we'll cut the top rail to form an arch.
Now that's going to be cut out of this wide piece right here and I've made up a template out of a piece of scrap plywood. So all we'll do is lay this on here like this and pencil — and just draw this arch right around here like that. Nice, okay?
The top curved rail will be three inches wide. So we need to draw a second parallel line that distance from the first. No, we can't just use the same template because this second line has a slightly larger radius. So we set a compass to three inches and plot a series of points beneath the first line.
When is the last time you used a compass?
LISA HOLEN:
Oh, I don't know if I ever used one.
RON HAZELTON:
Third grade? [LAUGHS]
[LISA LAUGHS]
Mike taps in small nails on Lisa's marks and now, it's time for the old bent stick trick.
This is just a thin strip of wood, thin enough to be flexible. So we'll start here. Lisa, if you could hand me a couple of clamps over there and we're just going to clamp this to the nails as we go around here. And what it's going to do is form a nice even arc for us.
This strip makes a template for an arc exactly parallel to the first and Mike draws in the line. To cut out our arch, we move to the portable band saw.
And just really take your time, there's no rush on this. Try not to drift off the line too much, just back up.
Next, Mike cuts the ends of the gate sides to match the curve of the arch top. Then Lisa and I fit the top and sides together.
And then we'll take this, our pencil. We're going to use the edge that we just cut as kind of a template, just going to cut around there. Great, okay. There is the top of our gate.
After sanding the arch with an oscillating drum sander, we start gluing the gate together.
Well, I'll bet you've done a lot of things one-handed, Lisa, but the gate I don't think was one of them that you probably planned on doing.
LISA HOLEN:
No.
RON HAZELTON:
Want a little bit of gluing?
LISA HOLEN:
Huh?
RON HAZELTON:
Want to try your brush.
LISA HOLEN:
I don't need to.
RON HAZELTON:
Good, excellent, excellent.
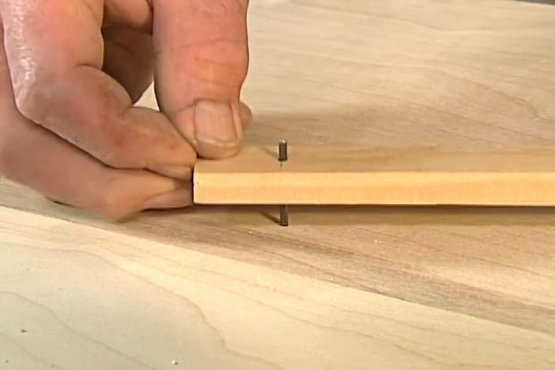
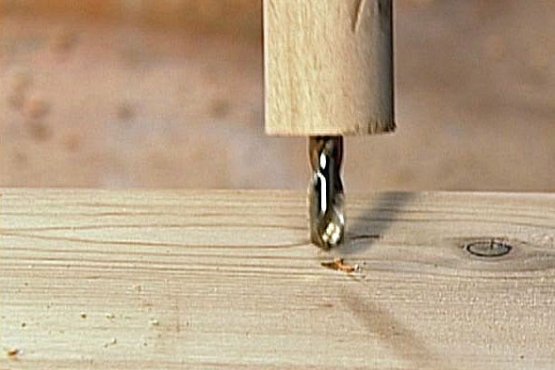
In addition to gluing all of our joints, we'll reinforce them with wooden pegs. We start by drilling two holes completely through each joint. Next, we brush glue on pieces of dowel and start them into the holes and hammer them in.
[SOUNDS OF DRILLING AND CASHLIN]
MIKE KERRIGAN:
Give it to Mommy.
RON HAZELTON:
Okay, Cashlin, the next dowel. We're good, hon. Good.
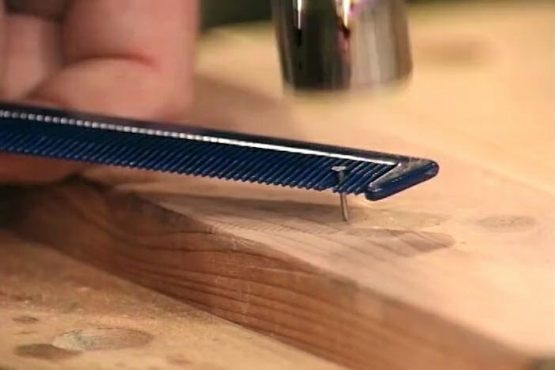
The dowels or pegs are intentionally left long and then cut off flush with my Japanese handsaw.
Well, our frame's together. Now we're going to be putting a piece of latticework in the center here. And to hold that in place, we'll need to install these little keeper strips.
Lisa attaches the wooden strips with a nail gun.
LISA HOLEN:
Oh, whoa.
RON HAZELTON:
After cutting out a piece of latticework to fit the frame, we drop it into place against the keeper strips.
There we go, all right. It's going to be nice. Now we'll take some more of these keeper strips and put them, put them on this side the same way we did the back side.
MIKE KERRIGAN:
Right.
RON HAZELTON:
All righty, we got a gate.
MIKE KERRIGAN:
It looks great.
RON HAZELTON:
But it's getting dark, so we call it a day. When I come back the next morning, Lisa's just finishing painting the gate.
Oh, this is coming along great.
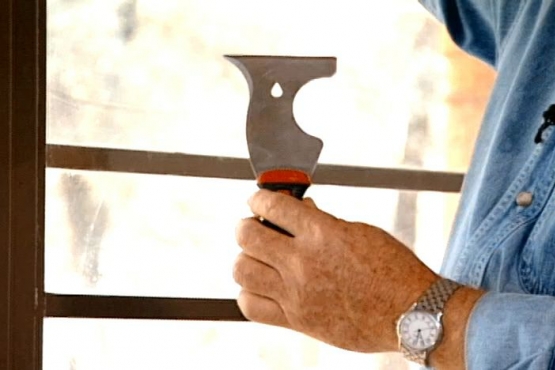
After the paint's dry, Lisa screws one side of the hinges to the fence post. Now we can hang the gate. We set it on 2 x 4s to give us the proper clearance underneath, then level the gate with shims. Finally, Lisa screws the other side of the hinges to the gate. Now all that's left is to mount the latch.
Well, you've got a real New England garden going here. You know, I couldn't imagine this having turned out any better. I love the way the top of this gate reflects that arch up there. It makes it look almost like a complete circle.
MIKE KERRIGAN:
It really looks great, Ron.
RON HAZELTON:
I'm very happy with it.
LISA HOLEN:
Well, you know, Ron, a couple years ago, they filmed The Perfect Storm here in Gloucester.
RON HAZELTON:
Yeah, that's right.
LISA HOLEN:
Well, now I think we have the perfect gate in Gloucester [LAUGHS].
RON HAZELTON:
With their new gate, Lisa and Mike have indeed beefed up security for Cashlin and our customized design is not only a perfect compliment to their fence but to the historic character of this old New England town.