How to Build a Table for Craft Projects
Learn how to build a craft table; the table consists of kitchen base cabinets connected with a top covered in durable plastic laminate.
For this next HouseCall, Ron found himself at the crossroads of California, Arizona, and Mexico in the desert city of Yuma, Arizona, and the home of Candace Kirk. Promoting the beauty of Yuma is what Candace does for a living working for the convention and visitor's bureau. In her spare time, she likes to create beautiful things with her arts and crafts projects. Unfortunately, Candace had outgrown her workbench so she called upon Ron to help her build a bigger and better craft table.
Purchase and Assemble Base Cabinet Kits for Craft Table Supports
Purchase and assemble four base cabinet kits, following manufacturer's instructions. The melamine kits used here have shelves and drawers and are durable and easy to clean--important characteristics in a table for craft projects. Assembly requires less than thirty minutes.
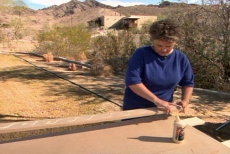
Reinforce the Perimeter of the Table for Craft Projects
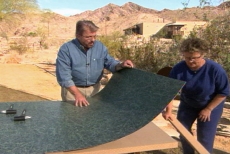
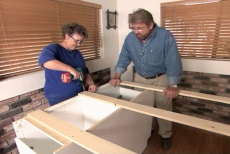
Glue wooden supports on the edges of a large piece of Medium Density Fiberboard (MDF) for the craft table. The strips will prevent sagging and provide a surface for attaching trim strips later. Secure glued strips with a nail gun.
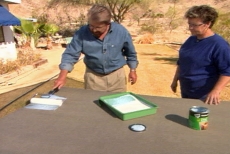
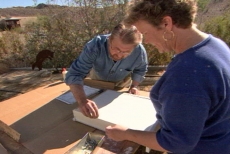
Apply Contact Cement to Craft Table Top Components
Roll contact cement onto the back of a large sheet of plastic laminate. Contact cement bonds to itself, so apply two coats on the porous craft table fiberboard as well. When dry, it goes from white to clear.
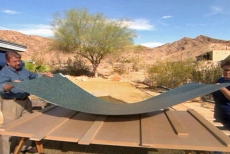
Position the Glued Laminate over Boards on the Craft Table
Lay half a dozen temporary boards across the glued surface of the fiberboard table for craft projects. Center the glued back of the laminate across the boards to temporarily prevent the two glued surfaces from making contact until later.
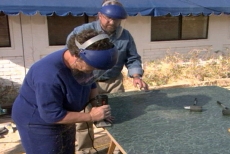
Remove Boards One-by-one and Press together the Glued Craft Table
Slide the boards out one-by-one beginning at one end of the craft table while pressing the exposed laminate and fiberboards surfaces together with a pressure roller. Roll from the center to the edge to force out any air bubbles.
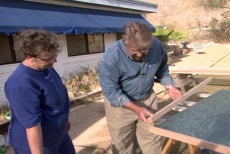
Trim off the Excess Laminate Edges from the Craft Table
Roll the bearing of a laminate cutter along the edge of the fiberboard while the cutter slices through the excess laminate on the table for craft projects. Keep the base flat and move in a slow and even pace.
Secure Hardwood Trim on the Edges of the Craft Table
Miter corner joints on hardwood trim and nail it on the edges of the workbench. The mitered corners make a clean edge, exposing only the face grain rather than coarse end grain that butted corners reveal on the craft table.
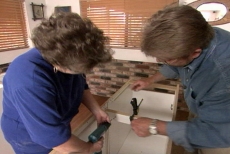
Attach Cabinet Backs together to Support the Craft Table
Position pairs of assembled cabinets back-to-back to form two separate craft table bases or supports. Join each pair securely with long wood screws driven from the inside back of one cabinet through the one behind it.
Connect Both Cabinet Bases for the Workbench
Position the two pairs of back-to-back cabinets far enough apart to make a stable base for the craft tabletop. Join them with three lengths of one-by-four stringers and secure them with screws. They will also add support to the top.
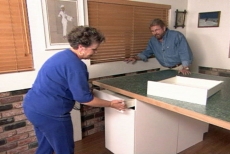
Set the Craft Table on the Cabinet Base
Position the finished workbench top on the cabinet base on top of the stringers. Add the drawers that came with the cabinet kits and a variety of bins to hold supplies inside the cabinets.
Related Tips


Blog Articles

Maximize Your Yield with DIY Netting for Strawberry Beds
Keep your strawberries safe from pests with our DIY strawberry cage netting solution. Learn how to create sturdy frames and find the best netting for your strawberry plants.

Change It Up: Swapping Out Your Light Switch Plates
Tired of boring light switch covers? Upgrade your home decor with this simple guide on replacing light switch plates and make a statement in every room.

Revamp Your Outdoor Space: How To Stencil A Concrete Patio
Learn how to create a stunning patterned concrete patio with our easy-to-follow instructions for stenciling. Upgrade your outdoor space in no time.


