RON HAZELTON:
You know, whenever it rains like that, I cringe. Not because I'm worried about getting struck by lightning, the chances of that are infinitesimal, but the odds are pretty good, probably 50-50, that my basement is going to flood.
In fact, when it storms like that, it's almost a guarantee that I'll be pulling this out and doing some pumping. In fact, during one particularly nasty storm, not too long ago, my basement looked more like a wading pool. I pumped, I swept, I watched, as the water kept coming in and I vowed that this was one scene I didn't want repeated. So I began checking the Internet for companies that offered state of the art dry basement solutions.
I settled on one called Basement Systems, and in a few days, the founder himself, Larry Jeneski arrived at the house. Hey, Larry, how are you?
LARRY JENESKI:
Great, Ron, nice to see you.
RON HAZELTON:
Come on in, let me show you the problem here.
LARRY JENESKI:
All right.
RON HAZELTON:
So this is kind of the heart or core of the problem right here. I notice that when we get heavy rains outside, this is where the leaking seems to start, right here in this corner. Also, over here in that sump, just this last year, I had so much water, it was actually coming up out of the sump and flooding the, the basement here. What's going on here and why is it coming here [LAUGHS], I guess that's my question.
LARRY JENESKI:
Yeah. Well, you know, there's, there --
RON HAZELTON:
Larry explains that when it rains, water saturates the soil and begins pressing against the basement walls and the underside of the floor. Water can begin to flow into the basement through cracks and joints, and even penetrate the concrete itself.
LARRY JENESKI:
We call that hydrostatic pressure and that water pressure pushes the water in at the weakest point, which is that floor wall joint.
RON HAZELTON:
So, so how much pressure is there out here?
LARRY JENESKI:
Well, it will vary certainly on how hard it rains and from house to house, but certainly enough to push water in. Water's a pretty small thing and concrete is porous, so we don't stand a chance at trying to seal it out. What we want to do is drain it away and relieve the pressure.
RON HAZELTON:
Larry also points out ample evidence that water has been migrating right through the basement walls.
LARRY JENESKI:
You know, you see all this white chalky powder stuff on here, this is called efflorescence. And it's minerals from the soil and the concrete that dissolve in the water, the water comes through the wall very slowly, and when the water evaporates, it leaves the minerals behind.
RON HAZELTON:
So if you see this kind of chalk on your wall, you know that you've got water that's been moving through that concrete.
LARRY JENESKI:
Yeah.
RON HAZELTON:
Now this is another problem I've got right here. If I get rain, I get water that's coming in from the sides here, at the bottom of the step. I mean a good bit of water -- and then it floods out into the basement this way. So what's causing that?
LARRY JENESKI:
That's pretty common. You see this is a precast hatchway steps. When it gets bolted to the foundation and when they try to backfill, it's very difficult to backfill under there, so it leaves a lot of voids. So when it rains hard, all the water goes down underneath here and fills up behind these steps and pushes the water in at this joint and even on the sides.
RON HAZELTON:
Well, in a way, it's almost like a funnel.
LARRY JENESKI:
That's right.
RON HAZELTON:
Well, I'm sold. So a few days later, one of Larry's crews shows up and goes to work. Step one is to jackhammer a narrow trench around the perimeter of the basement next to the wall. [JACKHAMMER SOUNDS]
The crew also begins cutting a hole in the floor to provide a pit for the new sump that will collect all the water channeled to it by the perimeter drain. As fast as it's made, the debris is hauled out of the basement, one container at a time.
Now, remember the discoloration and staining on the walls? Well, it's unsightly and evidence that some water is entering through the concrete. The solution here is to put up polyethylene panels. Basement Systems calls these, bright wall panels.
They're attached by drilling quarter inch holes with a carbide masonry bit, then pushing in ribbed plastic fasteners.
LARRY JENESKI:
If the walls do leak, the water will run down behind that panel and into our system, but the homeowner does not see any of that water, doesn't -- nothing in the basement gets wet and it works way better than a coating because it can never come off of the wall.
RON HAZELTON:
Once the wall panels are in place, it's time to install what is the heart of the system. These plastic drains will collect any incoming water and channel it to the sump. The sections are laid end to end and connected to molded corner pieces.
The drain in front of the door incorporates an open grate so that water can flow in from the top. Next, the sump liner is dropped into position. The drain is laid in place behind it and a T connector is installed. A short section of PVC pipe connects the drain to the sump. The sump covers are set in place temporarily and crushed rock is used to fill the space between the liner and the well. The covers, of course, prevent the rock from spilling inside.
Then the space between the drain and the edge of the trench is also filled with crushed rock. If the drain is the core of the system, the pump is the muscle. Actually, there is not just one pump but three.
LARRY JENESKI:
We have backup sump pump systems in the event that the pump is unplugged or a circuit breaker trips or the pump fails, the water will rise to a second pump. In the event that the power goes out, the water will rise to a third pump, which is a DC-operated pump, it runs off a battery.
RON HAZELTON:
The main unit can move 2400 gallons of water per hour. But it doesn't stop there. When both the primary and secondary pumps are online, the system can remove over 7000 gallons of water per hour.
[MUSIC]
Now, Larry and his team have to create a way to get it out. First, two inch holes are bored through the siding and rim joist, just above the basement wall.
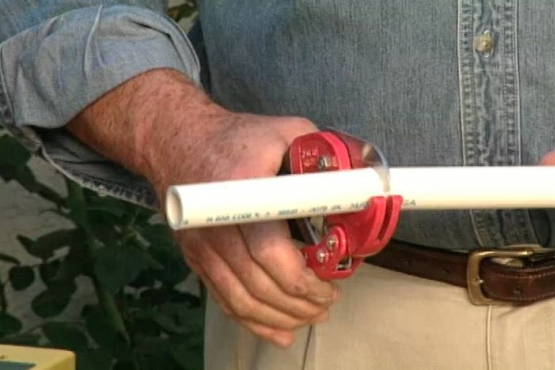
There will be a pair of drain lines coming out of the basement. One for the primary pump, and a second for the backup unit. Now, Larry assembles a run of PVC drain pipe that terminates at a drain grate. Any water that's pumped out of the basement will be carried well away from the foundation and discharged through the grate, where it will run away from the house.
Inside, the plastic pipe is run down to the sump where it's connected to the discharge side of the pumps. Then the pumps are plugged in and the battery for the emergency DC pump is connected. The battery will be monitored and kept fully energized by the automatic charger.
With the plumbing work complete and the pumps ready to go, the crew begins troweling concrete around the drain, concealing everything except the top. The grate at the bottom of the stairwell is first covered with duct tape to keep it clean. Once the concrete work is finished, the tape is removed.
So let's review what's been done. A trench was cut into the basement floor, plastic panels were attached to the walls and the rain was laid in place.
Now here's how the system works. Any water coming through the floor enters holes near the bottom of the drain and is carried away. Water leaking through the walls flows downward, behind the plastic panels and into the same holes in the drain. The drain then discharges the water into the sump.
Well, it's time to put the system to the test. Now I'm simulating water coming down the stairwell. Instead of flowing onto the floor, the water goes through the grate and into the drain. It's channeled to the sump and the rising water turns on the pump. The water is then carried to the outside where it's discharged through the grate.
In the winter, a frozen line could render the drain useless. To prevent this, Larry invented these fail safe bypass fitters which allow water to flow, even if the drain is ice clogged downstream.
This looks great. If it works half as good as it looks, I'm going to be really happy. But seriously, you know, you hardly would even know except for the sump here that this has been put in. What about maintenance? I notice you've got a service log up here.
LARRY JENESKI:
We have an annual maintenance program, where we come out once a year, check out the system, check out the pumps and we look for problems and find them before the problems find you.
RON HAZELTON:
So I don't have to do anything then.
LARRY JENESKI:
No, there shouldn't be anything you have to do. There's an alarm that will sound off from, from here [ALARM SOUNDS] if you have problems, and if your battery backup pump operates, there's an alarm here that will sound off [ALARM SOUNDS] to tell you that you're on battery power, so that you know to check the primary pump to get that restored before the battery goes dead.
But the battery will pump out about 10,000 gallons of water before it goes dead, so you've got a long time on that.
RON HAZELTON:
So, Larry, I've had water in this basement since I moved into the house. Are my leaks over?
LARRY JENESKI:
Well, the whole idea is that you have a dry basement, and Ron, you now have a dry basement.
RON HAZELTON:
From now on, I'm going to sleep like a baby knowing that this is only a bad dream and that if it is pouring rain outside, any water that finds its way into my basement will be delivered right outside again.