DIY Bay Window – Learn Easy Steps to Install Bay Windows
Learn how to repair dry rot and install a new bay window to make your room more inviting.
An existing living room window admits beautiful morning light and frames a favorite scene, bringing the charm of the garden inside this home while leaving the weather and wildlife outside. As much as the view, however, a window's size and style can add ambience and grace to any room. Follow this project as we replace a flat window and its accompanying dry rot with a state-of-the-art bay window to make the room feel larger and more inviting. The new window provides more insulation, enhances the inside decor and compliments the other windows as seen from the outside of the house. On completion, it looks as though it has always been there.
Read More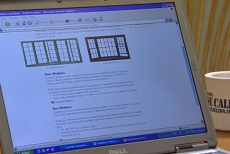
Determine What Is Involved in the Bay Window Installation
Take careful measurements and send dimensions for the custom-made bay window to the factory. Research what is involved in an installation. The size, weight, and complexity of this installation along with dry rot repair require help from a professional contractor.
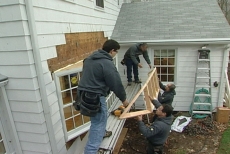
Remove the Wooden Trim Holding the Old Window and Screens
Remove the sash-stops, sashes and tracks, storm windows, and the large center pane for disposal. Pry off the interior sill and window casings. Take off the storm window frames and exterior trim. Lift the window frame from the rough opening.

Pry off Shingles beneath the Window to Examine Dry Rot
Determine the extent of the dry rot beneath the shingles and plywood sheathing under the window. In this project, the dry rot is isolated. Cut away the damaged sheathing and replace it with a new section.
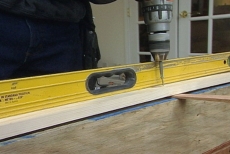
Create a Stable Level Surface for the New Window Frame
Install a one-by-four base for the bay window frame to rest on, leveling it with shims and securing it with screws. Apply aluminum flashing tape to the bottom and sides of the rough opening to seal out moisture.

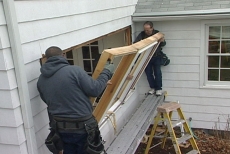
Position the New Bay Window in the Opening
Remove window panes and sashes from the bay window frame to reduce weight. Set it in place. Attach and tighten support cable clamps to the solid header above the window opening once the window is level. Add remaining window components.
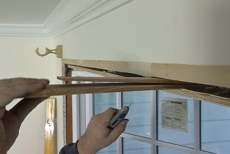
Level and Secure the Bay Window Frame in the Opening
Insert shims between the top of the bay window frame and the rough opening to level it. Do this from the inside of the window. Secure the window permanently by driving screws through the shims and into the wall.
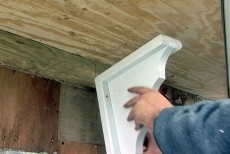
Frame and Install the Roof Cap for the Bay Window
Construct and install the bay window roof cap. Insulate the interior with fiberglass and waterproof it with drip caps, roofing felt, aluminum flashing tape, asphalt shingles, and step-flashing before replacing the wooden house shingles along the upper edge.
Finish the Bottom of the Bay Window with Insulation and Corbels
Use strips of wood trim to form a shallow tray for rigid foam insulation at the bottom of the bay window. Secure an outer plywood cover with nails. Add decorative wooden braces/corbels for additional support. Replace the wooden wall shingles.
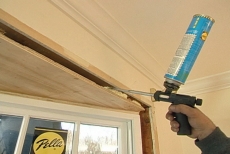
Insulate the Interior Space between the Bay Window and Wall
Insulate the space between the window frame and wall framing with spray foam sealant that expands to form a barrier against heat loss and cold intrusion. It will be hidden beneath trim when the bay window installation is complete.
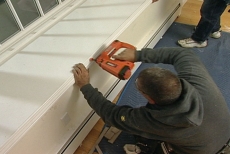
Trim the Bay Window Interior and Add High-transparency Screens
Dress the bay window interior with a pre-finished top and bottom panel. Add trim at the sides and exposed joints and finish the edges with decorative casing. Finish with high-transparency window screens that block very little light and are nearly invisible.
Related Tips


Blog Articles

Expert Tips: How to Mount a TV on the Wall
Get step-by-step instructions on how to mount a TV on the wall, especially for big screen TVs. Master the art of wall mounting with our tips.

Frustrated by Stripped Screws? Here’s How to Get Them Out Fast
We've all been there. You're in the middle of a project, and suddenly your screwdriver spins uselessly in the screw head. The screw is stripped, and frustration sets in. With a little know-how and this simple trick, you can tackle a stripped screw and get your project back on track.

The Secret to Finishing Plywood Edges
Plywood projects are fantastic, but exposed edges can be an eyesore. This blog post unveils the magic of edge banding - a simple technique to create flawless, finished edges on your plywood projects, making them look professional and ready for paint or stain. Watch the video to learn how to apply edge banding like a pro!


