How to Install a Wood-Look Plank Ceiling
Give your ceiling a true makeover with this lightweight, wood-look, floating plank system.
This project was done in collaboration with Armstrong Ceilings. While I received compensation for the production of the video and article, the opinions, observations and experience are my own. For more information about the wood-look plank ceiling installed in this project, visit Armstrong Ceilings' website.
If you’re out to make a real statement with your room makeover think outside the four walls. The ceiling sometimes called the 5th wall offers appealing possibilities. This wood-look plank ceiling is a good example and it truly is a do-it-yourself project.
This is a “floating” system that can be installed over just about any existing ceiling, including damaged plaster or drywall, “popcorn” acoustic ceilings and more. Here’s how to do it.
Read More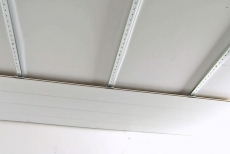
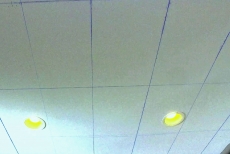
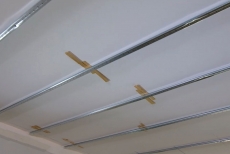
This is A Floating Ceiling System
Metal tracks are attached to the ceiling joist and the planks, themselves, are held in place with specially designed metal clips. The planks can be installed over just about any existing ceiling.
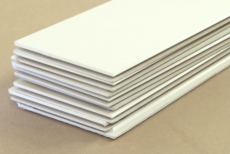
Open Cartons 2-3 Days Prior to Installation
Allow material to adjust to the relative humidity in the space where it will be installed.
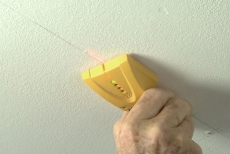
Locate Ceiling Joists
Use a stud sensor to locate ceiling joists.
Mark Ceiling Joists
Mark ceiling joist locations using a chalk line.
Mark Mounting Track Locations
Strike chalk lines perpendicular to the joist lines to mark the location of the mounting tracks. The tracks should be spaced no more than 18" apart.
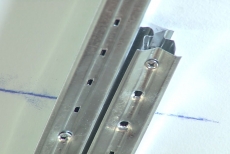
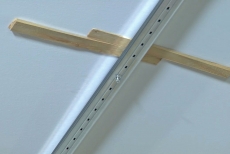
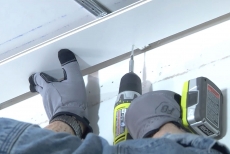
Install the Mounting Tracks
The tracks are screwed into the ceiling joist and can be overlapped -- a method that saves time and work.

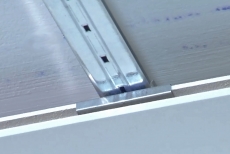
Tracks Can Be Butted End to End
If it is necessary or desirable to butt the tracks end to end, they can be easily cut to length using either a hacksaw or a jig saw fitted with a metal cutting blade.
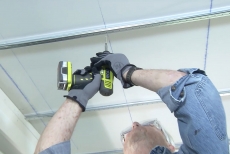
Attach Each Track Securely
Screw each track at the point where it crosses a joist.
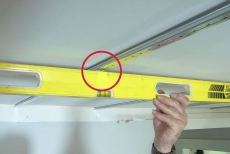
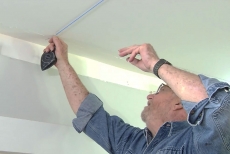
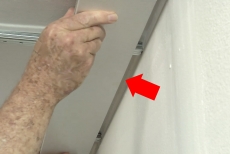
Check Tracks for Flatness
The mounting tracks must be flat. Check with a 4-foot level.
Shim Track Where Necessary
Wherever the track bows upward, showing a gap between the track and level, loosen the nearest screw and insert shims. Re-tighten the screw to hold the shims in place.
Mounting Track is Ready to Receive Planks
With the track up and shimmed where necessary, installation of the planks can begin.

Cut the Border Plank to Width
The first and last row of planks will need to be cut to the proper width. The formula for calculating what the width should be can be found on this Armstrong Ceiling web page The planks can be ripped to length using either a table saw or circular saw.
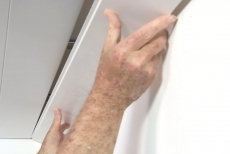
Set the Border Plank in Position
Set the first (border) plank in place being sure to leave a 1/2" expansion gap between the edge of the plank and the wall. Leave a 3/4" expansion gap between the end of the plank and the wall.
Leave Expansion Gap at End of Planks
Leave a 3/4" expansion gap between the end of the plank and the perpendicular wall.
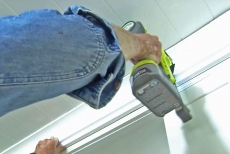
Screw the First Plank Into Place
On the wall edge of the plank, drive one or two screws through the plank and track and into the ceiling joist. The screw will be concealed when the crown molding is replaced.
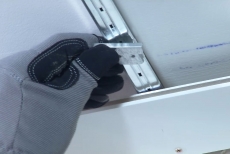
Snap Mounting Clips on Track
Snap clips on several tracks.
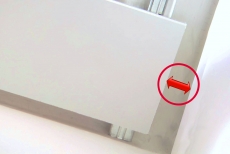
Push Clip Into Groove on Plank
Slide the clips along the mounting track until the tab on the clip engages the groove in the plank.
Insert the Tongue of One Plank Into the Groove of the Next
There is also a tongue and groove design on the ends of the planks.
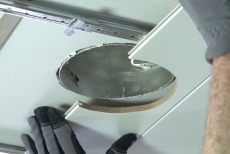
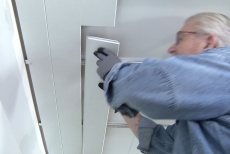
Cut Openings to Accommodate Light Fixtures
Measure from the edge of the nearest plank to determine the hole center for the cutout. Circular cutouts can be made using a jig saw or hole saw.
Install Remaining Planks
For the final row of planks (the finishing row), measure the distance from the last full-width row of planks to the wall. Deduct 3/4" for the expansion gap and rip the finishing (border) planks to width. The wall-side edge of this row will be also be held in place with screws that will be concealed by crown molding.
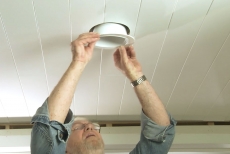
Reinstall Light Fixtures
Replace the Crown Molding
Blog Articles

Expert Tips: How to Mount a TV on the Wall
Get step-by-step instructions on how to mount a TV on the wall, especially for big screen TVs. Master the art of wall mounting with our tips.

Frustrated by Stripped Screws? Here’s How to Get Them Out Fast
We've all been there. You're in the middle of a project, and suddenly your screwdriver spins uselessly in the screw head. The screw is stripped, and frustration sets in. With a little know-how and this simple trick, you can tackle a stripped screw and get your project back on track.

The Secret to Finishing Plywood Edges
Plywood projects are fantastic, but exposed edges can be an eyesore. This blog post unveils the magic of edge banding - a simple technique to create flawless, finished edges on your plywood projects, making them look professional and ready for paint or stain. Watch the video to learn how to apply edge banding like a pro!


