How to Install Ceramic Tile Over Vinyl Flooring
A Unique and Time-Saving Way to Apply Ceramic Tile Directly on Top of Vinyl Flooring
Using the Tavy Thin Skin System, home owners are now able to lay ceramic tile over surfaces that would have never before been possible. Ron and Armen Tavy demonstrate one such surface in this project, as they install ceramic tile over vinyl flooring.
You can find the Tavy products here.
Read More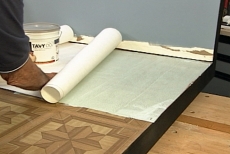
Apply the Thin Skin Fabric
Begin the project by creating the Thin Skin surface. Use a trowel to spread a thin layer of adhesive across the entire surface that is to be tiled, and then press the fabric into the adhesive with a large putty knife. Now you have created a surface that will bond with the mortar. Remember, the adhesive sticks to the vinyl and the fabric sticks to the adhesive.
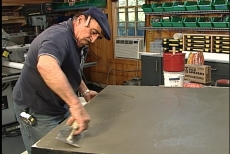
Skim Coat the Fabric with Mortar
Mix a thin batch of mortar and spread it over the Tavy fabric with a flat edged trowel. The mortar should be about the consistency of ketchup. This skim coat should be very thin, and only needs to be thick enough to bond with the fabric. After it dries in about 30 minutes, you will have created a smooth, masonry surface upon which to install your tile. All of the worries that come with installing tile over vinyl, have literally been covered up.
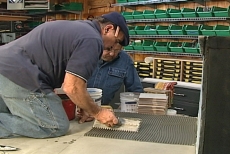
Set the Tile
Begin this step after the skim coat is dry. Trowel on a 2nd coat of mortar, this time using a 1/4" notched trowel. Be sure to create even ridges over the entire surface, as this will prevent air gaps. Air gaps can lead to cracked tiles down the road. Set the tiles into the mortar, making sure to wiggle each tile into position, as this will ensure uniform coverage of the mortar onto the back of each tile. The edges will be cleaner if you place the tiles edge to edge and the slide them apart to create the correct spacing.
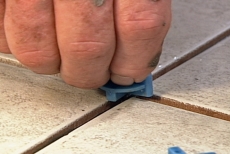
Install Spacers
As you work your way across the field of tile, setting them into place, install spacers at every intersection to ensure that all of the grout lines in your floor are uniform. Armen Tavy has invented a type of spacer that is double sided and can be used between two tiles, or at a corner between four tiles. As you install the spacers, tap each tile with a rubber or plastic mallet to ensure that all of the air underneath the tile has been forced out.
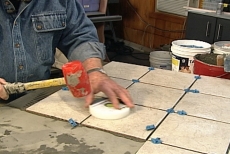
Check for High Tiles
The Tavy System also includes a unique tool called a tile puck. This small, hand held tool is run back and forth over each joint as you install the field, and will notify you with a small click if you have adjacent tiles that are different heights. Work your way across your joints with your Tavy Tile Puck and a rubber mallet to ensure that you don't have any high spots in your floor.
Apply the Grout
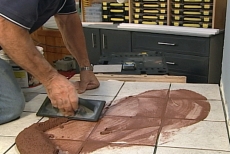
Grout should be worked into the joints with a grout float, working across the floor at a 45 degree angle. After the first pass of grout with the float, you will need to do a rough wash with a damp sponge. Most projects require several rough washes with a sponge, allowing the surface to dry between each wash. Once the grout has been removed, go back with a clean dry cloth and buff away any remaining grout residue or haze that is left behind.
Related Tips
Blog Articles
Expert Tips: How to Mount a TV on the Wall
Get step-by-step instructions on how to mount a TV on the wall, especially for big screen TVs. Master the art of wall mounting with our tips.
Frustrated by Stripped Screws? Here’s How to Get Them Out Fast
We've all been there. You're in the middle of a project, and suddenly your screwdriver spins uselessly in the screw head. The screw is stripped, and frustration sets in. With a little know-how and this simple trick, you can tackle a stripped screw and get your project back on track.
The Secret to Finishing Plywood Edges
Plywood projects are fantastic, but exposed edges can be an eyesore. This blog post unveils the magic of edge banding - a simple technique to create flawless, finished edges on your plywood projects, making them look professional and ready for paint or stain. Watch the video to learn how to apply edge banding like a pro!
