A Covered Gutter System Keeps Out Leaves and Debris
A Long-Lasting, Maintenance-Free Gutter System That Stays Clean and Won't Clog
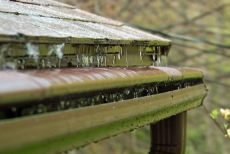
You can avoid ever having to clean your gutters again or worry about them clogging or overflowing with a covered gutter system like this one from LeafGuard. The system incorporates a curved hood that prevents leaves from collecting inside, while allowing water to travel around the top and into the gutter below. This video shows how covered gutters work and features experienced professionals fabricating and installing new gutters on site.
Read More
How the System Works
The closed gutter system has a curved hood that prevents leaves and debris from collecting inside and allows water to travel around the top and into the gutter below.
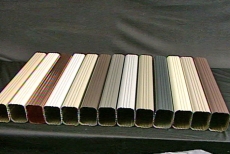
Color Can Match or Contrast House or Trim Color
The gutter system is available in many colors and has a scratch-guard finish that won't chip, peel or crack. It carries a limited lifetime warranty.
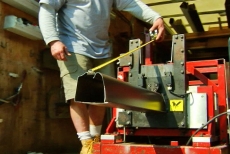
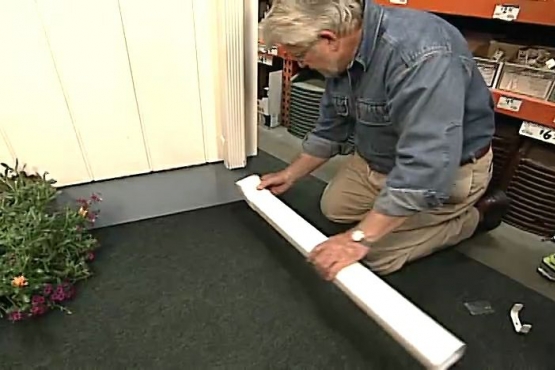
Cutting the Pieces to Length
After removing the old gutters, the new gutters are cut to length on-site using heavy duty sheet metal.
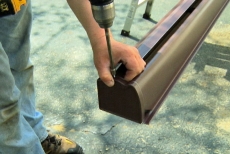
Adding Mounting Brackets and End Caps
Internal mounting brackets are inserted into the gutters and end caps are glued and secured in place with rust-resistant screws.
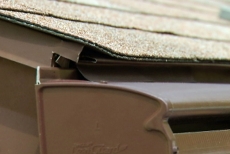
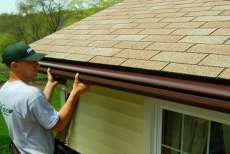
Securing the Gutters to the Fascia Board
The gutter is placed against the fascia board, slipped under the drip cap on th edge of the roof and fastened with mounting screws. It is set on an angle so that water flowing into it will run toward the downspout opening.
The Benefits of no External Braces or Brackets
This mounting systems requires no external braces or brackets and the existing roofing material is left untouched. Because the gutters are seamless, all leaks associated with joints and connecting brackets are avoided.
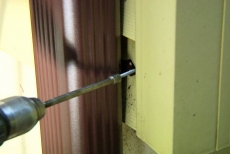
Securing the Downspouts
The downspout sections are fitted together and secured with screws, then attached to the exterior wall with standoff brackets and connected to the existing drainage system or set up to discharge water onto the ground away from the foundation. Because the downspouts are twice as large as standard downspouts, they can handle double the water flow and because the aluminum used is 30% thicker that standard downspouts, they are extremely durable and resistant to dents and bending.
Further Information on Covered Gutters
If you would like to explore covered gutters further, contact LeafGuard directly.
Related Tips
Blog Articles

Expert Tips: How to Mount a TV on the Wall
Get step-by-step instructions on how to mount a TV on the wall, especially for big screen TVs. Master the art of wall mounting with our tips.

Frustrated by Stripped Screws? Here’s How to Get Them Out Fast
We've all been there. You're in the middle of a project, and suddenly your screwdriver spins uselessly in the screw head. The screw is stripped, and frustration sets in. With a little know-how and this simple trick, you can tackle a stripped screw and get your project back on track.

The Secret to Finishing Plywood Edges
Plywood projects are fantastic, but exposed edges can be an eyesore. This blog post unveils the magic of edge banding - a simple technique to create flawless, finished edges on your plywood projects, making them look professional and ready for paint or stain. Watch the video to learn how to apply edge banding like a pro!


